flourishingkitchen.com

menu icon
go to homepage
  • Recipes
  • Articles
  • About
  • Shop
  • Subscribe
subscribe
search icon
Homepage link
  • Recipes
  • Articles
  • About
  • Shop
  • Subscribe
ร—
Home ยป Recipes

Watermelon Chickpea Salad

July 31, 2021 by Juliette Leave a Comment

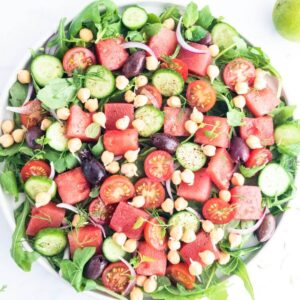
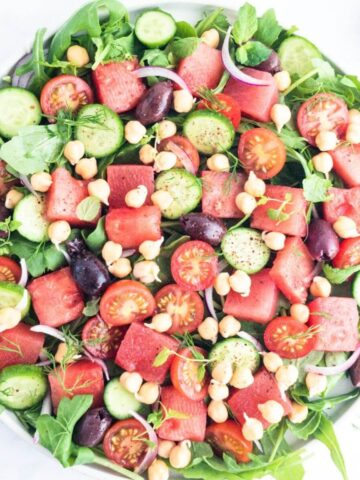
A large bowl of watermelon, chickpea and rocket salad with olives.

A juicy summer watermelon chickpea salad made with sprouted chickpeas, rocket, olives, cucumbers and fresh herbs.
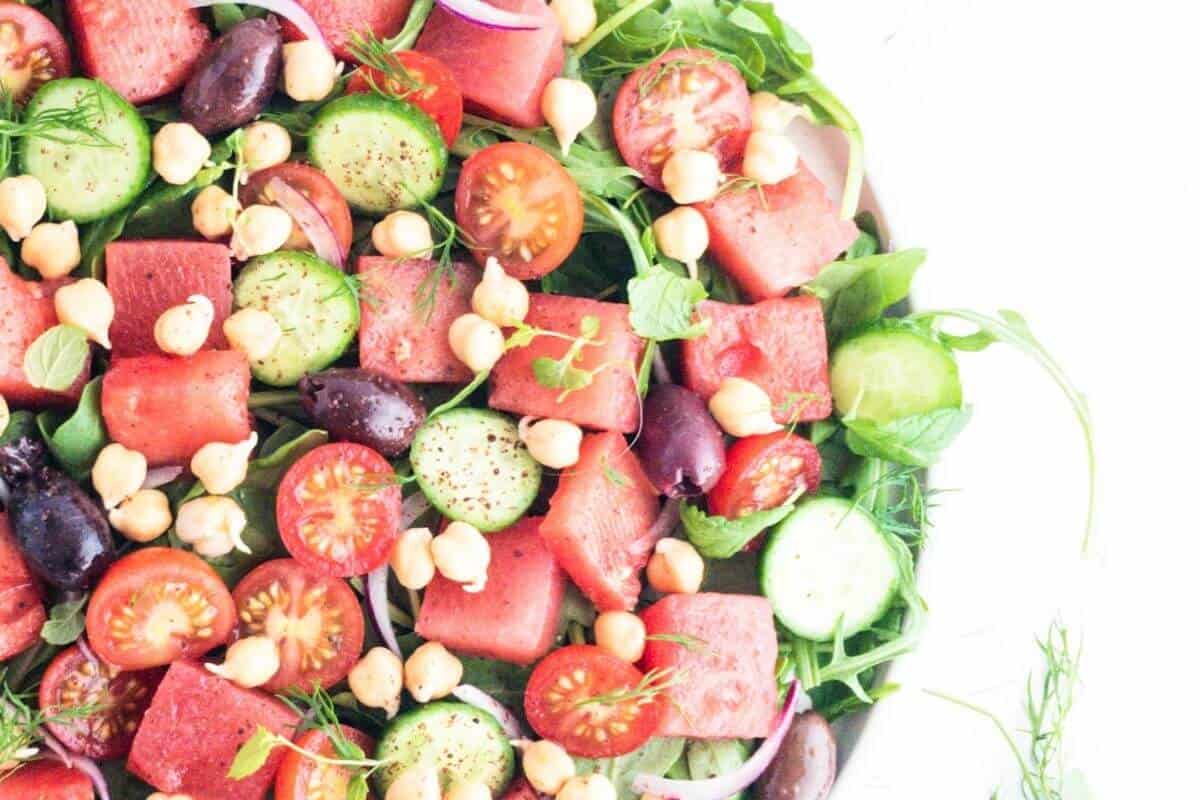
Watermelon chickpea salad.

I kid you not this recipe is absolutely delicious! Watermelon is the sweet ingredient in this salad. For the best flavour youโ€™ll want to choose a ripe juicy watermelon for the job and serve it nice and cold.

[feast_advanced_jump_to]

How to choose a ripe watermelon.

Watermelons tend to come in 2 shapes: an oval or round shape. Look for a watermelon that is perfectly round as these tend to be the sweetest and most ripe.

Also, look for the watermelon thatโ€™s a gorgeously deep green colour with a nice big creamy yellow patch on the bottom where it will have sat on the vine in full sun ripening.

There should also be brown webbing on it and when you pick one up it should feel heavier than it looks.
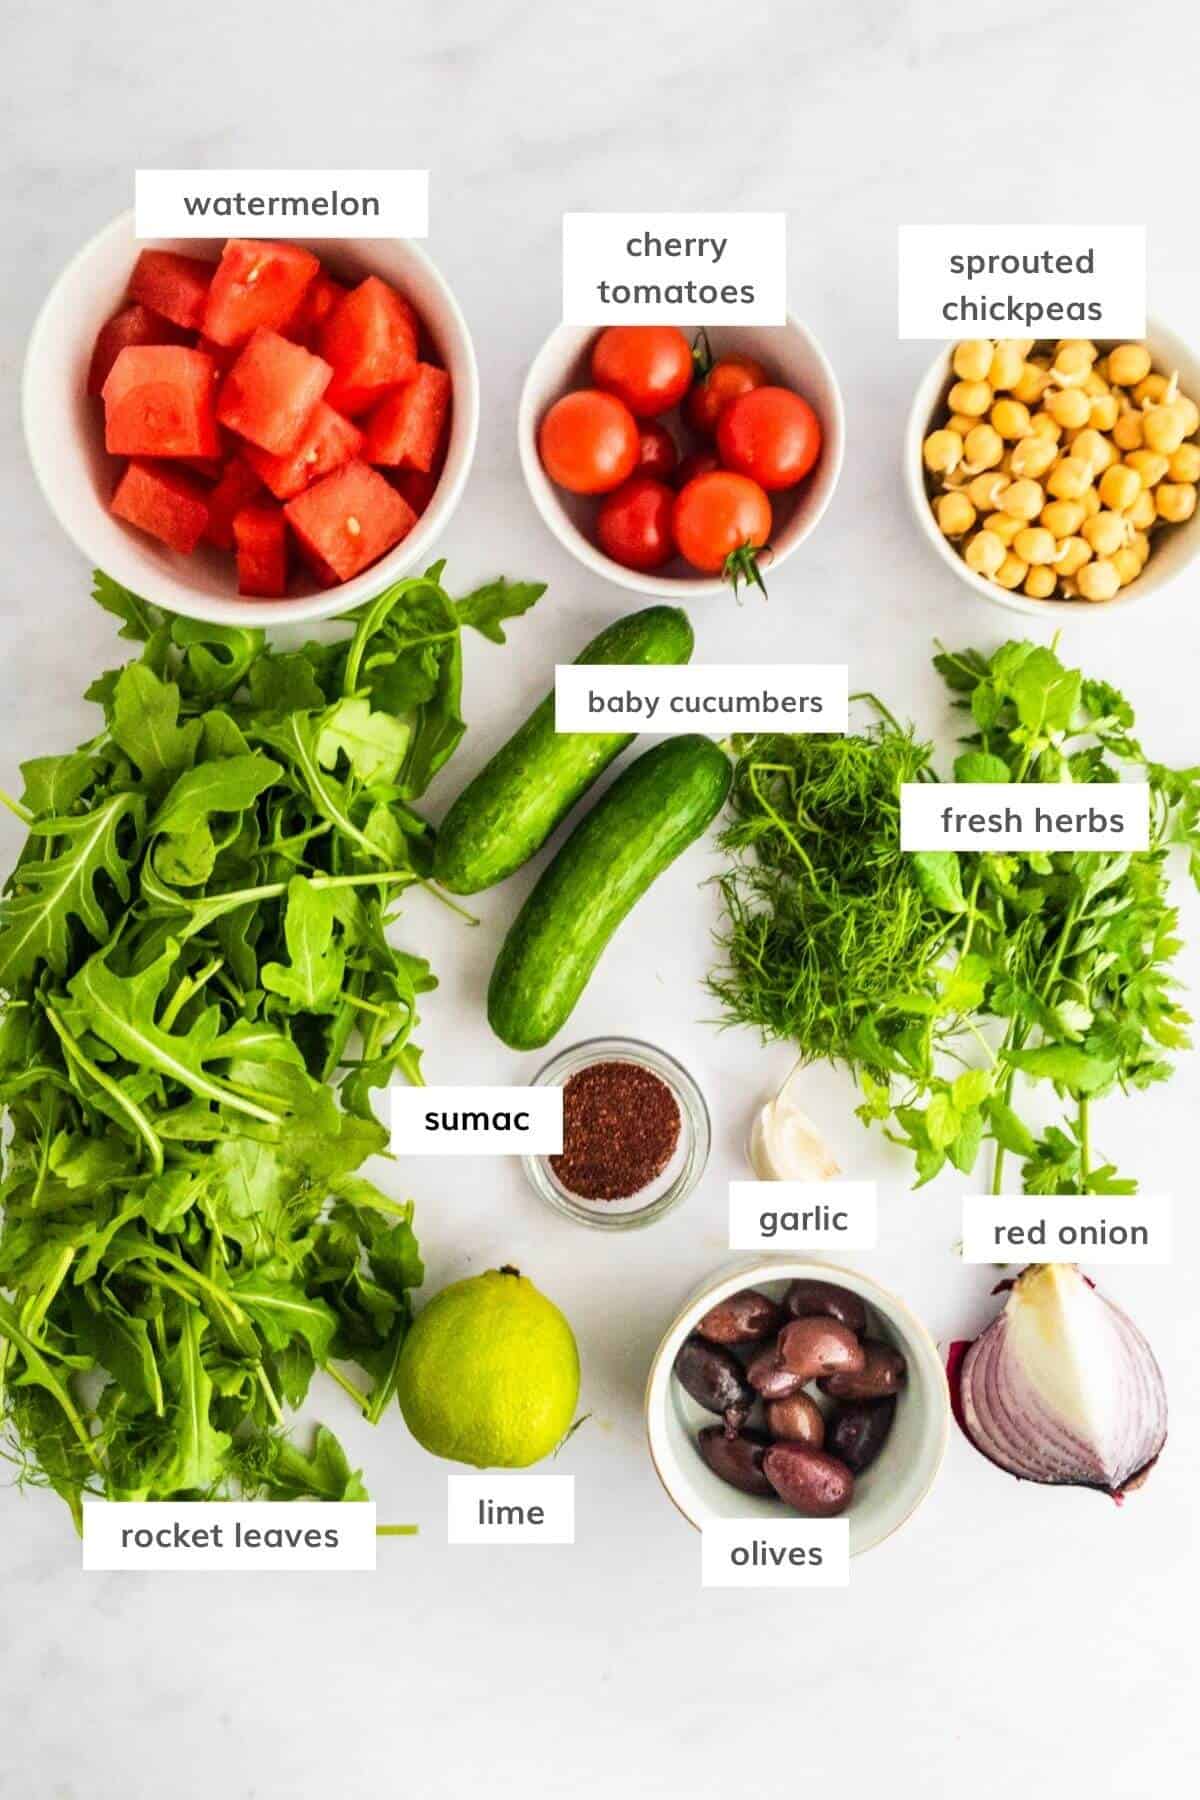
Watermelon salad recipe ingredients.

Other sprouted chickpea recipes.

Chickpea Peach & Watercress Salad

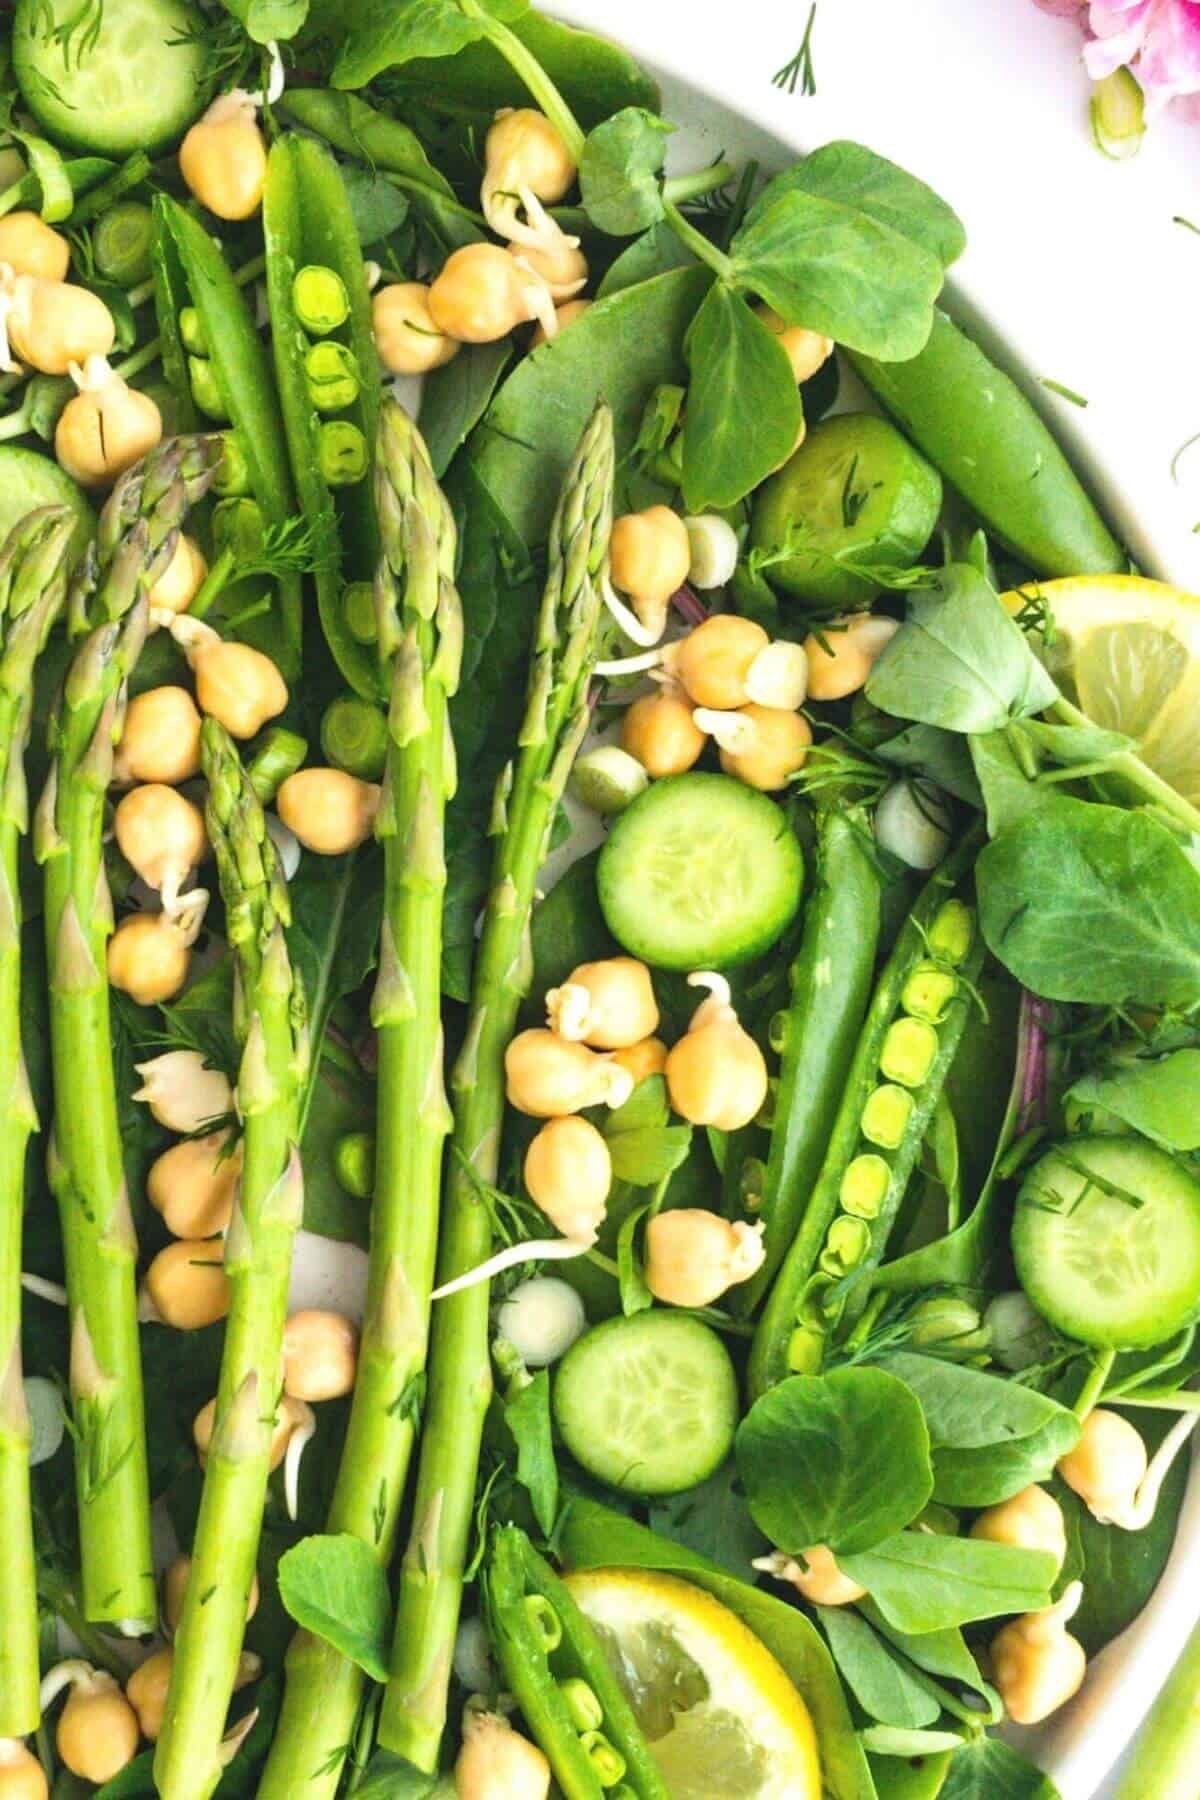
Asparagus & Pea Shoot Salad with Sprouted Chickpeas

Sprouted Chickpea Hummus with Rocket & Pomegranate Seeds

If you'd like to know how to sprout your own chickpeas try my blog post How To Sprout Chickpeas.

Ingredients.

Baby Cucumbers - I chose baby cucumbers for this recipe just for a change. Theyโ€™re small, measuring about 4-6 inches long. Quite firm in texture and crunchy with very little in the way of seeded central area unlike the much larger more watery full grown English cucumber. You donโ€™t need to peel baby cucumbers. I love that theyโ€™re not watery like a full English cucumber is. They chop up very quickly and easily.

Wild Rocket - I love the pepperiness of the flavour of rocket in this dish that lines the salad plate as it pairs really well with the sweetness of watermelon, saltiness of the olives, the finely diced onions and fresh herbs.

Rocket brings it all together really neatly. Of course, feel free to choose whatever leafy greens you like or just use up whatever you have in the fridge, so nothing goes to waste. 

Olives - I chose Greek kalamata olives for this dish because I just love how naturally soft in texture they are.

If you have a favourite then use those. Large Italian green olives also work really well here.

๐Ÿ“– Recipe

A large bowl of watermelon, chickpea and rocket salad with olives.

Watermelon chickpea salad

Juliette | Flourishing Kitchen
A delicious Summer watermelon salad sitting on a plate of wild rocket sprinkled with Greek olives, baby cucumber slices & sprouted chickpeas. Served with a gorgeous citrus lime dressing. Perfect for lazy Summer afternoons!
Leave a review
Print Recipe Pin Recipe Save Recipe Saved Recipe
Prep Time :10 minutes mins
Total Time :10 minutes mins
Course: Main Course, Salad
Cuisine: Mediterranean
Servings :1

Equipment

  • Sharp knife.
  • Chopping board.
  • blender
  • Large plate or serving bowl.
Prevent your screen from going dark

Ingredients
  

  • 2 cup or a large handful of rocket leaves.
  • ยพ cup diced watermelon.
  • 2 baby cucumbers.
  • ยฝ cup (65g) sprouted chickpeas.
  • 6-8 cherry tomatoes.
  • handful kalamata olives.
  • ยผ small red onion.
  • 2 tablespoon each fresh mint, parsley & dill.

Watermelon lime dressing.

  • ยผ cup diced watermelon.
  • juice of ยฝ a lime.
  • 1 small garlic clove.
  • ยผ teaspoon sumac.
  • pinch of salt & pepper to taste

Instructions
 

  • To prepare the fruits, chop the watermelon into bite size pieces, dice the cucumber into small rounds & half the cherry tomatoes.
  • Finely slice the red onion & roughly chop the fresh herbs.
  • Add a large handful of rocket to a plate or bowl. Top with watermelon, tomatoes, cucumber & sprouted chickpeas.
  • Sprinkle the salad with the finely diced red onion, olives & fresh herbs.
  • To make the dressing blend ยผ cup watermelon with the sumac, crushed garlic & freshly squeezed lime juice until smooth. Add salt & pepper to taste. Serve the salad with the watermelon dressing on the side.
Notes

Optional
Use cooked chickpeas instead of sprouted, if preferred.
Did you make this recipe?Please leave a comment below to help other people.

How to make Oat Milk

March 25, 2021 by Juliette 8 Comments

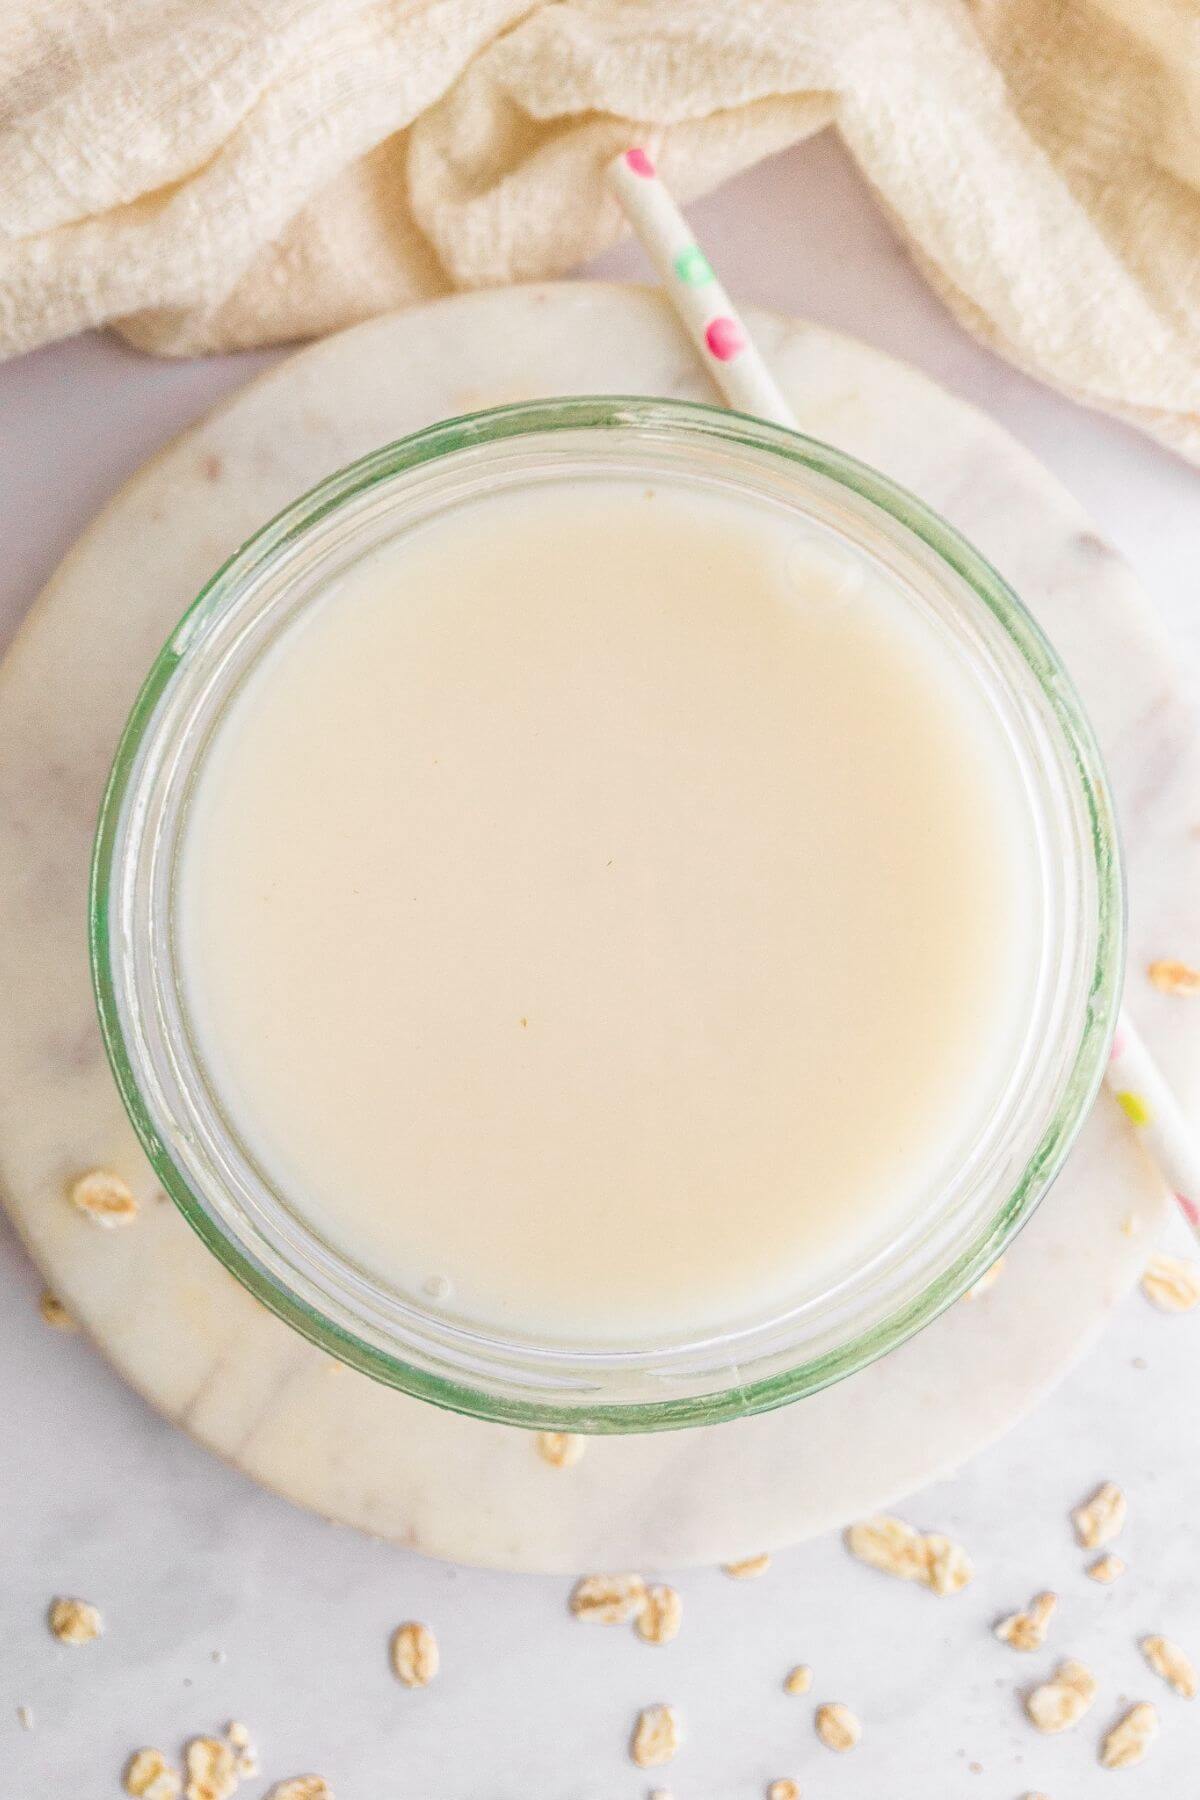
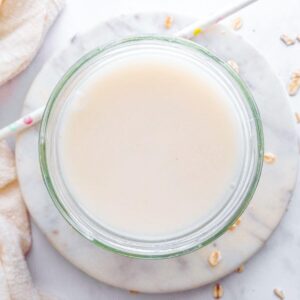
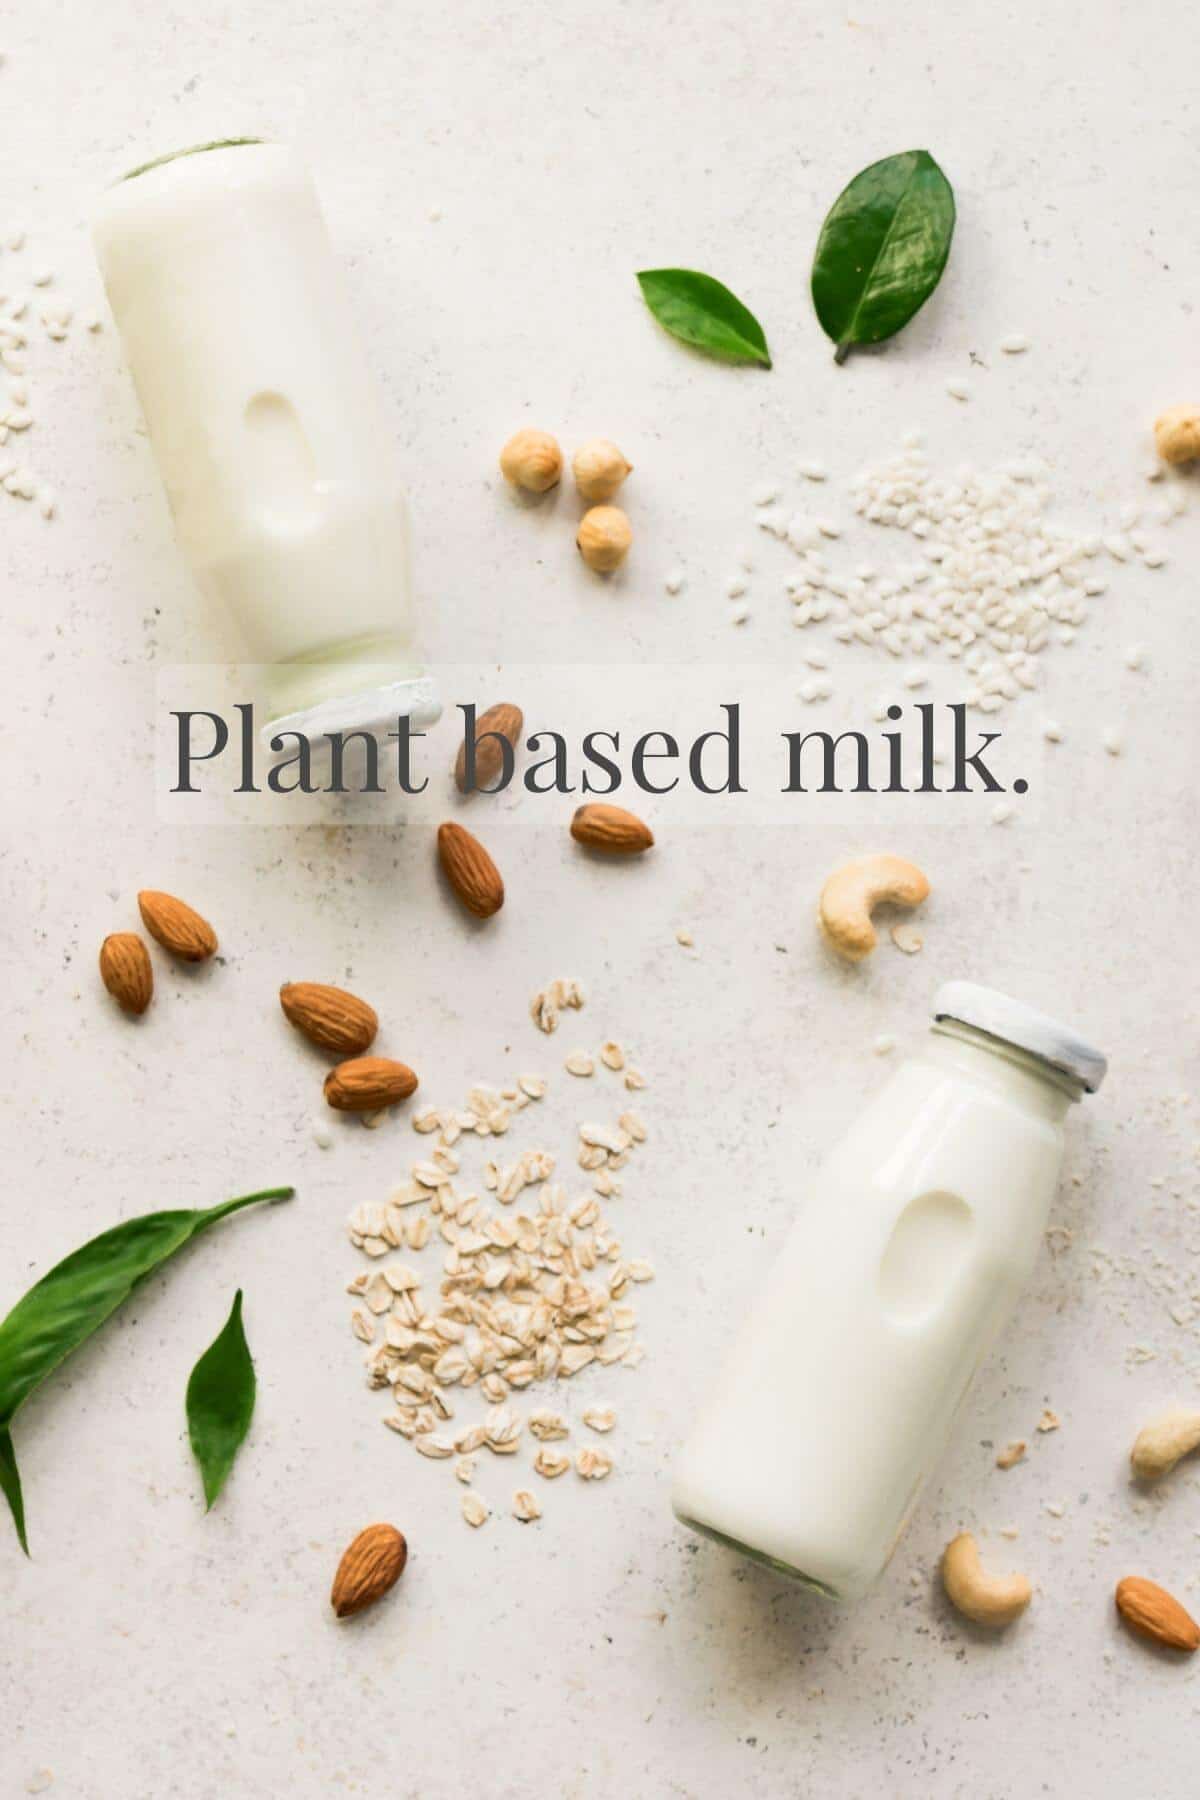
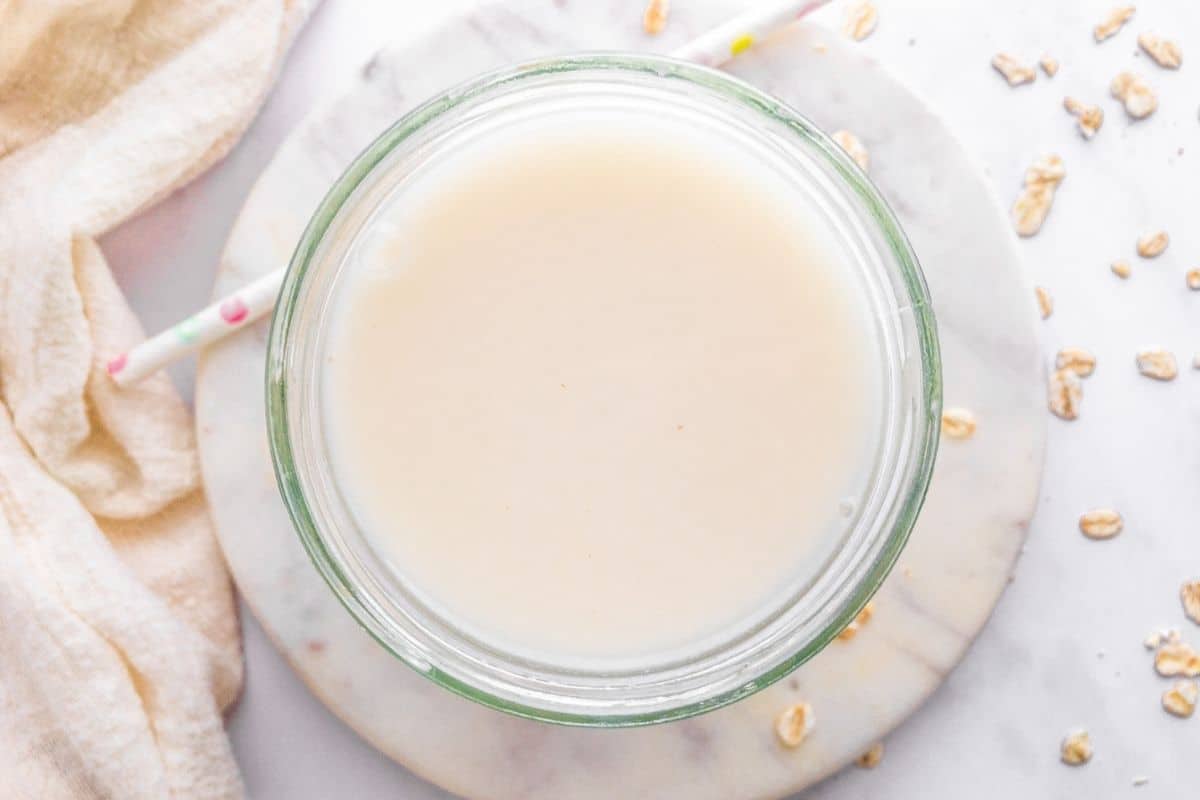
A small glass of homemade oat milk.

Discover how to make oat milk in 5 minutes with 2 ingredients. Use it in your morning cereal, smoothies, coffee, pancake mix and more.

A glass of oat milk.
[feast_advanced_jump_to]

What is oat milk?

Homemade oat milk is a truly wonderful thing. It makes a fabulous vegan alternative to dairy milk and can be used in a multitude of recipes.

As oats are easily available and economical to buy, you can make oat milk yourself at home for next to nothing. Just blend rolled oats and water together then strain it through a nut milk bag to separate out the pulp.

Yes, itโ€™s really easy to make.

Try it just once and youโ€™ll see. Itโ€™s now my go to dairy free milk alternative.

Itโ€™s not a raw food because rolled oats are heated in their processing.

There are many brands of ready made oat milk available in stores. Unfortunately, some have added ingredients listed like additives, artificial flavours, sugars or sweeteners. Be sure to check their labels, so you know what you're buying. Or, if you want to know how to make oat milk at home keep reading.

Sprouted oats are more expensive and not as yet widely available in the UK but hopefully that will change with their growing popularity (fingers crossed).

Oat milk benefits.

There are many benefits of including oat milk in your diet.

Oat milk is wonderfully rich and creamy in flavour. It can be used as a replacement to dairy milk with cereal, milkshakes, smoothies, desserts, tea and coffee and in savoury dishes.

Oats are a great natural whole food full of nutrients and nut free, lactose free, soy free, dairy free and vegan. 

Learn how to make your own oat milk and put yourself in charge of the ingredients.


Oat milk nutrition.

The nutrition in homemade oat milk comes from the oats plus any additional ingredients you may add.

Oats are a natural whole food that are high in fibre and a good source of vegan protein.

They contain many nutrients, including potassium, iron, calcium, magnesium, copper B vitamins and zinc (source).

If youโ€™re buying it from a store you sometimes find they have been fortified with added vitamins and minerals. Again-check the packet labels for clarification.

Are oats and oat milk gluten free?

While oats themselves donโ€™t contain gluten, they're sometimes processed in factories that process gluten-containing ingredients. For this reason, you may want to buy oats and oat milk which have been certified as gluten-free if you have any kind of gluten sensitivity or intolerance (source) or check with your doctor first.

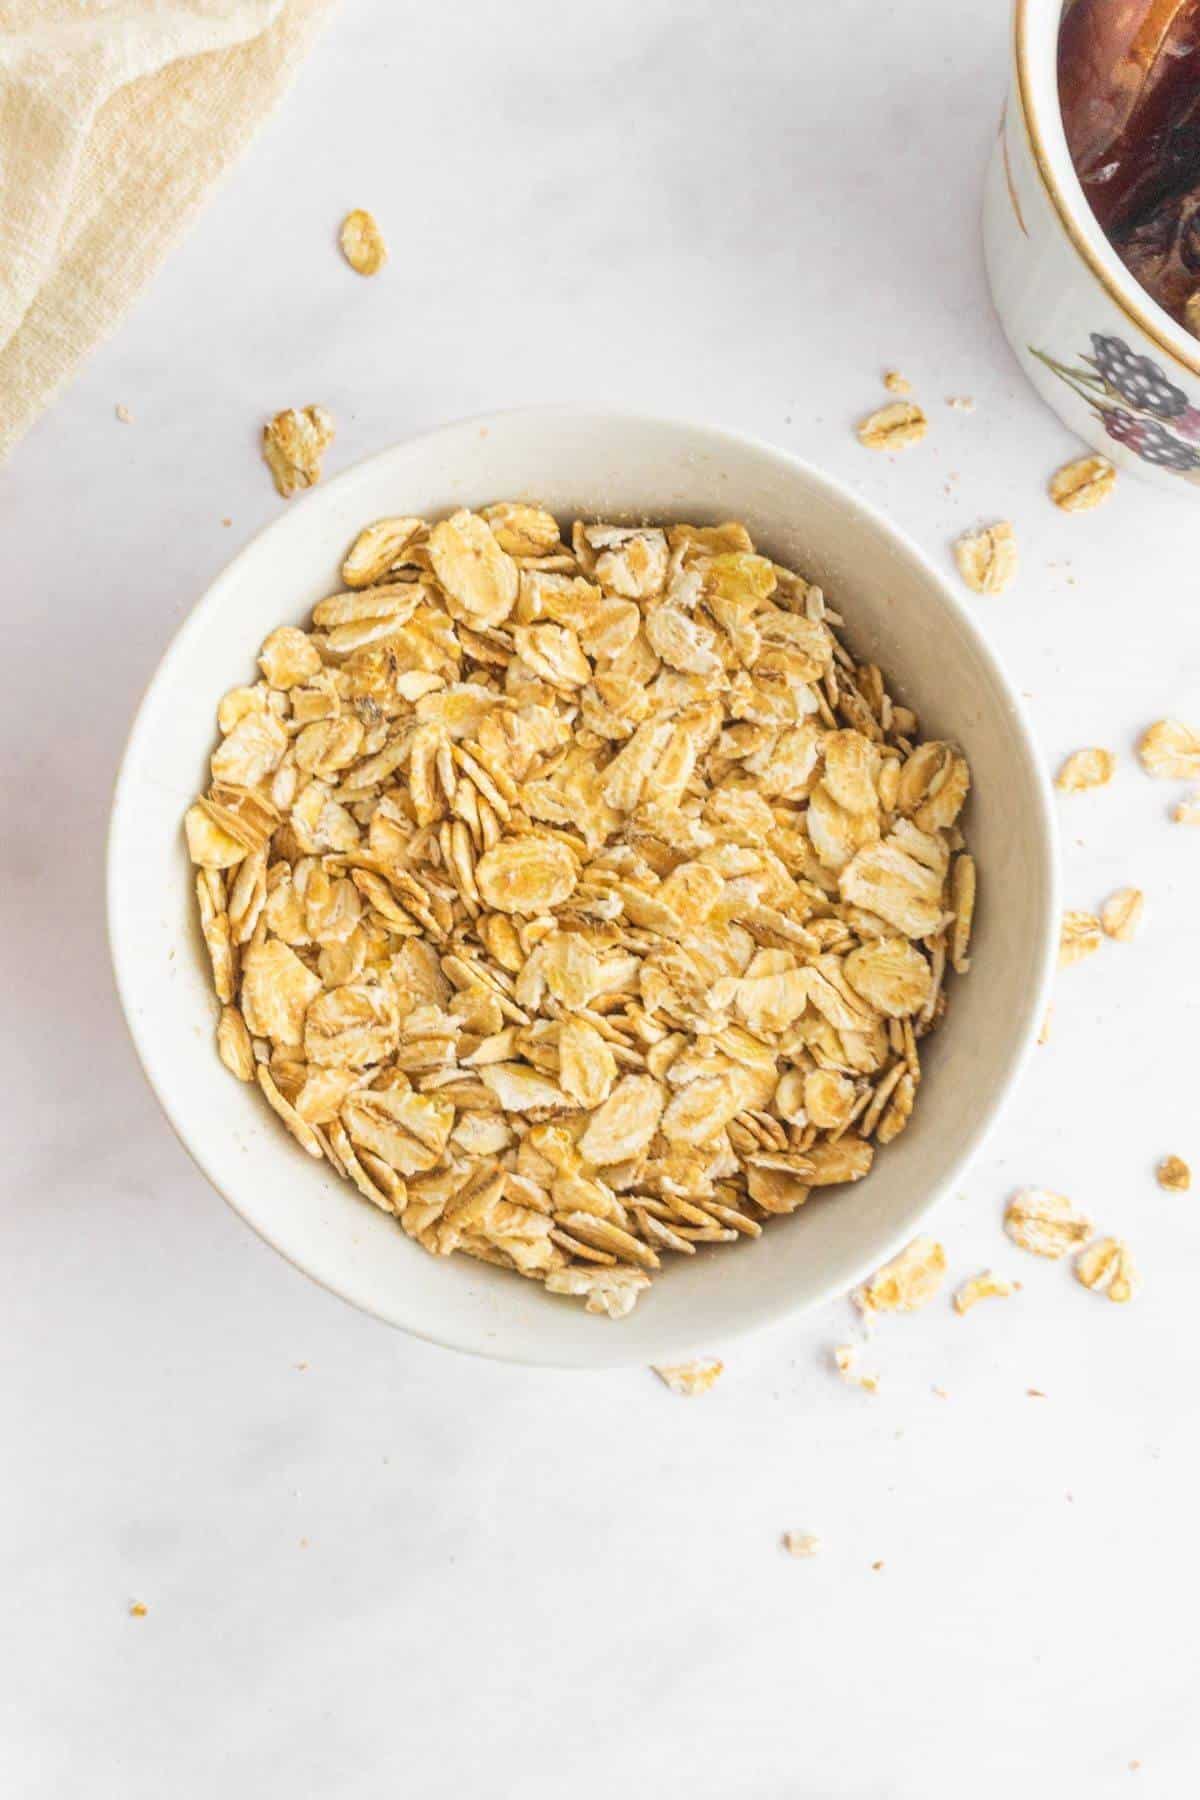
Rolled oats.

Non dairy milks and milkshake recipes.

Other homemade vegan milk recipes you may like:

  • Almond milk
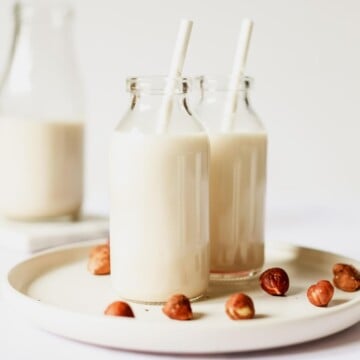
  • Hazelnut milk
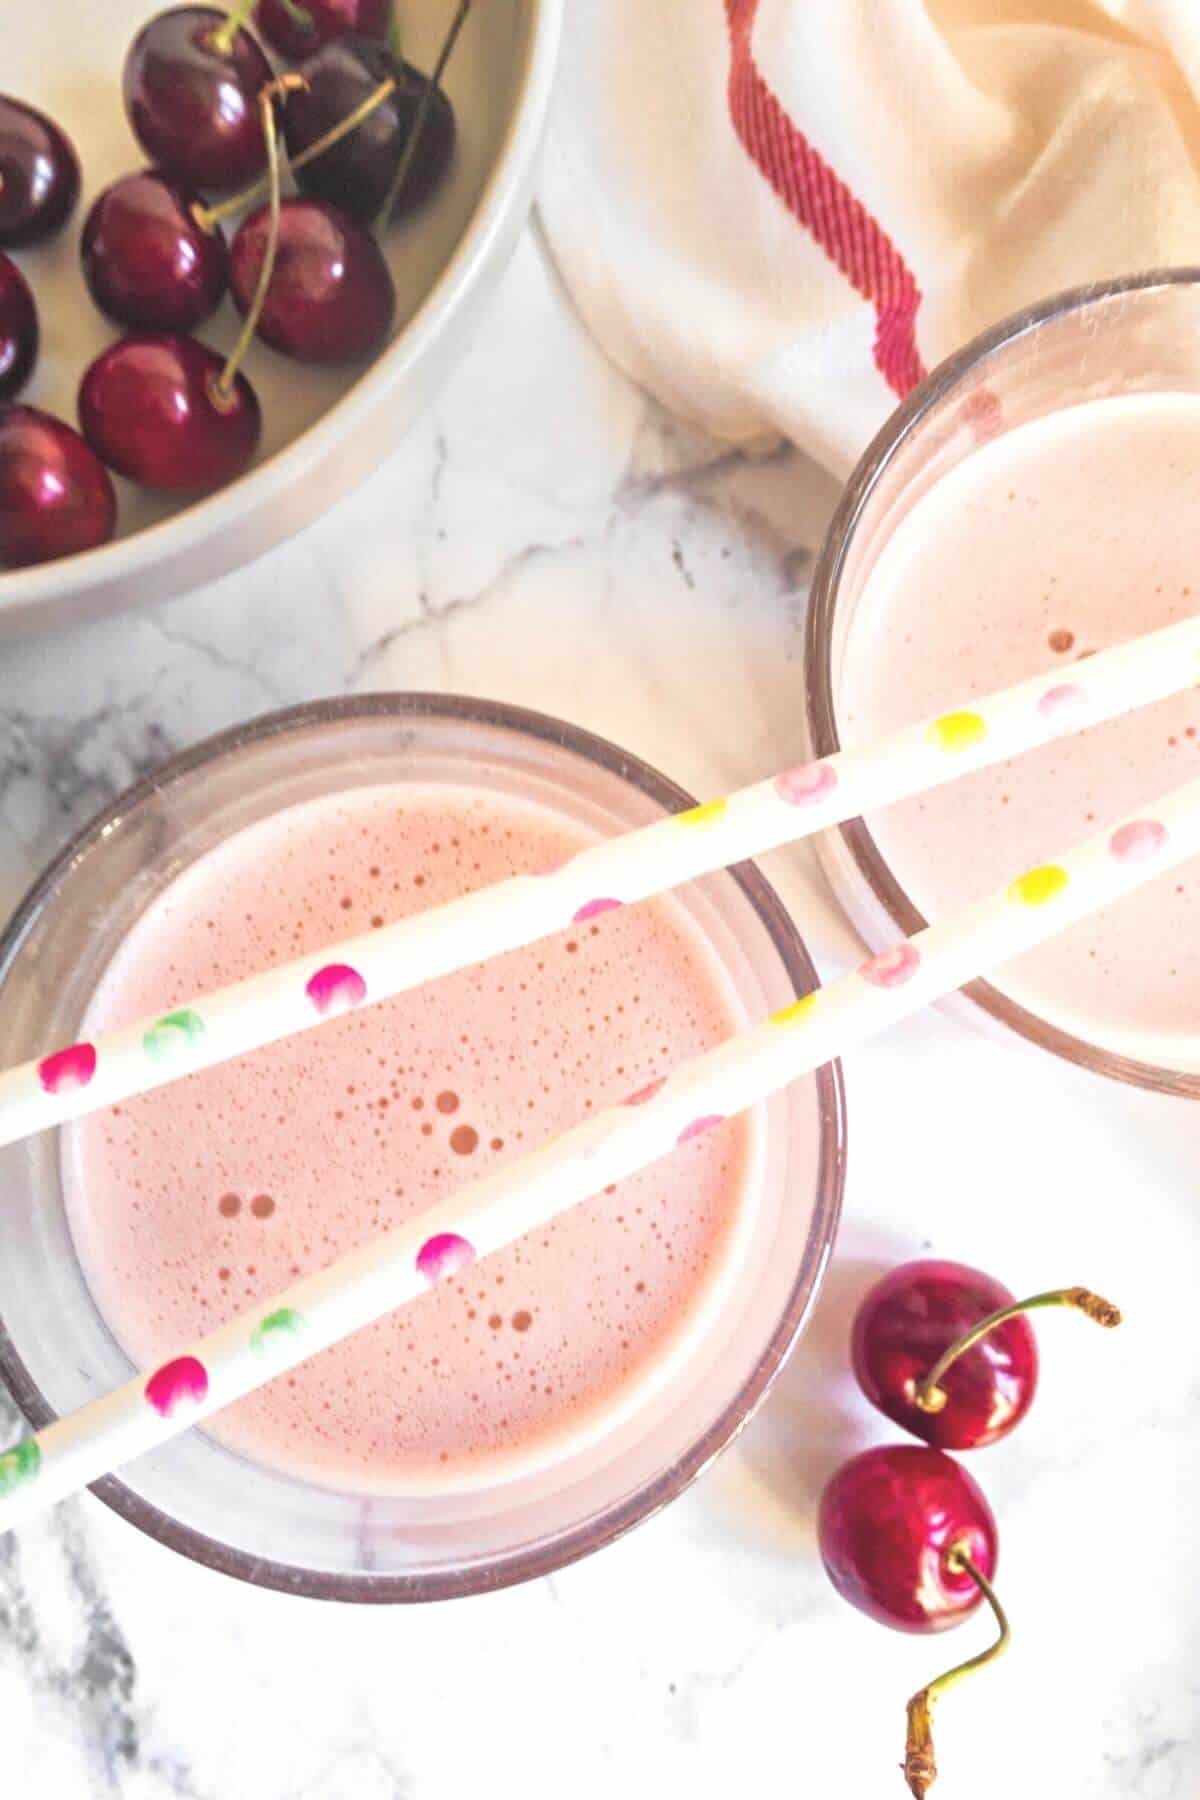
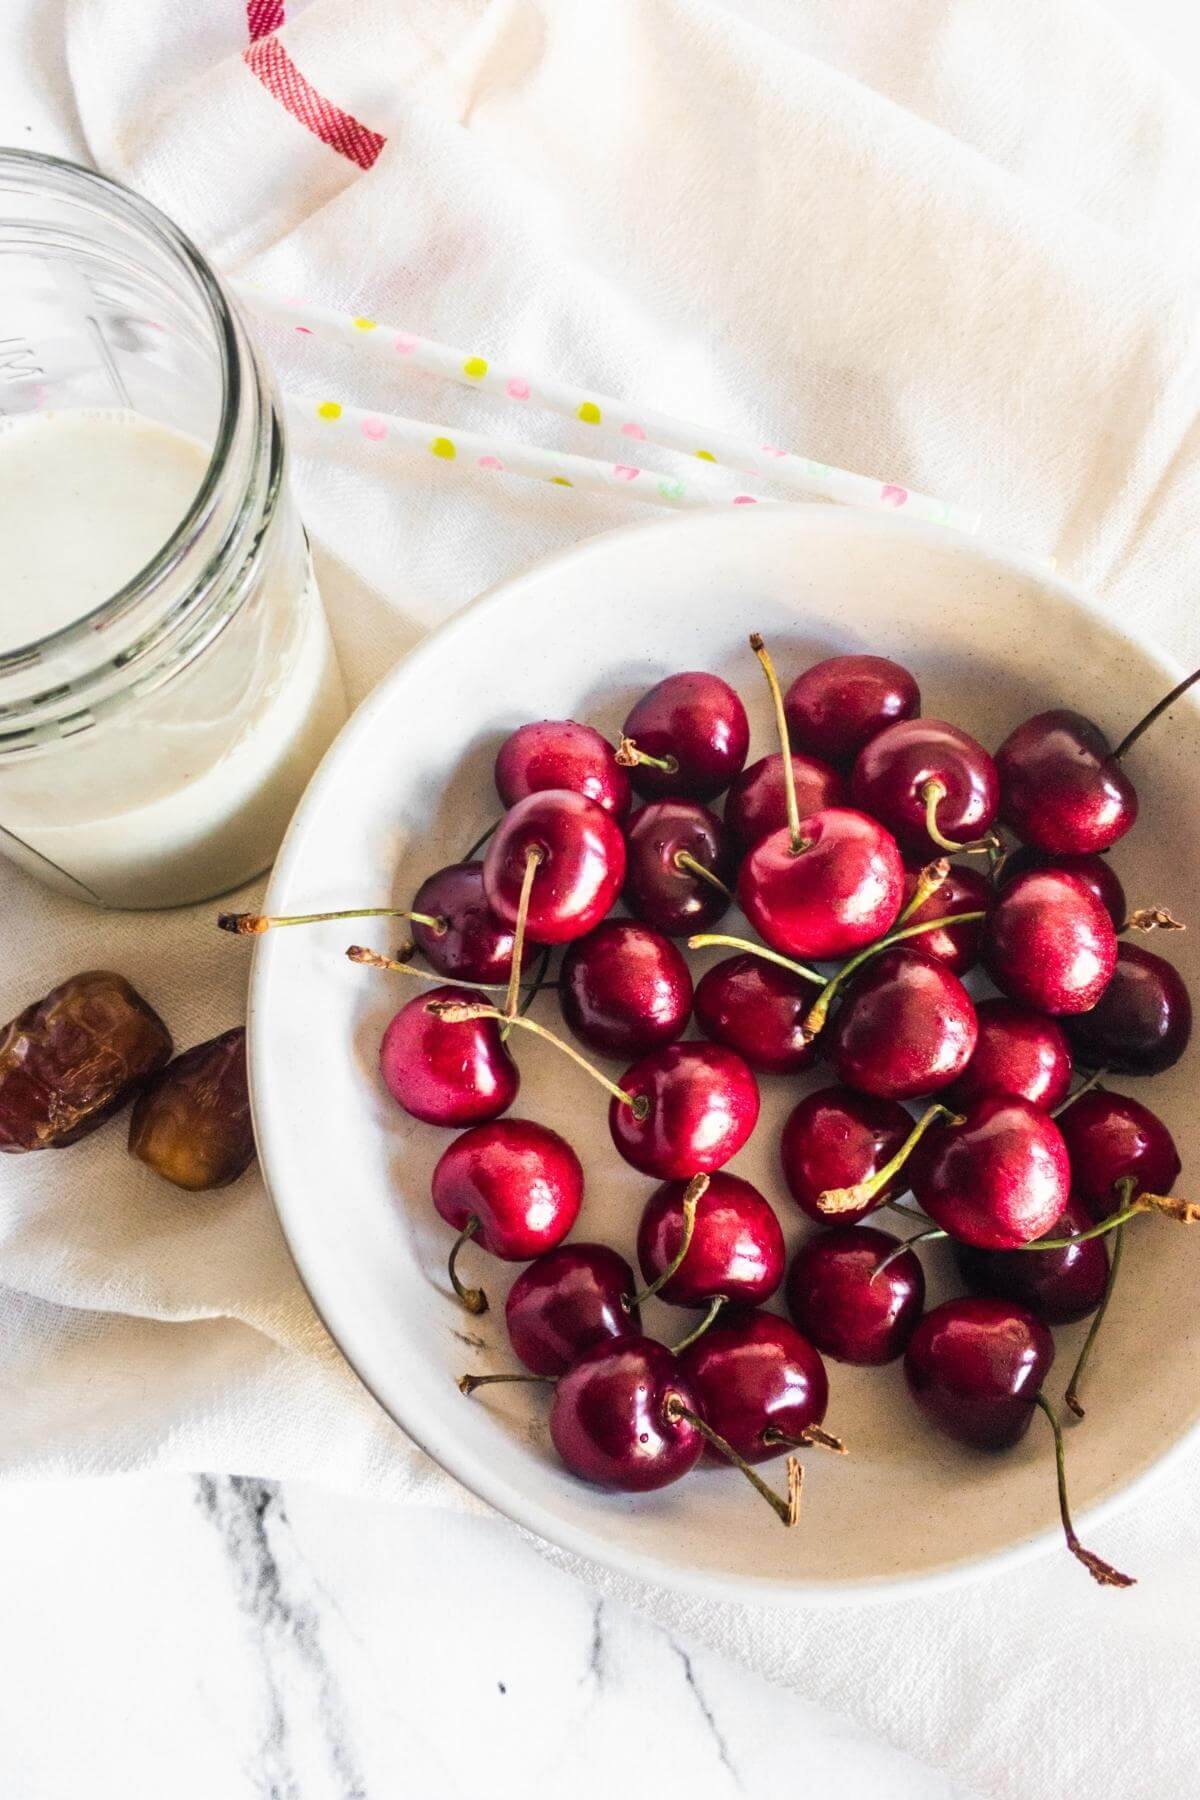
  • Cherry almond milkshake
  • Chocolate hazelnut milkshake

The best ways to make it.

I make oat milk by blending the oats and water together in a high-speed blender for 30 seconds then straining the liquid through either a fine mesh strainer or a nut milk bag. Both ways of straining work really well.

Using cold water to blend with, and not pre-soaking the oats helps to keep the milk free of that slimy texture associated with some oat milks.

A fine mesh strainer. 

Pouring the blended oats directly through a fine mesh metal strainer into a mixing bowl does a great job. Although a little of the blended oats does escape into the bowl. Once the milk is poured into a jar, the residue falls to the bottom. As it settles youโ€™ll see the layer of heavier milk at the bottom. You can either give it a stir before you use the milk or not.

A nut milk bag. 

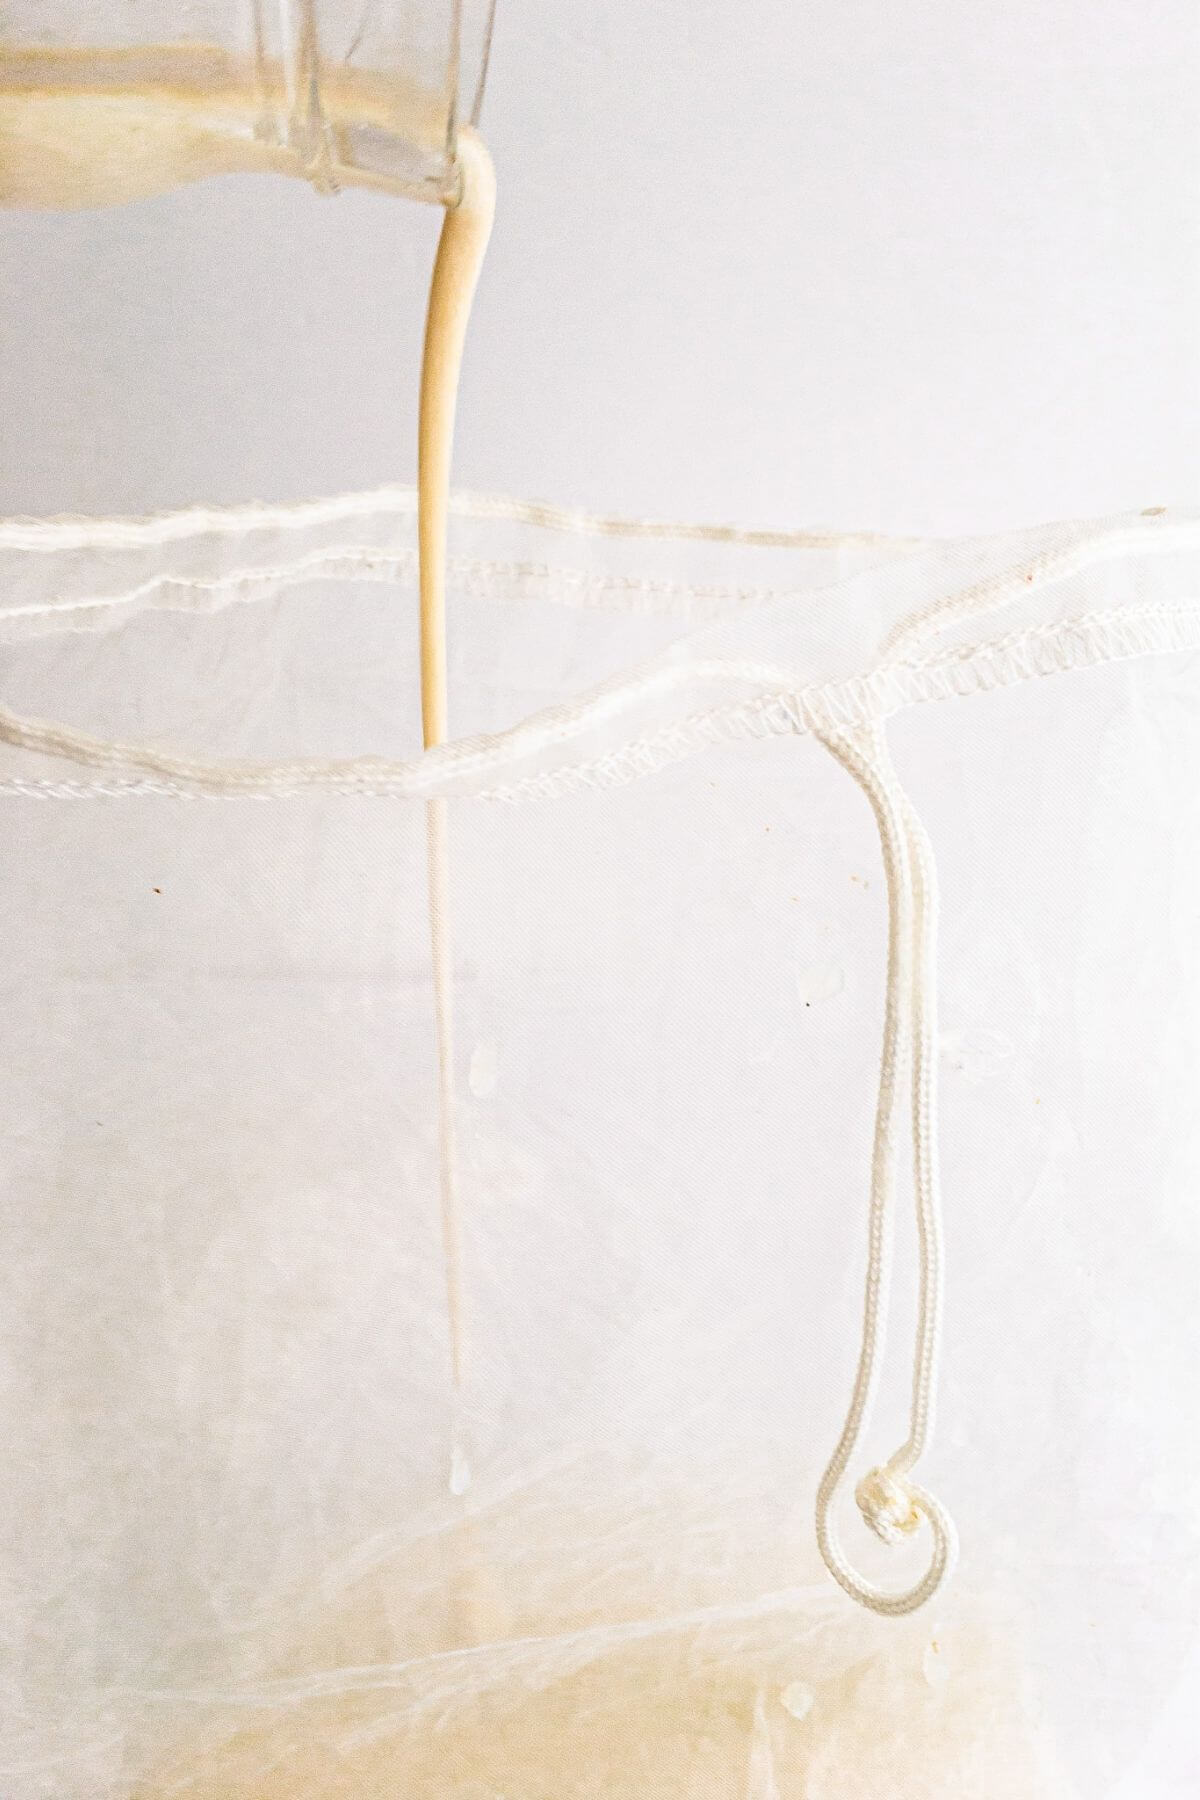
Using a nut milk bag is easy. The milk poured through the bag into a mixing bowl catching all but the smallest amount of thicker oat mixture.

Be sure not to squeeze the oats at the bottom of the bag (like when you make nut milk), or you'll end up with slimy oat milk. 

The milk is a finer texture than when using the fine mesh strainer method, and it has that mild oaty flavour that I love.

Honestly, I think that both methods produced a delicious quality of milk. I settled on using a nut milk bag for the much finer finish but I think it's just down to personal preference.

Oat milk pouring into a nut milk bag.

How to store oat milk.

Oat milk will keep fresh in the fridge for up to 5 days in a sealed container like a mason jar or glass bottle.

Freezing oat milk.

Yes, you can freeze oat milk. When I make a big batch I like to freeze some in a silicone ice cube tray. I let it defrost in a mug. 1-2 ice cubes is just enough for me to add into an afternoon coffee. 

For larger amounts, freeze in suitable ziplock bags and allow to defrost overnight in the fridge.

When defrosted, oat milk can be a little grainy. Give it a stir to even out the texture if you want to. I tend to add mine to cereal or sometimes pop it in the blender with fruit to make a milkshake, so don't really notice.

What does oat milk taste like?

Yes it tastes of oats. Try it and see. It can take a little getting used to if you are coming off dairy milk as it sometimes can have slightly dry aftertaste. With store bought versions I find it varies with the brand.

The most difficult swap I found was in my tea and coffee. What worked for me was to swap my morning tea for green tea and using oat milk in my afternoon coffee.

This 2 ingredient recipe will give you light-tasting, plain oat milk. 

I like to add a couple of ingredients into the mix. Of course this is optional. I add 1-2 pitted dates, a pinch of sea salt and ยผ teaspoon of vanilla extract before blending. 

This adds a little natural sweetness which I love. It's a perfect combination poured over morning cereal with fresh fruit and a sprinkle of powdered cinnamon.

If youโ€™re making the milk to use in savory meal prep you can omit the optional added ingredients.

Oat milk.

Recipe variations.

Date and vanilla - add 1-2 pitted dates, a pinch of sea salt and ยผ teaspoon vanilla extract before blending.

Banana cinnamon oat milkshake - add 1 chopped banana and ยผ teaspoon powdered cinnamon before blending.

Oat and hemp seed milk - add a tablespoon shelled hemp seeds before blending.

๐Ÿ“– Recipe

A small glass of homemade oat milk.

How to make oat milk.

Juliette | Flourishing Kitchen
Discover how to make oat milk in 5 minutes with 2 ingredients. Use it in your morning cereal, smoothies, coffee, pancake mix and more.
5 from 6 votes
Leave a review
Print Recipe Pin Recipe Save Recipe Saved Recipe
Prep Time :5 minutes mins
Total Time :5 minutes mins
Course: Drinks
Cuisine: British
Servings :2

Equipment

  • A blender.
  • Nut milk bag or fine mesh strainer.
  • Mixing bowl for straining the milk into.
  • Wide mouthed kitchen funnel.
  • Glass jar or container with a lid for storing.
Prevent your screen from going dark

Ingredients
  

  • ยฝ cup (40g) gluten free rolled oats.
  • 2 cups (480ml) cold water.

Optional.

  • pinch of salt.

Instructions
 

  • Add the oats and water to a blender. If you want to add the optional ingredients do so now.
  • Blend all the ingredients together for about 30 seconds or until the mixture is combined.
  • Pour the oat milk through a nut milk bag or fine mesh strainer and into a large bowl so that the liquid is separated from the oat pulp.
  • Using a kitchen funnel decant the oat milk from the mixing bowl into your mason jar or glass bottle for storing. Refrigerate until needed.

Notes

Will keep for up to 5 days stored in a lidded container in the fridge. The recipe is easily doubled for a larger quantity.
I found the following helpful to avoid getting a slimy oat milk:
Use cold water and donโ€™t pre-soak the oats.
Donโ€™t blend the ingredients for longer than necessary.
Donโ€™t squeeze the oats at the bottom of the nut milk bag, like you do when you make nut milk.
Did you make this recipe?Please leave a comment below to help other people.

How To Make Raw Cauliflower Rice

March 22, 2021 by Juliette 3 Comments

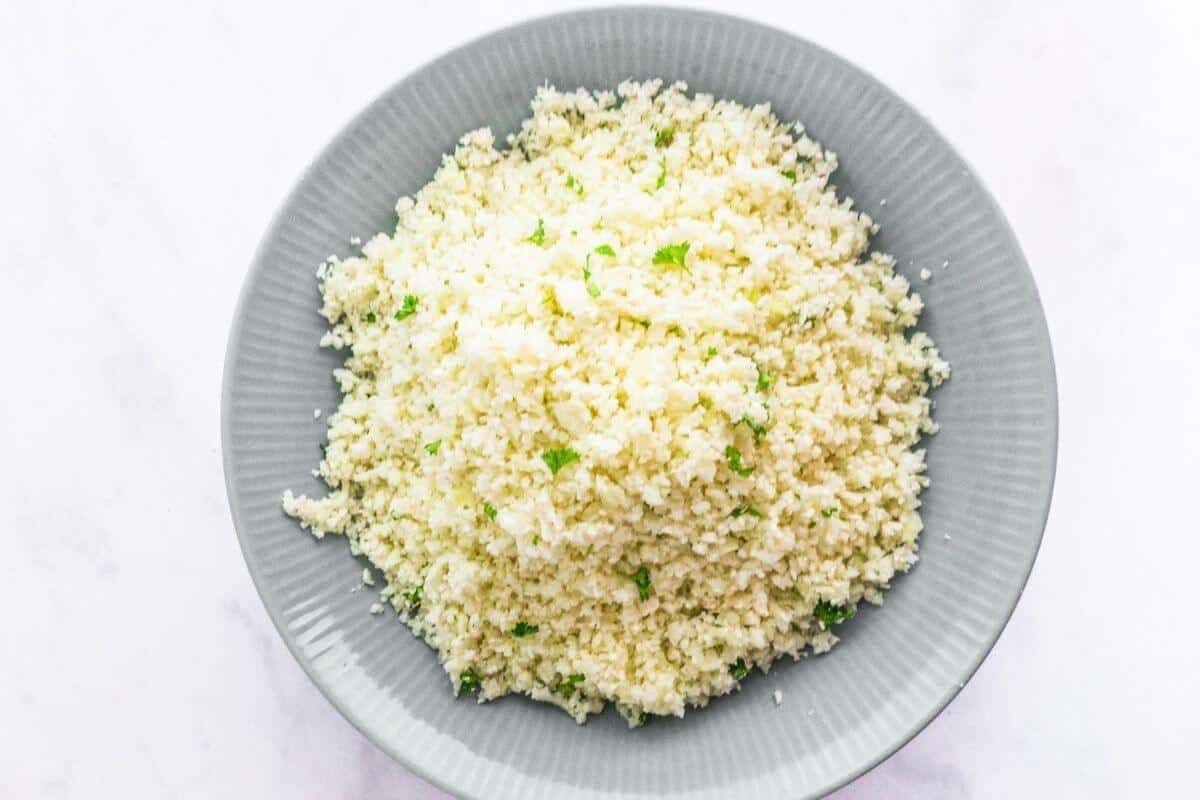
A bowl of fresh raw cauliflower rice.

This 5-minute raw cauliflower rice makes an easy raw alternative to cooked brown or white rice. Itโ€™s marvellous with salads, in burritos, vegan sushi and more.

A blue ceramic bowl filled with raw cauliflower rice.

[feast_advanced_jump_to]

What is raw cauliflower rice?

Raw cauliflower rice, also known as cauliflower couscous, is a fabulous raw alternative to cooked rice made in about 5 minutes with a food processor.

Itโ€™s quick and easy to make and tastes quite plain rather like rice does, so it works well with other flavours.

It has a light and airy, slightly grainy texture, which easily replaces rice in many dishes. This is partly why itโ€™s become so popular.

How to make cauliflower rice without a food processor.

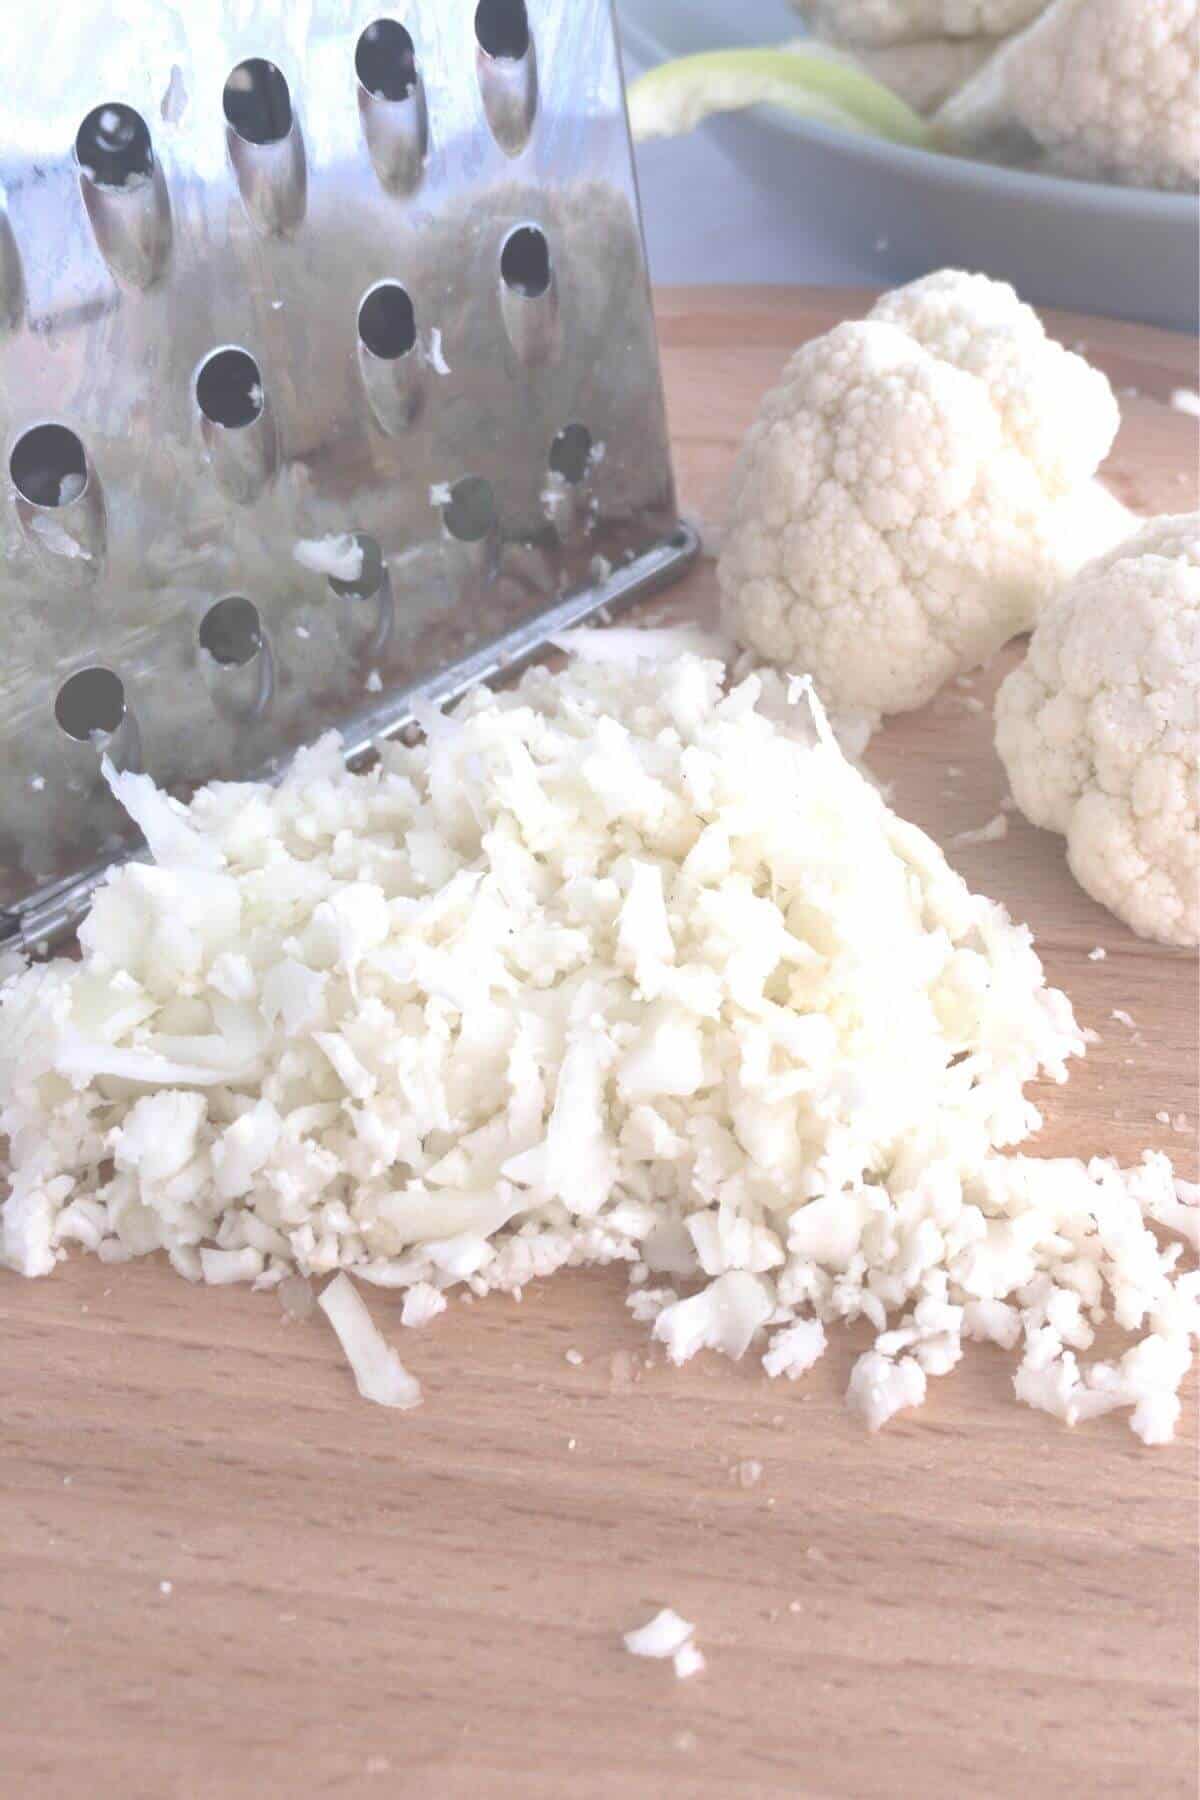
If you donโ€™t have a food processor you can make cauliflower rice with a handheld grater. The trick to making it is not to chop the cauliflower up too small at the outset.

You want to cut the cauliflower into quarters keeping the stalk intact because that gives you something more substantial to hold against the grater.

Grate the cauliflower florets onto a chopping board using the larger grating size. Grating the stem against the smaller size will work.

Chop any larger grated pieces with a knife if you need to. Then scrape it all into a container and cover with a lid until you need to use it. 

Raw cauliflower with a handheld stainless steel grater.

Using a food processor.

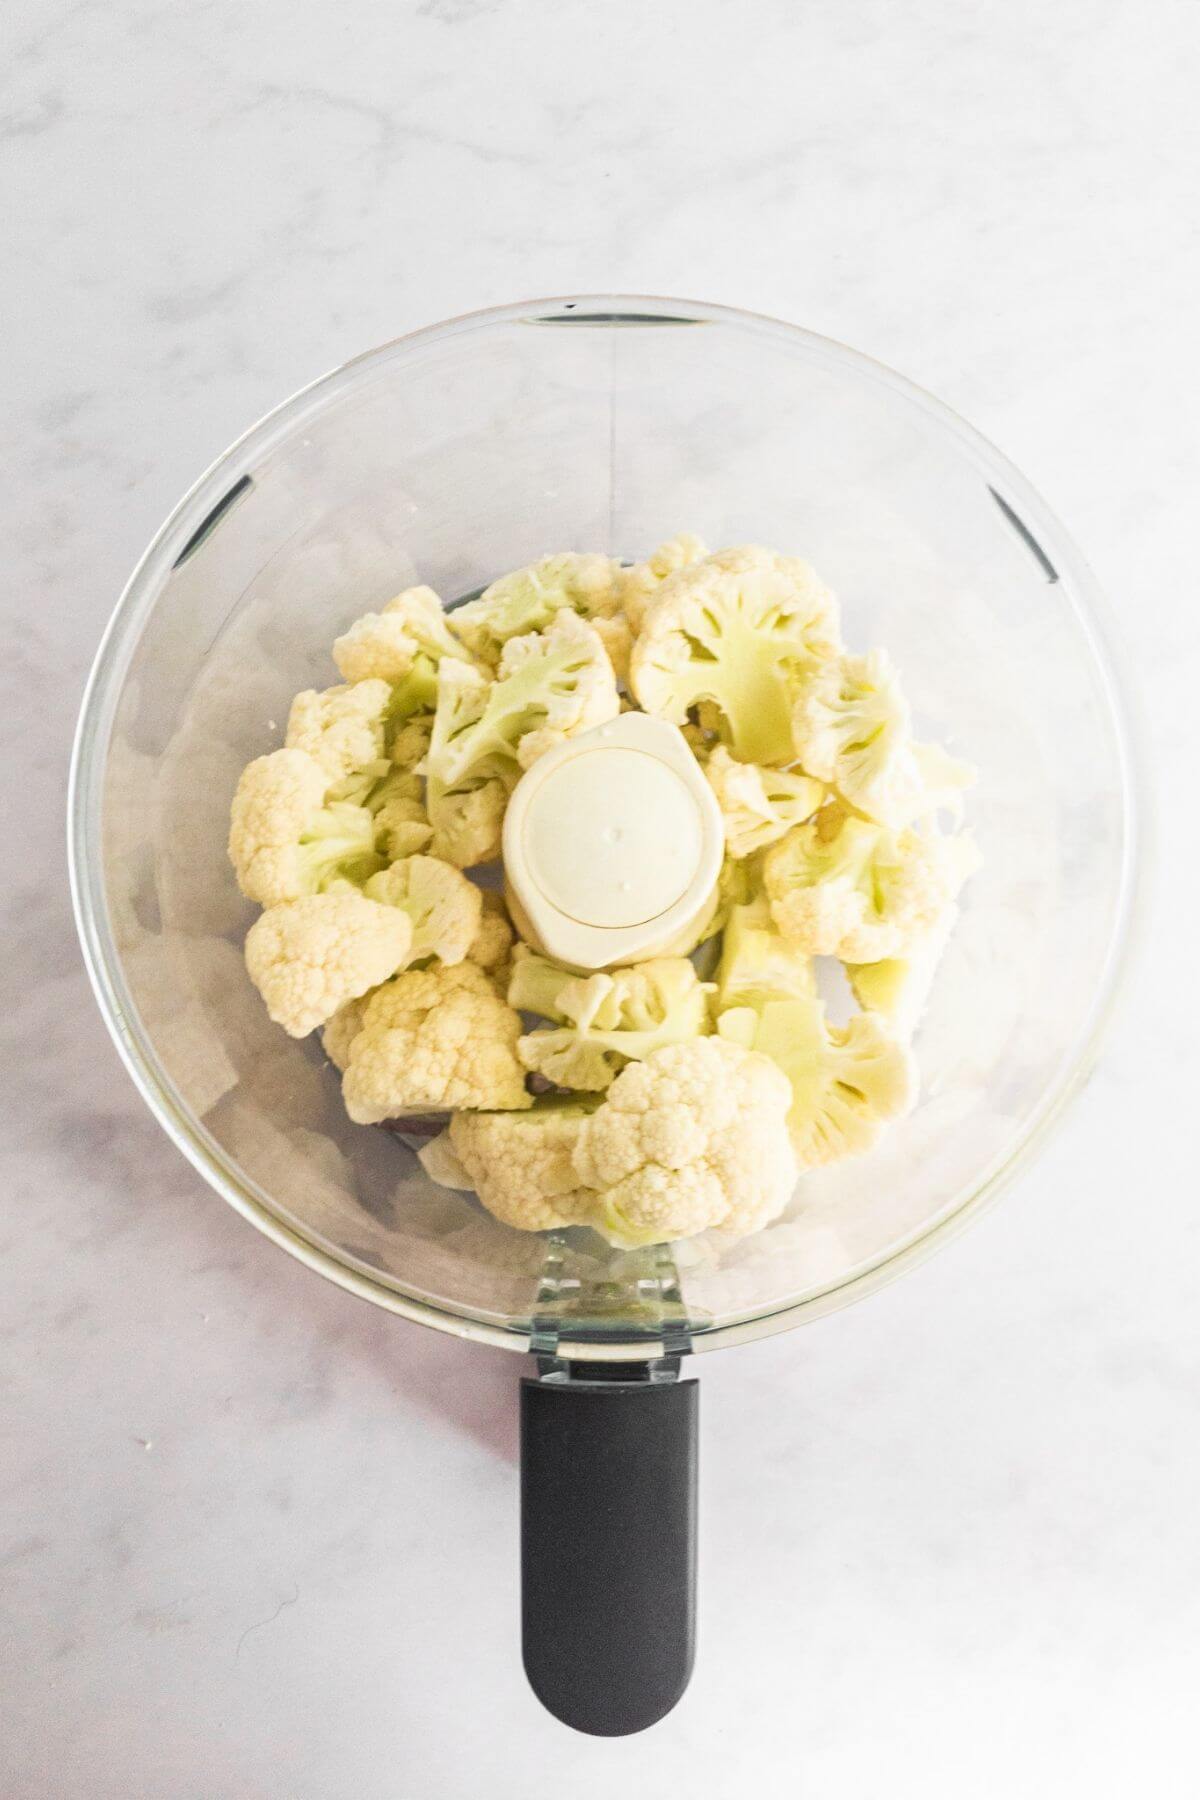
When chopping the florets, try to get them a roughly similar size then it will all come together easily. I also include the stemโ€”no need to waste it.

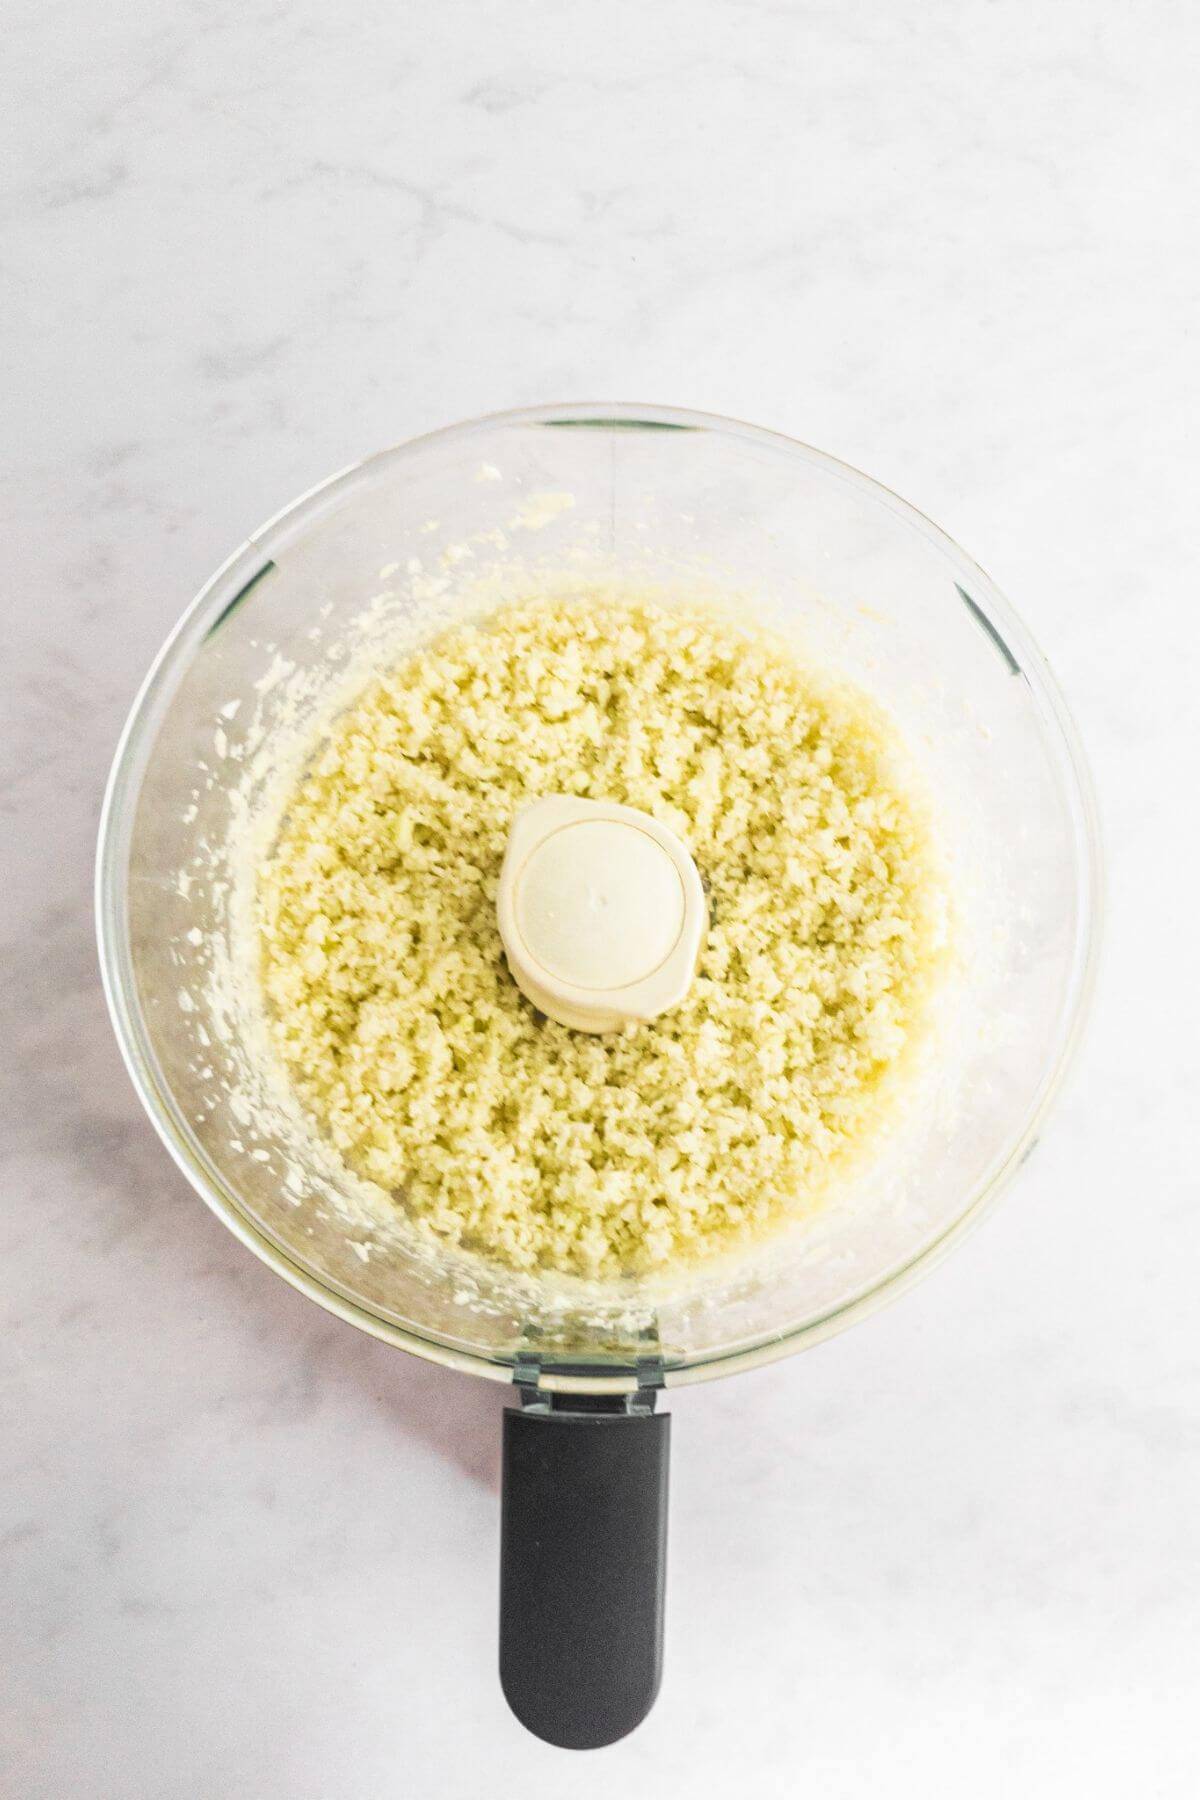
Itโ€™s best to pulse the cauliflower in small batches instead of filling your food processor to the top. If you process them too much, theyโ€™ll turn to mush, which you should avoid. I found that on average one small cauliflower took 8-10 pulses of the food processor then it was all done.

Roughly chopped cauliflower in a food processor.
Riced cauliflower in a food processor.

Raw cauliflower recipes.

You may like to check out these other cauliflower rice recipes:

  • cauliflower couscous salad.
  • raw cauliflower โ€˜friedโ€™ rice.

How to store.

Storing cauliflower rice is easy. Keep it in a lidded container in the fridge for up to 4 days. After this, it does begin to smell a little sulphur like. I like to squeeze some lemon juice over the rice and fork it through, to help it stay fresh and take some of the bitterness away.

Freezing.

Yes, you can freeze raw cauliflower rice. Pop it into a suitable container for your freezer, and it will keep fresh for up to a month. I donโ€™t like to keep it any longer because I prefer to enjoy food at its freshest. 

It took 3-4 hours to defrost at room temperature. Note that once it has defrosted, it will feel a little softer in texture. I found it best enjoyed the same day.

Recipe variations.

Adding flavours to cauliflower rice is easy. Here are some variations for you to try. Theyโ€™re all quick and easy to do. 

Finish them off with a little salt and pepper to taste. Or instead of salt, you could try using a little celery salt or a pinch of mixed seaweed flakes.

Parsley - in the image below I added a tablespoon of chopped curly leaf parsley to a whole small riced cauliflower. I added a pinch of celtic sea salt and stirred them both through with a fork..

Turmeric - add ยฝ teaspoon powdered turmeric, cumin, sumac, with some crushed fresh garlic. Top with sprouted chickpeas raw or lightly steamed. Sprinkle with finely chopped parsley and fresh thyme leaves.

Mexican inspired - add a little lime zest and juice, some chopped jalapenos, fresh chopped coriander and sliced avocado.

I love to keep the freshest looking tender cauliflower leaves for use in a salad. These are usually the ones underneath the cauliflower closest to the stalk rather than the tough outer leaves. Theyโ€™re full of nutrients. Give them a wash and a chop, and they will mix well in any chopped salad.

Ditto with carrot tops.

๐Ÿ“– Recipe

A bowl of fresh raw cauliflower rice.

Raw cauliflower rice.

Juliette | Flourishing Kitchen
A 5-minute raw cauliflower rice makes an easy raw alternative to cooked brown or white rice.ย Itโ€™s marvellous with salads, in burritos, vegan sushi and more.
5 from 3 votes
Leave a review
Print Recipe Pin Recipe Save Recipe Saved Recipe
Prep Time :5 minutes mins
Total Time :5 minutes mins
Course: Side Dish
Cuisine: British
Servings :3

Equipment

  • Food processor with an s-blade.
  • Sharp knife.
  • Chopping board.
  • spatula and fork.
  • container with a lid for storing.
Prevent your screen from going dark

Ingredients
  

  • 1 small head of cauliflower.
  • ยฝ a lemon.

Instructions
 

  • Wash the head of cauliflower in cold water and remove the leaves. Pop it onto a tea towel and pat it dry. You donโ€™t want the cauliflower to be wet when you rice it or it will stick together.
  • Chop the cauliflower into florets. Youโ€™ll want them to be small enough to fit into the food processor. 2 inches or so in size is about right.
  • Put the chopped cauliflower into the food processor and pulse a few times until theyโ€™ve broken down enough to resemble grains of rice. You may need to intervene with a spatula to scrape it down the sides part way through this process.
  • If there are any larger pieces of cauliflower left, take them out. Once youโ€™ve removed the cauliflower rice, you can pulse these again until theyโ€™ve turned into rice.
  • Remove using a spatula and pop into a suitable container. Squeeze over the juice of half a lemon and give it a stir through with a fork. Cover and refrigerate until needed.
Did you make this recipe?Please leave a comment below to help other people.

Iโ€™m off for some tea.

Love raw food.

XOXO

Juliette Young

10 Raw Food Techniques Youโ€™ll Love

March 17, 2021 by Juliette Leave a Comment

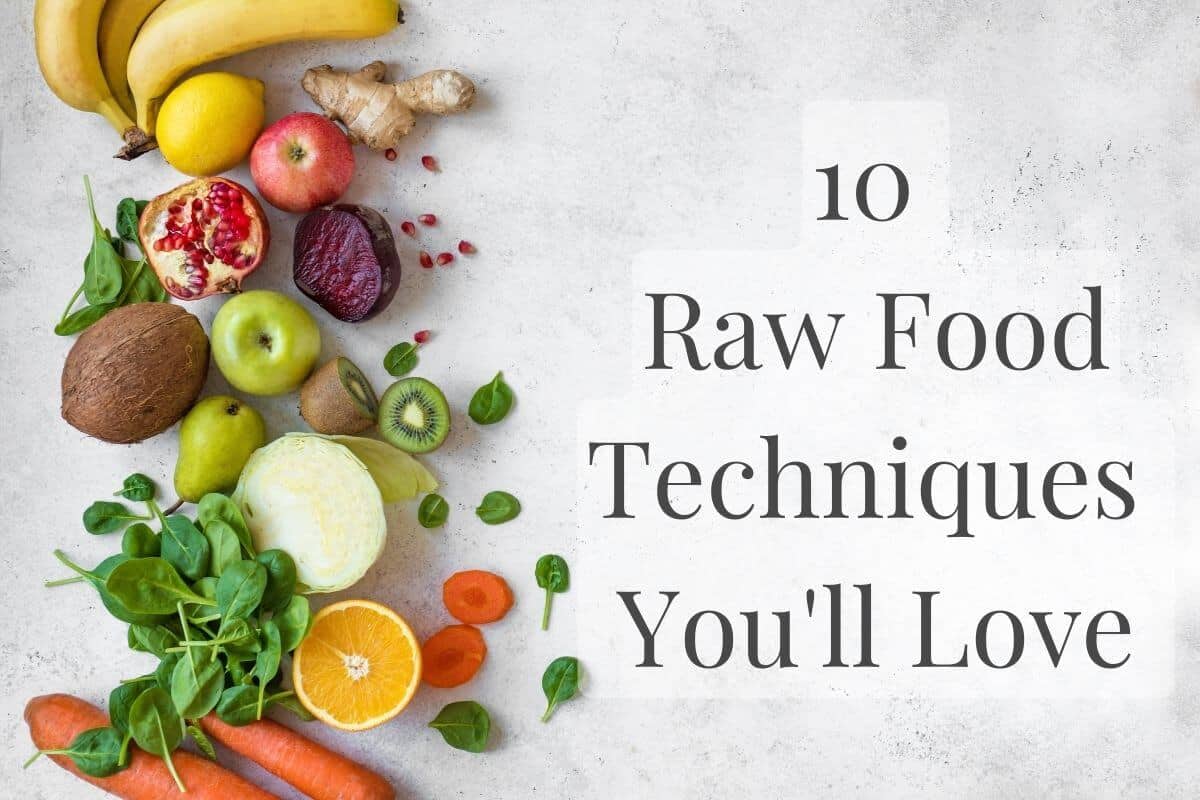
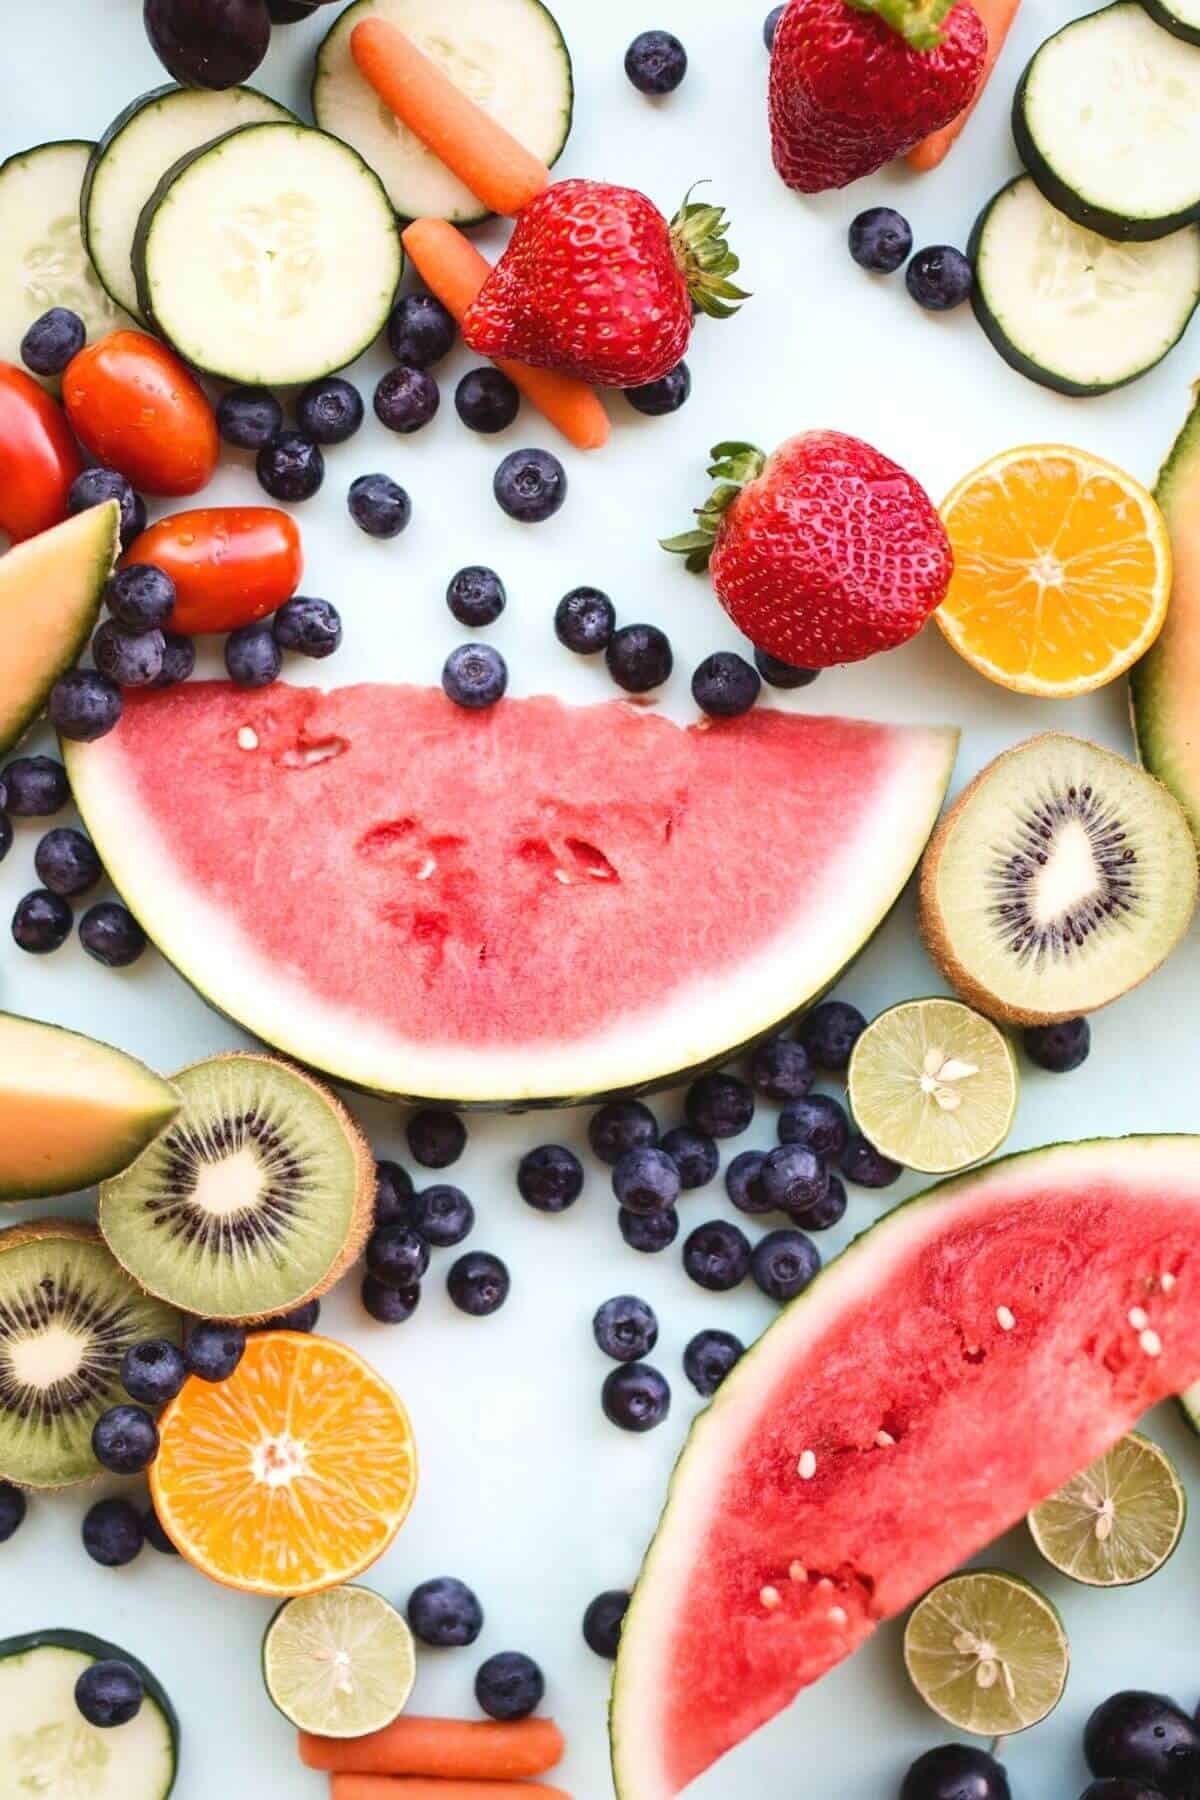
Mixed raw fruits and vegetables on a marbled background.

Preparing raw food is simple when you know how. Instead of always thinking about what to cook, you could take advantage of some simple raw food techniques to create gorgeous alternatives.

Enjoy making delicious raw juices, smoothies, tacos, zoodles, nice-cream and more with the right kitchen know-how.

Let's take a look at what you can do to make the most of all the natural, nourishing goodness that comes from raw foods. And get excited about eating the rainbow, like never before! 

A selection of raw fruits and vegetables.
[feast_advanced_jump_to]

Juicing

Juicing is the process of extracting fresh and nutrient-rich juices from whole foods.

It's an easy way to add heaps of pure, unadulterated nutrition to your diet quickly and easily.

Because the process of juicing separates the fibre from the whole food, your digestive system doesn't need to do as much work. 

This makes enjoying freshly prepared juices a gentle way for your body to absorb nutrients. 

It's best to drink freshly made juices straight away to get the most out of them because their nutrients start to degrade over time very quickly.

I love juicing and think it's a joyful, delicious way to supplement your diet.

If youโ€™re new to raw foods you'll love my blog posts My Top Raw Food Kitchen Tools, 10 Ways to get started with raw food and 6 Healthy Foods Raw Foodies Love.

Blending

Blending is the process of mixing together one or more substances into a puree to become smooth and evenly combined. 

I have a blast using a blender to create some wonderful raw foods; things like:

  • Dips - like this easy cashew mayo or hummus.
  • Dressings - try my peanut salad dressing or this lemon herb vinaigrette.
  • Desserts
  • Sauces
  • Soups
  • Nut milk
  • Nice cream
  • Milkshakes and yes, of course
  • Smoothies. 

Yes, it's safe to say that I love to use my blender every day. You could also try using a food processor with an s-blade.

If you're stepping into raw food, then getting a blender is definitely worth your time and money. 

You don't need anything fancy to get started. I bought a cheap blender from the supermarket for about ยฃ20. It did me for over a year, and I loved it! I keep it as a spare, just in case.

The more expensive blenders do typically give you a smoother consistency. They work at incredibly high speeds to give you a truly quality product with some wonderful guarantees. 

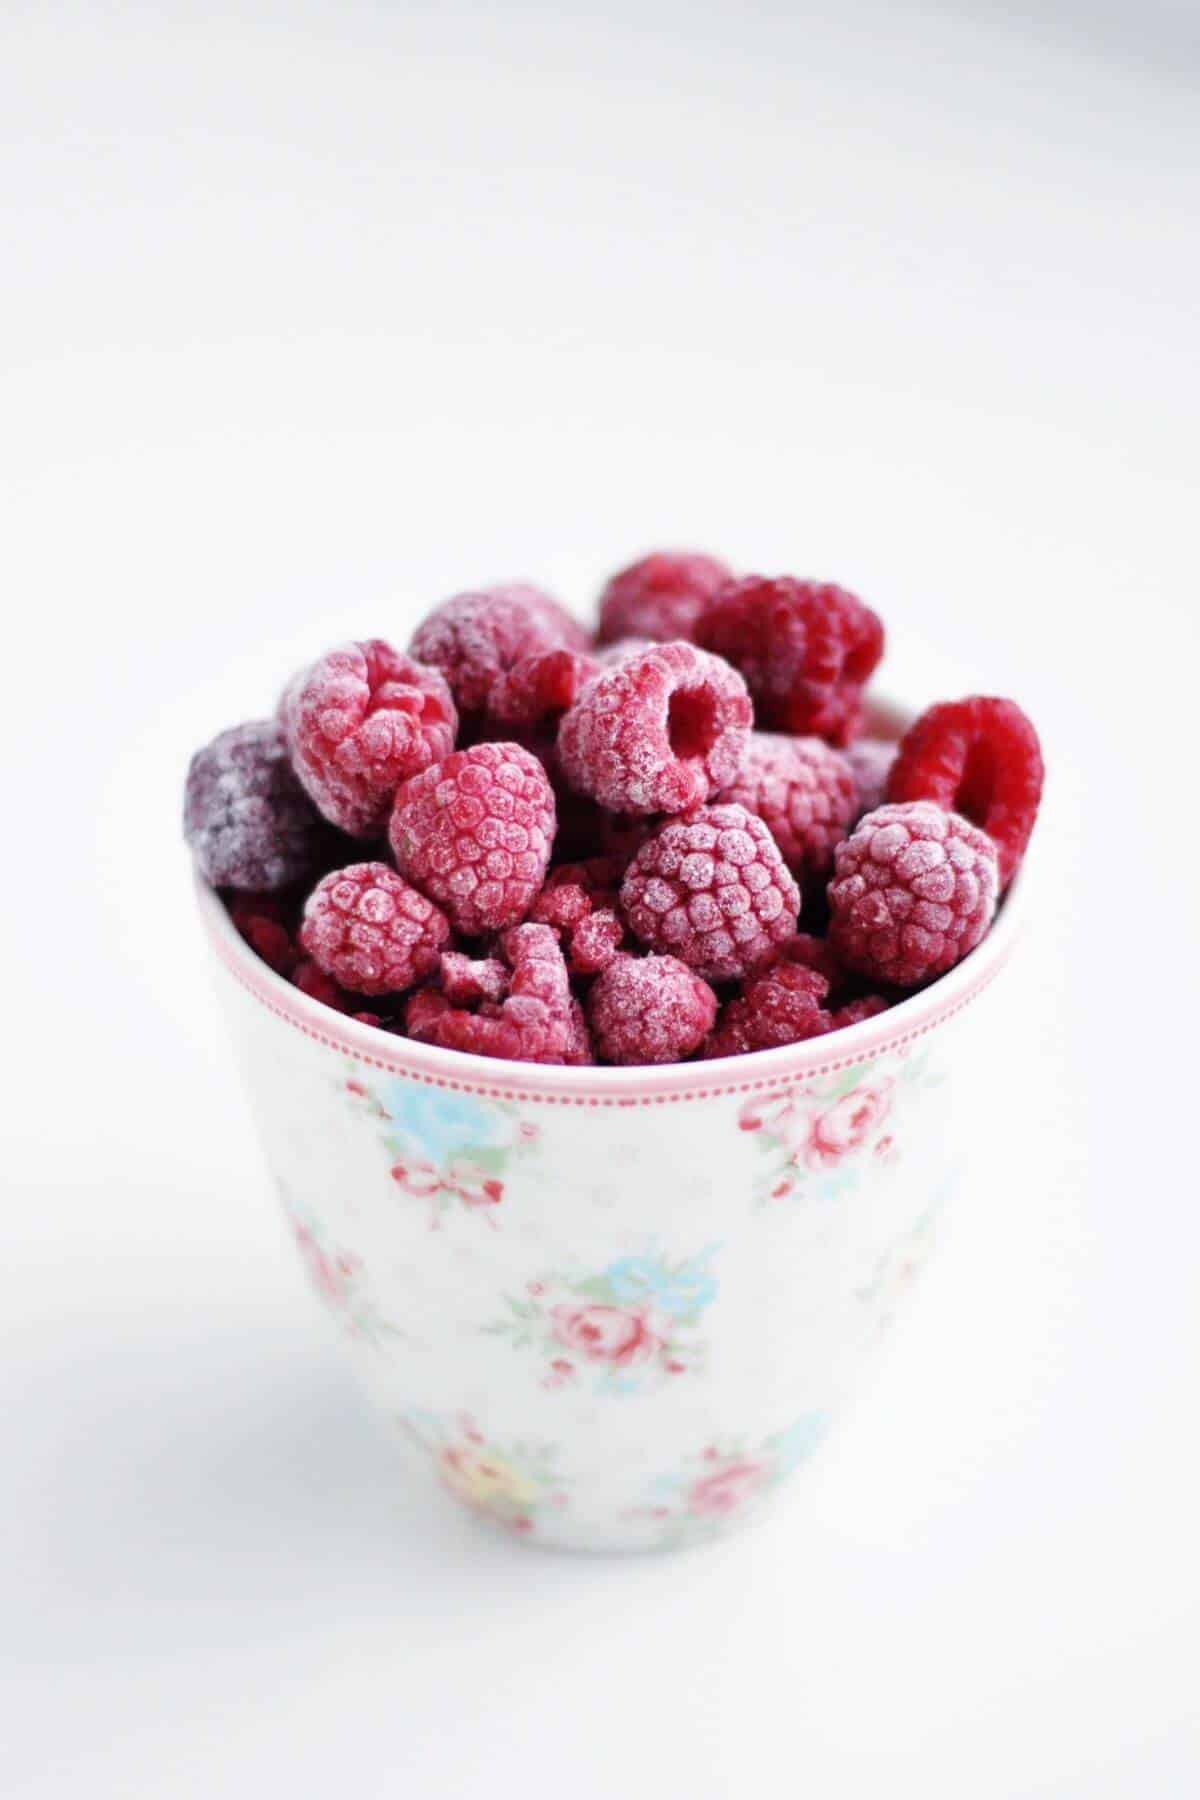
A cup of frozen raspberries.

image by Ashley Winkler on Unsplash

Freezing

Freezing is a tool that most of us have and they can be really useful when it comes to raw foods.

When you want to make things like banana ice cream, smoothies, fruit sorbets, tart crusts, raw cheesecakes and much more, having a freezer is essential. 

Freezing is a brilliant way to store raw food bought in bulk. 

For example, I sometimes buy whole boxes of fresh fruits and vegetables at the local town market on a Saturday. Toward the end of the day, greengrocers can offer discounts on foods they need to shift.

I've been able to get big boxes of foods like avocados, mangos and bananas for ยฃ1-ยฃ2. I know, right! I'm not even kidding. This is a super cost-effective way to shop. When it happens, I'm dancing all the way home!

I wash, peel, chop or slice it all up. Pop onto a baking sheet in a single layer, so that the foods donโ€™t stick together, and straight into the freezer.

Once the foods have frozen, transfer them into suitable container to keep for whenever you need them.

Freezing also works really well with the more expensive items, such as nuts and seeds.

I regularly freeze foods like smoothies, vegan pates, sauces, soups, desserts, fresh ginger and fruits โ€”especially berries and bananas for making smoothies and nice-cream.

When you've prepared too much of something, or if you love to batch prep, freezing can be your best friend.

Spiralizing

Using a spiralizer is a really playful and creative way to make raw meals in the kitchen. With one, you can create noodles and ribbons out of courgette (zucchini), pumpkin, squash, carrot, beetroot, for example. 

Using a big countertop spiralizer is best if you want to make big bowls full of noodles. There are smaller handheld versions that are great for occasional use or when you want to make smaller amounts.

You can pair your vegetable noodles and ribbons with sauces, dressings and salads to create gorgeous meals quickly and easily.

A vegetable peeler and julienne peeler are also good for making noodles, so a spiralizer is by no means an essential kitchen tool. Theyโ€™re fun to use though. ๐Ÿ˜€

Marinating

Marinating is a simple way to tenderise and flavour foods by soaking them in homemade dressings for a while.

Typically a marinade will be made up of a liquid or oil base, then youโ€™ll add an acid like lemon juice, lime or orange juice, you can add herbs and spices too.

Softer foods like fruit and tofu tend not to take very long to marinate as they will tenderise fastest. If you want to marinade a dish for more than a couple of hours, remember to keep it covered and transfer it to the fridge to keep it fresh.

Creating your own marinades allows you to take complete control over the ingredients instead of buying pre-made bottles from the store that might be full of nasty ingredients. 

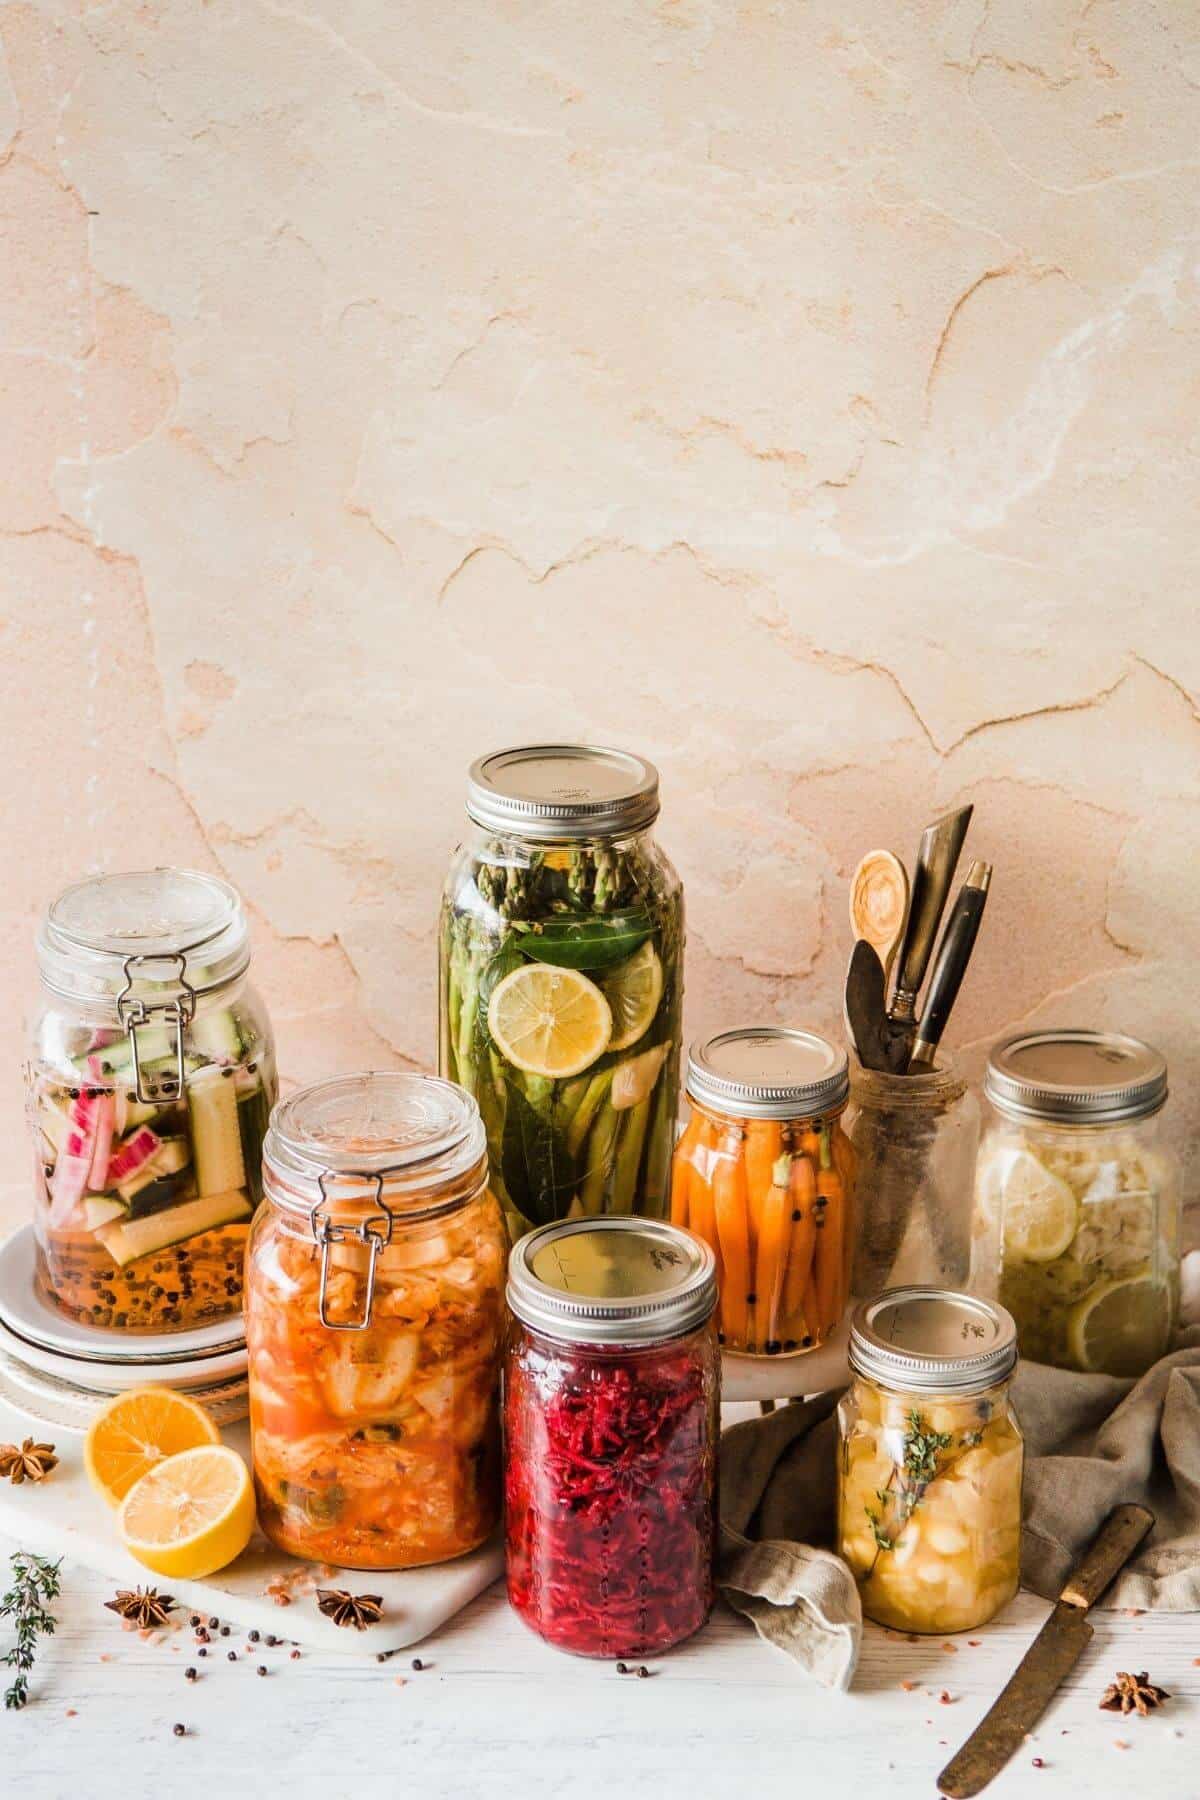
Jars of cultured fermented foods.

Image by Brooke Lark on Unsplash

Fermenting

Fermenting, of course, is one of the world's most traditional methods of preparing foods naturally, way before electricity, fridges and freezers came about. Itโ€™s a technique that has been handed down families for generations and I'm so grateful that it's becoming more popular now because it's a fantastic thing to do.

I've tasted some amazing foods and drinks that are fermented. When youโ€™re making them, the longer you leave the foods to ferment, the tangier and more flavourful they become.

It has to be one of my most favourite things to do in the kitchen. It's exciting waiting for those bubbles to appear on your creations!

There are many different kinds of cultured foods you can make from home. You can even buy starter cultures and kits online to help get you started. 

You often hear about the benefits of fermenting foods for gut health, which is well worth reading up on, by the way. 

Honestly, it's so fun to do! Here are just some kinds of foods you can make by fermenting at home (not all of them are raw):
- Sauerkraut - try this basic sauerkraut recipe to get started.

  • - Kimchi
  • - Kefir
  • - Kombucha
  • - Ginger ale
  • - Yoghurt
  • - Cheese
  • - Tempeh
  • - Sourdough 
  • - Pickles and Lacto fermented vegetables

Oh, I do wish my kids didn't dislike the smell so much. Yes, it pongs, but I find it kinda funny. 

Soaking nuts and seeds

I soak nuts and seeds often in the kitchen. The process of soaking softens them.

When blended and mixed with other ingredients, you can turn your soaked nuts and seeds into all kinds of things, such as:

  • Pates
  • Cheese
  • Desserts
  • Dips
  • Dressings
  • Nut Milk - like this chocolate hazelnut milkshake
  • Sauces
  • Taco 'Meat' and more.

Sprouting

Sprouting and growing microgreens are both really easy to do. Sprouting isn't a new technique either, and rather excitingly, it's becoming ever more popular, just like fermenting.

Sprouting happens when a seed has been soaked and its outer coating begins to soften. It becomes activated and starts to germinate. So, in just a couple of days you should see the seeds begin to grow a tiny tail, also known as a shoot. 

There are different methods for sprouting, including:

  • In a jar,
  • On a tray,
  • In a sprouting bag,
  • or in a bowl.

You grow sprouts using water. It's essential to rinse and drain them thoroughly 2-3 times per day, not just to stimulate their growth but also for food hygiene purposes. 

When theyโ€™re ready and you eat the sprouts, you eat both the shoot and the edible seed that's attached.

Growing Microgreens

Microgreens take the idea of sprouting seeds a little further. It's the next stage in growing baby vegetables.

You harvest them when they're a few centimetres long, after theyโ€™ve started to develop their first tiny leaves on top. And they can can take 2-3 weeks to develop, whereas sprouts take just a few days.

Microgreens are grown differently than when you want to produce a sprout.

You typically grow microgreens using a tray, pot or a dish, and you can plant the seeds in either soil, coir, on grow-mats, in wood shavings, or even on paper towels. 

Harvesting microgreens is different from harvesting sprouts too. When microgreens are ready, you cut them from above the soil, leaving the seed behind.

Sprouting and growing microgreens are simple, easy, economical ways to grow your own food. 

Itโ€™s essential that your equipment is spotlessly clean before you start. The same when youโ€™re fermenting. Look for packets of certified organic seeds specifically created for sprouting and growing. This will minimise any risk to your health.

Add them to your salads, juices, smoothies, roll-ups, sushi, and top pretty much any recipe with them. 

They also look incredibly beautiful especially when you use them with edible flowers.

I hope this post has been useful, especially if you're just starting out.

Dehydrating

Dehydrating is a technique raw foodies use for creating foods using heat at low temperatures to keep the food's live enzymes and vitamins intact. That's a hugely important aspect of raw foods. Allowing all the vitamins and nutrients to shine is kinda the main point of it all.

Using this gentle warming process, the food's moisture content is reduced or removed altogether while the flavour is enhanced.

A dehydrator is thermostatically controlled to avoid the temperature going too high and typically uses a timer, making it easy for you to make your recipes.

Look at the list of amazing foods you can make with a dehydrator:

  • Dried fruits, nuts and seeds,
  • Fruit leathers,
  • Biscuits, granola and granola bars, 
  • Onion rings,
  • Vegetable crisps (chips), i.e. kale chips,
  • Vegetable powders,
  • Sun-dried tomatoes,
  • Wraps, crackers,
  • Pizza,
  • Macaroons and so much more.

Although it's a useful technique to have, a dehydrator can be an expensive piece of equipment to purchase. It's also quite a time-consuming way to create food, so you need to plan your meals and foods well in advance.

I don't really see a dehydrator as an essential tool when you're first starting out. I think it's better to keep things as simple and easy as possible, to begin with.

Many new ovens can run at low temperatures, even with just the oven light on. You could start this way if you want to try dehydrating first before investing in expensive equipment. 


Hey, did you like this article? If so, please share this post with your friends on social? Thanks!

Iโ€™m off for some tea.

Love raw food.

XOXO

Juliette

Top Raw Food Kitchen Tools

March 15, 2021 by Juliette Leave a Comment

A modern kitchen with pink walls and a pink dining chair.

Having the right kitchen tools means you have many more options for creating a whole variety of raw food recipes at home.ย  It also cuts down prep time too.

If youโ€™re curious about all things raw and keen to upgrade your diet without having to cook, hereโ€™s my list of top raw food kitchen tools.

Kitchen utensils.

Image by Olga Peshkova on Unsplash

One of the things I love about this raw food lifestyle is the simplicity of it all. Chopping, grating, spiralizing, blending, and the rest becomes fun really quickly when you have the right tools in front of you. It makes preparing food so easy, you can start enjoying all the goodness that comes from eating like this straight away.

If youโ€™re looking to find out more about raw foods check out the following articles on my blog, Raw Food Diet - what do you eat?, 10 Ways to get started with raw food and Ultimate plant based food swaps.

Creating a few raw meals each week is an inspiring, delicious way to get in your five (or ten) a day.

You certainly don't need to become 100% raw vegan to enjoy raw foods. 

I actually find that most of my food prep is done with a wooden chopping board and a good knife. That's all you really need to begin with for your raw vegan kitchen.

The tools listed below are not all essential, by the way. So you don't need to rush out and buy them all. When I started, I bought the smaller tools first then gradually added kitchen appliances to create my raw food kitchen bit by bit.

Chopping Boards

Wooden cutting boards will help to keep surfaces clean and tidy. 

Sharp Knives

Good quality knives are indispensable and will last you years. I have three:

- A chefโ€™s knife for chopping and slicing larger vegetables.

- A small paring knife for more intricate tasks like peeling, paring and slicing more delicate items like tomatoes. I like to have a serrated one plus a regular one. Serrated knives are great for cutting citrus fruits.

- A utility knife thatโ€™s somewhere in between for things like finely slicing and chopping herbs, shallots, avocados. A utility knife is longer than a paring knife and thinner than a chefโ€™s knife.

Utensils

  1. Measuring cups/scales plus measuring spoons.
  2. Spatulas and wooden spoons.
  3. Handheld citrus juicer and zester.
  4. Garlic press.
  5. Grater: for your salads, rolls ups and coleslaws.
  6. Julienne peeler and a vegetable peeler.

Salad Spinner

I use one of these all the time. Theyโ€™re not just good for spinning salad greens. I also use one without the spinning lid for rinsing and draining my fruits and vegetables. And for washing my sprouts and microgreens thoroughly. Theyโ€™re especially helpful too then you want to hull big batches of sprouts and just generally for helping to get all those leafy greens in that are essential to a raw food diet.

Salad Bowl

The large kind. If thereโ€™s one thing raw vegans know itโ€™s how to prepare an amazing salad and you wonโ€™t fit a good one on a standard sized plate. One of the things I love about eating raw is that you can really sit down and enjoy an abundance of whole food goodness.

Blender

I use both an immersion blender and a high-speed blender. They're brilliant for breaking foods down into a smooth consistency, necessary for making sauces, ice cream, dips and soups, smoothies and general food prep using frozen fruits, nuts and seeds.

Handheld lemon juicer.

image by Deva Williamson on Unsplash

Food Processor

Essential for all kinds of chopping and slicing, mixing and grating. Food processors with their various attachments make it really easy to mix, puree, slice, dice, grate and shred. 

They're indispensable for making wholesome, healthy meals and snacks with consistency. This is my most used kitchen tool after my blender. You can buy a good food processor in most stores and online, and it needn't be expensive. 

Mandoline

A fantastic tool for slicing fruits and vegetables really thin, especially root vegetables like parsnips, carrots and beetroot.

Do be careful when using one as they are incredibly sharp! I recommend looking for one with a handheld finger guard.

I use one with an adjustable thickness setting so that I can produce foods in different sizes. They're perfect for making big batches of sauerkraut and coleslaws. You can also make noodles with one and slice fresh ginger super thin.

Spiralizer

A spiralizer will help you to make raw pasta dishes and noodles. With them, you can create noodles and ribbons out of so many vegetables like courgette, pumpkin, squash and beetroot, for example. Pair them with salads, sauces and dressings, and you can create gorgeous raw recipes quickly and easily.

Glass Jars & Containers

Lidded jars are essential for keeping your homemade dressings, sauces, nuts/seeds, dairy-free milk, dried fruits, legumes, date paste, jams etc. They're also useful for keeping chopped vegetables like carrot, celery or herbs fresh in water.

Mason jars are fab for storing homemade pickles and fermented foods.

You can buy sprouting jars online and in some high street health stores. You can also just buy sprouting lids if you already have wide-mouthed jars at home.

If you're curious about sprouting might love my sprouting recipes,ย How to Sprout Quinoa,ย How to Sprout Chickpeas,ย How to Sprout Lentils and How to Grow Broccoli Sprouts.

Glass bowls and other containers are perfect for storing anything from salads, leftovers, lunches and for soaking. Youโ€™re basically gonna need lots of jars.

Nut Bilk Bags

Or simple cheesecloth for making raw dairy-free milks and vegan cheese with nuts and seeds.

Bamboo Rolling Mat

For when you want to make raw vegan sushi. 

Spice Grinder

For grinding up small seeds and various spices such as flax seeds, chia seeds, vanilla pods, cumin seeds and much more. If your blender is powerful enough, of course, you can use this also.

Dehydrator

Optional, and some ovens allow you to cook on low heat or use the defrost setting. Some ovens even have a dehydrator setting. 


Hey, did you like this post? If so it would mean the world to me if you would please Pin this to your Pinterest boards or even share it on social media so others can find it too.

Iโ€™m off for some tea.

Love raw food.

XOXO

Juliette

mum, dog owner, raw food enthusiast

Raw Vegan Parmesan Recipe

February 26, 2021 by Juliette 6 Comments

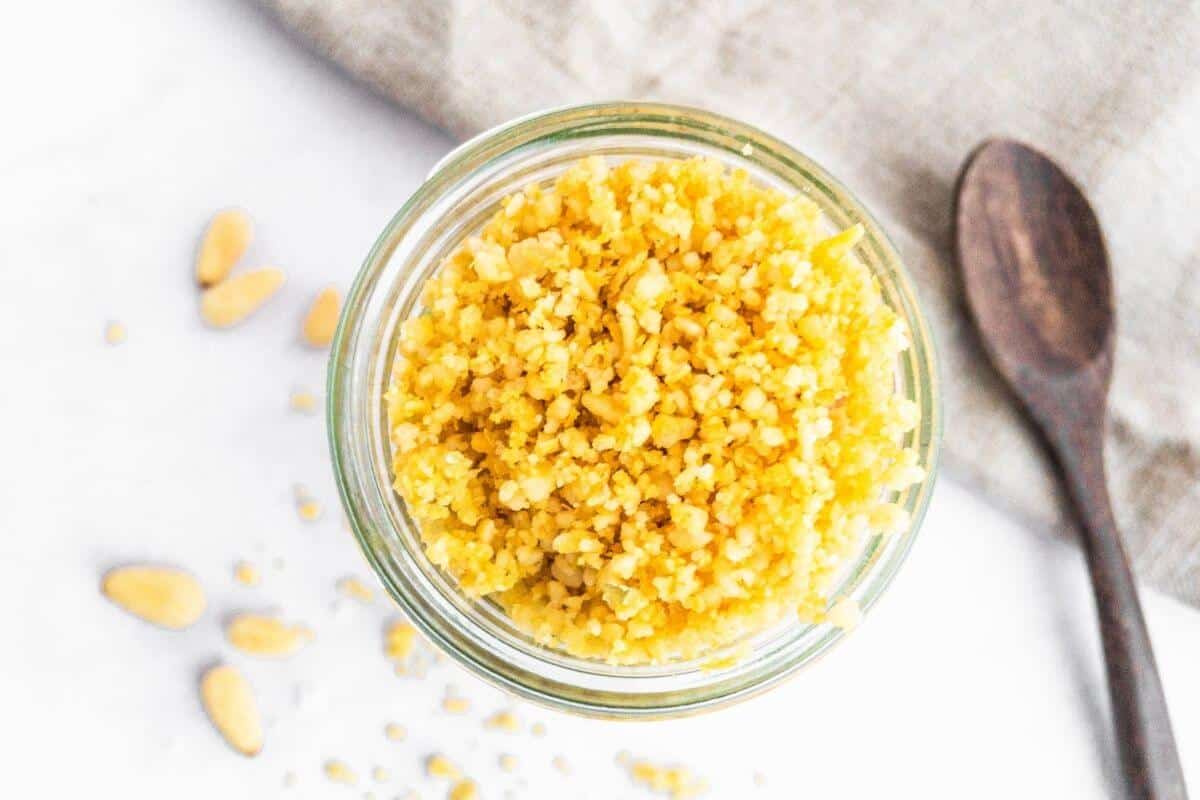
Small glass jar filled with minced nuts.

A quick and easy raw vegan parmesan recipe with just 3 ingredients. Itโ€™s light, cheesy, salty and savoury. Sprinkle it over your favourite raw dishes like raw zoodles, salads, soups and just about anything youโ€™d use with traditional parmesan.

Vegan parmesan cheese.
[feast_advanced_jump_to]

How to make vegan parmesan

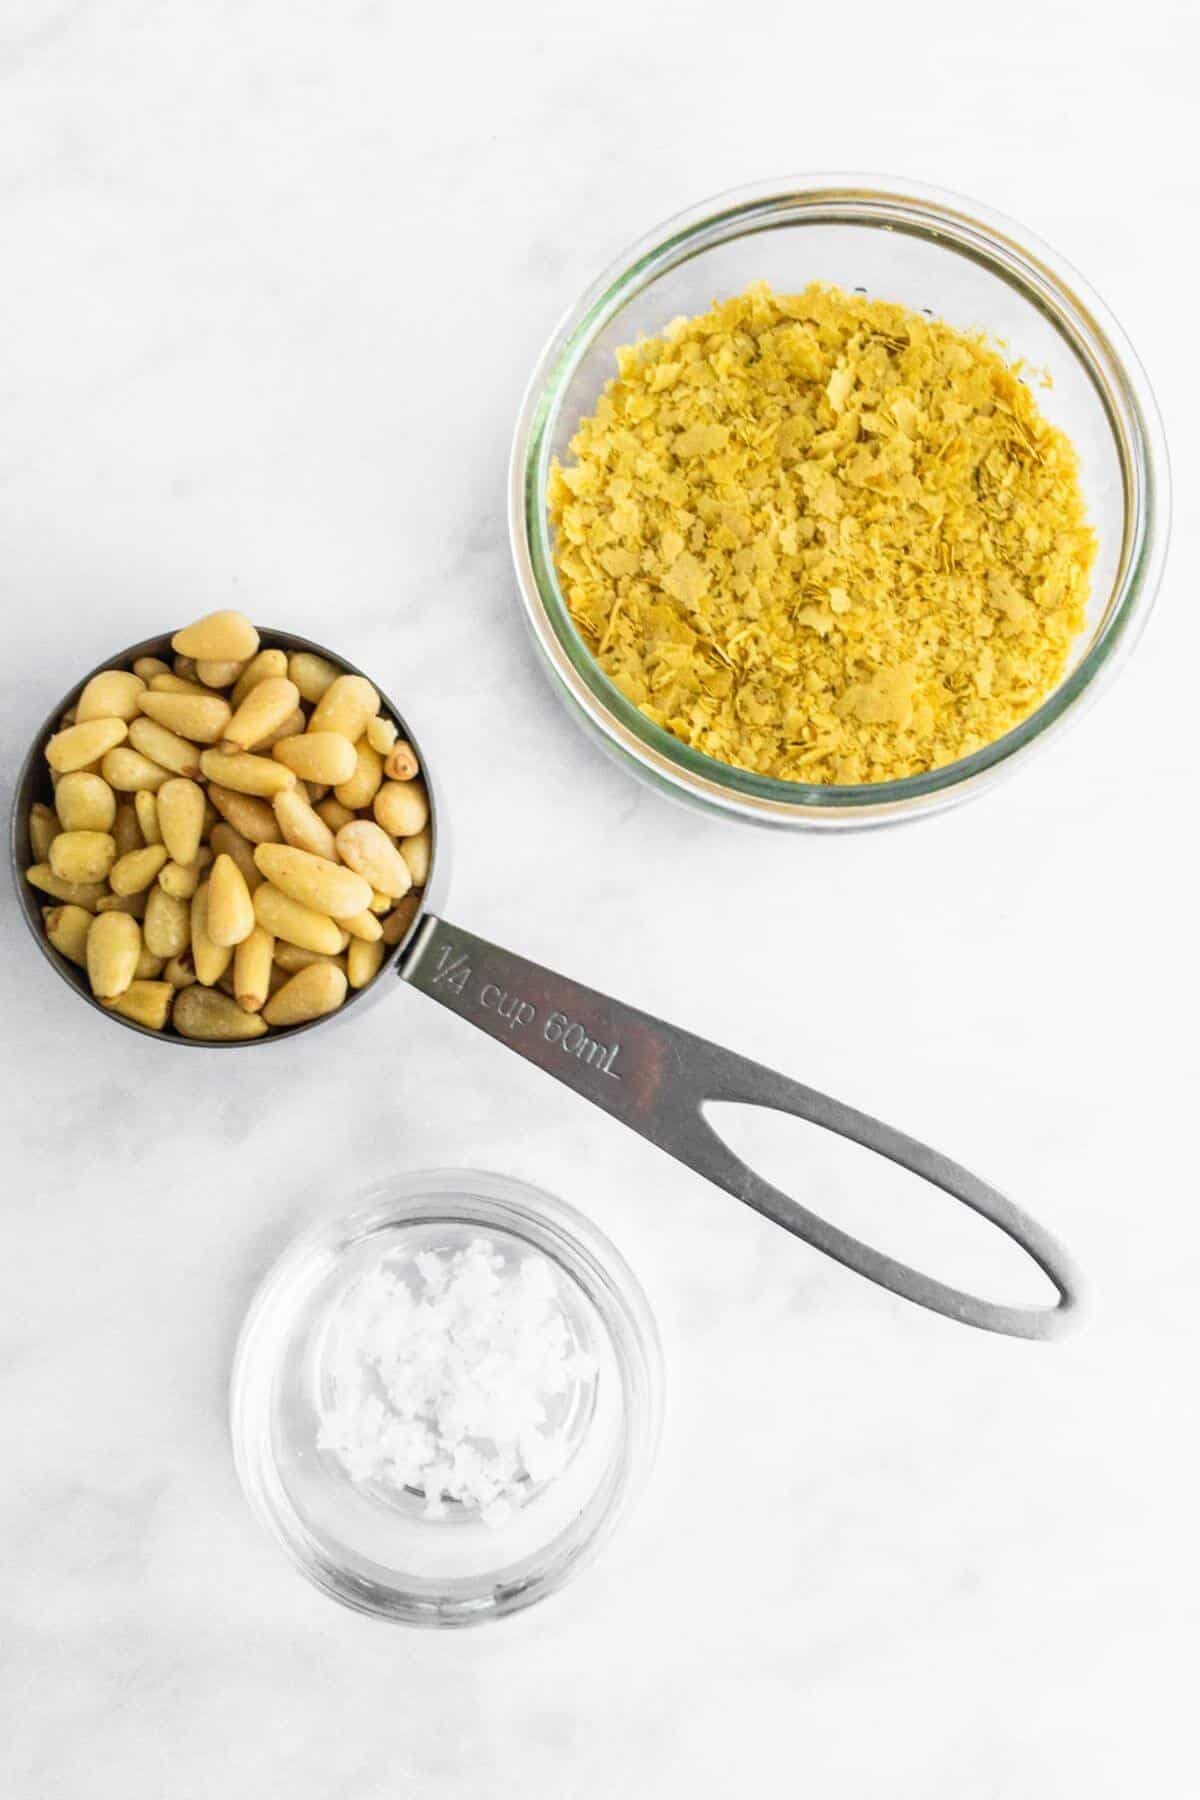
This recipe uses just 3 ingredients.

  1. pine nuts.
  2. nutritional yeast.
  3. sea salt or pink himalayan salt.

It's a nut free, gluten free and dairy free parmesan cheese alternative.

It aims to replace the taste of real parmesan as much as is possible with a raw vegan version that's quick and easy to make without using a dehydrator.

My favourite version is this one. Made with pine nuts because of their light, rich, slightly nutty, sweet flavour and creamy melt in your mouth texture. 

Add the ingredients to a blender or mixer with an s blade and turn it on. Not for too long. You want a breadcrumb-like texture or a powder if you prefer. 

As soon as this is reached, switch your machine off. It's done. If you leave it to run any longer it'll turn to mush. 

FYI, I use a mixer and prefer my vegan parmesan to have some texture so when I make this it takes about 30 seconds at the most.

I find a silicone spatula is the easiest way to get it from the machine into a jar.

Vegan parmesan cheese recipe ingredients.

Ingredients

Many of the vegan cheese recipes you find online use other nuts like cashew nuts, as well as onion and garlic powder, miso, chilli, fresh and dried herbs, which works really well. In fact making vegan cheese is a wonderful thing to do and I heartily recommend it.

To keep things simple and flavourful here for this recipe I use 3 ingredients:

Pine nuts - rich in protein, fibre, fats, vitamins and minerals such as vitamin E, K, B vitamins, zinc, copper, manganese, phosphorus, magnesium, iron and copper.

Nutritional yeast - (also known as nooch) although not a raw food, is much loved by many vegans because of its slightly nutty cheesy flavour.

You can use Nutritional to create cheesy flavoured sauces, use it in baking, making your own raw vegan cheese and this vegan nut free parmesan. 

Itโ€™s a deactivated yeast in the form of yellow flakes or powder and is often fortified with essential nutrients including vitamin B12.

Salt - I like to use a salt that has minimal processing and will keep some nutritional qualities. Table salt is stripped on most of its nutrition during processing.

How to store

Pine nuts are actually not a nut, but a seed that comes from pine trees. They do deteriorate quite quickly and so are best stored in an airtight container in the fridge. 

You can store this recipe in an airtight container in the fridge for up to 2 weeks. 

Recipe variations

Iโ€™ve made this dairy-free vegan parmesan with brazil nuts, pumpkin seeds, macadamia nuts, cashew nuts and others. 

And after trying many different versions, Iโ€™ve found that using hemp seeds and sunflower seeds are my next fave (after pine nuts) because of their mild flavour and texture.

I replace the seeds in the recipe at a ratio of 1:1. The other ingredients remain the same.

Hemp parmesan - there's no need to put these in a mixer or blender. Just measure out some hemp seed hearts into a bowl, add the salt, nutritional yeast and then stir with a spoon.  

Hemp seeds are rich in protein, fibre and nutrients, including essential fatty acids, vitamins and minerals - iron, zinc, vitamin E, B vitamins, magnesium, potassium and more.

This is my next favourite version after the pine nut version. The texture is good. Iโ€™m gonna get in my omega-3โ€™s, and this is definitely the fastest method. 

Sunflower seeds - these take a little longer to break down in the mixer as sunflower seeds can be quite hard. Definitely good to use if youโ€™re after a nut-free parmesan topping with some texture or crunch. They work really well and store well too.

Sunflower seeds are rich in protein, fibre and nutrients, including iron, zinc, 

Notes

Take care when blending so as not to over mix. Store in an airtight container in the fridge for up to 2 weeks.

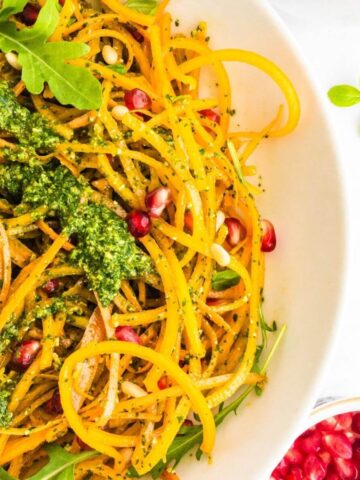
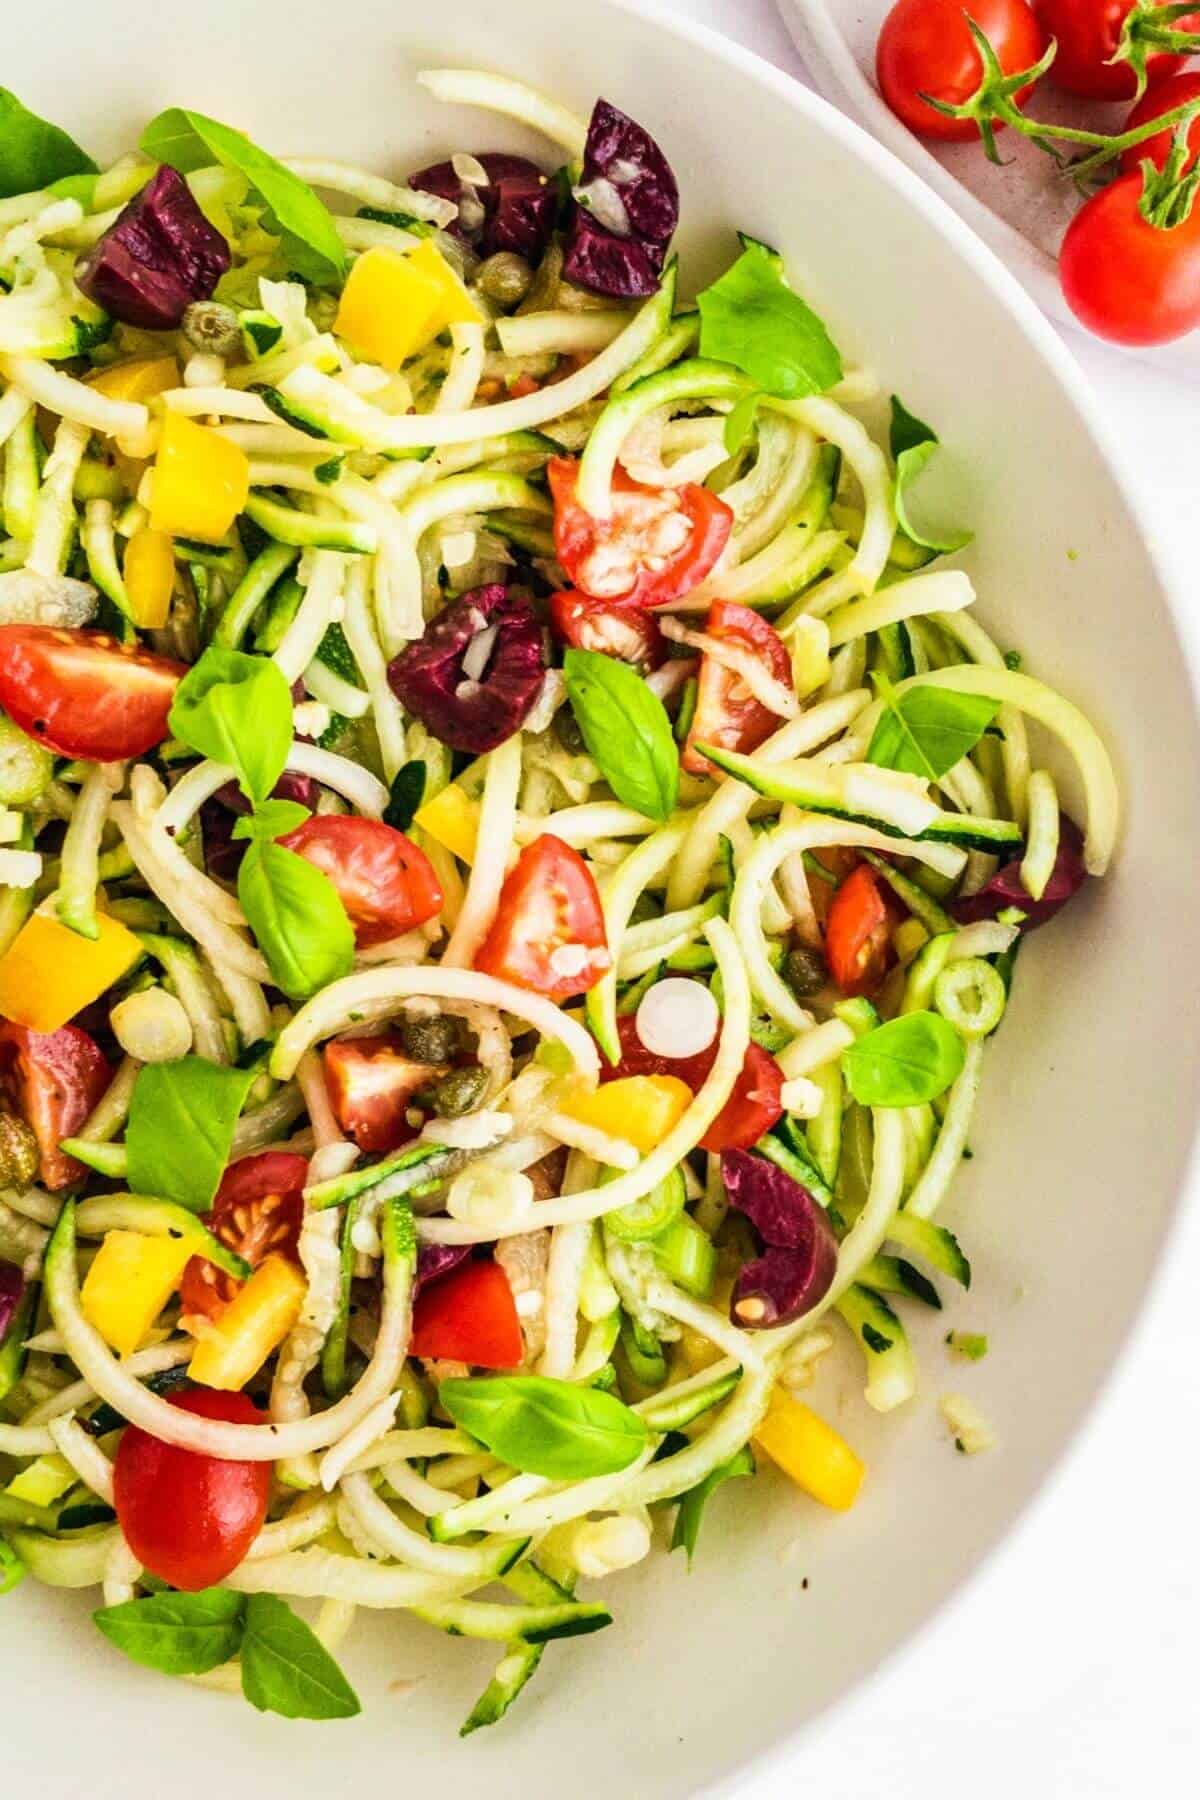
This recipe goes perfectly with courgette spaghetti with broccoli, lemon, chilli and courgetti spaghetti with vegetables and also squash noodles with pesto and pomegranate.

๐Ÿ“– Recipe

Small glass jar filled with minced nuts.

Raw vegan parmesan recipe

Juliette | Flourishing Kitchen
A quick and easy raw vegan parmesan recipe with just 3 ingredients. Itโ€™s light, cheesy, salty and savoury. 5 minute recipe.
5 from 4 votes
Leave a review
Print Recipe Pin Recipe Save Recipe Saved Recipe
Prep Time :5 minutes mins
Total Time :5 minutes mins
Course: Condiment
Cuisine: Italian
Servings :4

Equipment

  • blender or food processor with an s-blade.
  • spoon or spatula.
  • jar or container with a lid for storing.
Prevent your screen from going dark

Ingredients
  

  • 4 tablespoon pine nuts.
  • 2 tablespoon nutritional yeast.
  • ยผ - ยฝ teaspoon sea salt, to taste.

Instructions
 

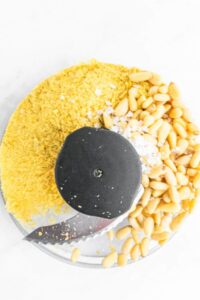
  • Pop the pine nuts, salt and nutritional yeast into the mixer or blender.
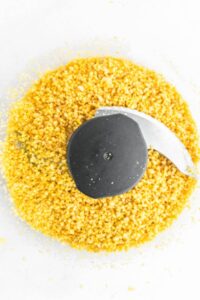
    Recipe ingredients for raw vegan parmesan sitting in a food mixer with an s-blade.
  • Blend into breadcrumb size pieces (or a powder if you prefer) using your food processor or blender.
    Recipe ingredients for raw vegan parmesan sitting in a food mixer blended.
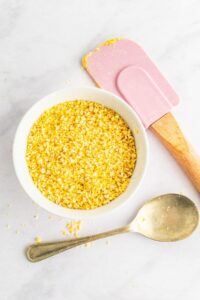
  • Using a spoon or spatula scrape out the vegan sprinkle into a container to store.
    A small dish of vegan parmesan next to a pink spatula and silver spoon.

Notes

Take care when blending so as not to over mix. Store in an airtight container in the fridge for up to 2 weeks.
Did you make this recipe?Please leave a comment below to help other people.

Hey, did you like this recipe? If so it would mean the world to me if you would please Pin this to your Pinterest boards or even share it on social media so others can find it too.

Iโ€™m off for some tea.

Love raw food.

XOXO

Juliette

How To Make Date Paste (quick & easy)

February 23, 2021 by Juliette 14 Comments

Date paste in a small glass dish sitting on a kitchen towel.

Learn how to make date paste with this easy date paste recipe. Makes a gorgeous natural sweetener and easily replaces other sugars in your raw dressings, sauces, sweets and desserts.

Raw date paste.
[feast_advanced_jump_to]

What is date paste?

Date paste is a heavenly tasting natural sweetener with a slightly caramel flavour. 

You make it by blending softened dates with water. Thatโ€™s it. Yes really!

Date paste is deliciously rich and intensely sweet in flavour. It makes the most brilliant alternative to other sweeteners, including maple syrup.

I know right.

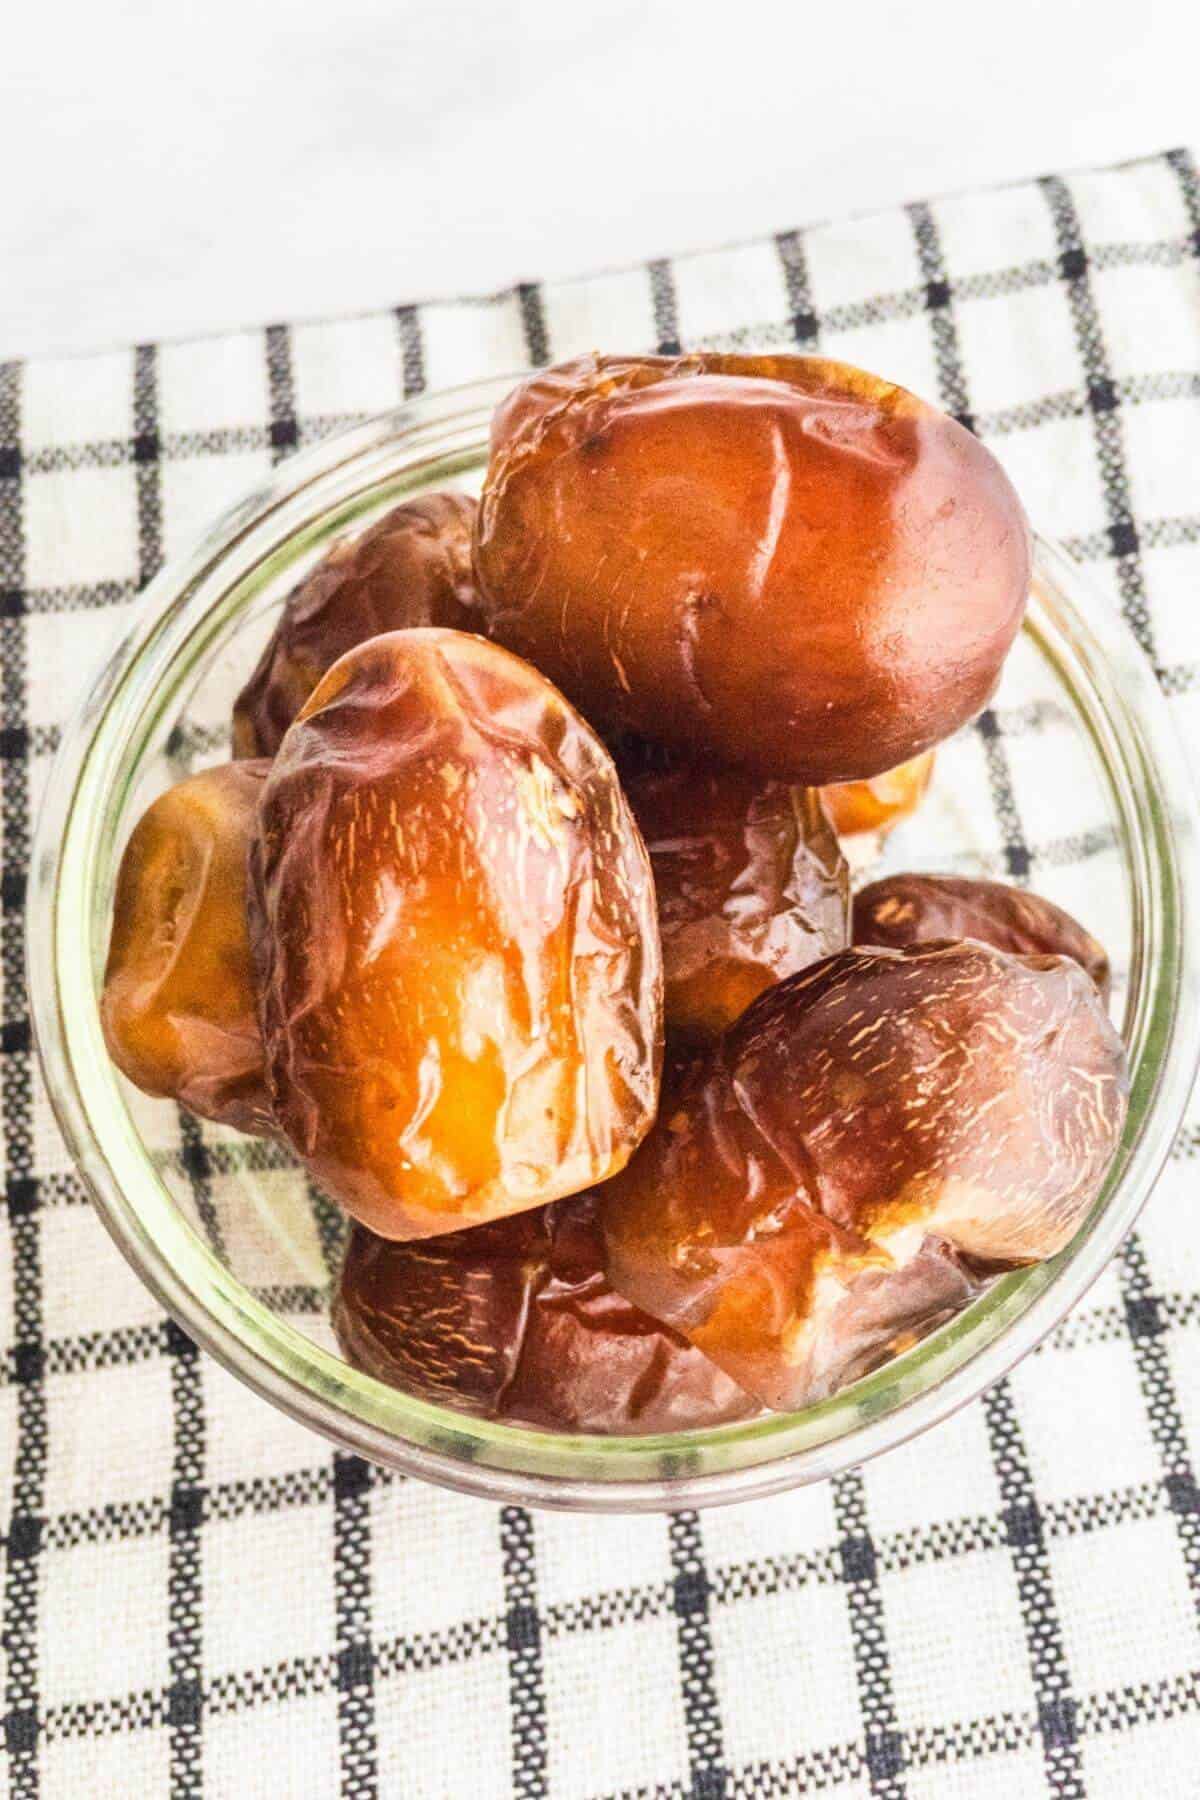
I use fresh dates rather than dried, although you can use either. The larger Medjool dates are very good, or Deglet Nour. My favourites though are the smaller Zamali dates which are often squishy to begin with, so donโ€™t take long to soak.

Use whatever you have available.

You can use a blender to make the smoothest paste. Or use a mixer with an S-blade. Although with a mixer, the paste may not be quite so smooth when finished. It still makes a super sweet paste and is totally worth doing.

What is it used for?

  • smoothies
  • nice cream
  • salad dressings
  • sauces
  • sweets
  • and of course raw desserts.

How long will it last last?

Date paste is an absolute delight to use in raw recipes. I substitute maple syrup with it at a ratio of 1:1. You can use the same ratio with honey (not vegan) or agave syrup. Give it a taste test and see what you think.  

Use it as a dip, a spread, or a healthy sugar substitute in

A dish filled with raw medjool dates.

Keep it in an airtight container in the fridge for up to 2 weeks. I donโ€™t like to keep fresh produce for too long simply because I like to enjoy food at its freshest. 

It gets used up pretty darn fast, mostly because I use it to make my weekly salad dressings as a sweetener to replace maple syrup.

If you want to make a larger batch just double the recipe.

Freezing

You can also freeze date paste by scooping tablespoon size portions into ice cube trays with the larger sections. Once frozen you can then remove them from the trays and store in a container in your freezer for up to 3 months.

Is it healthier than sugar?

Yes. Dates are a plant based whole food and gluten free. They are rich in dietary fibre and contain nutrients including calcium, iron, magnesium, potassium, B vitamins and more.

Can you use date paste in coffee?

Yes, you can use date paste in coffee to replace sugar and other sweeteners at a ratio of 1:1.

Recipe variations

You can add your own natural flavourings to date paste before blending, making it even more irresistible in your raw recipes.

Vanilla - add ยฝ teaspoon vanilla essence 

Cinnamon - add ยฝ teaspoon of powdered cinnamon 

Citrus zest - I like to add 1 teaspoon of finely grated zest like lemon, lime or orange. I like to dry the zest and remove the pith from the peel so that no bitter aftertaste is left.

For a thicker paste - use less soak water when blending. I like mine quite thin in consistency since Iโ€™m not using it in dry baking recipes to replace dried sugar.

๐Ÿ“– Recipe

Date paste in a small glass dish sitting on a kitchen towel.

How to make date paste.

Juliette | Flourishing Kitchen
This easy 5-minute raw date paste makes a beautiful natural sweetener and easily replaces other kinds in your raw dressings, sauces, sweets and desserts.
5 from 10 votes
Leave a review
Print Recipe Pin Recipe Save Recipe Saved Recipe
Prep Time :5 minutes mins
Cook Time :0 minutes mins
Soaking time. :30 minutes mins
Total Time :35 minutes mins
Course: Condiment
Cuisine: Mediterranean
Servings :10 tablespoons

Equipment

  • a blender or food processor with an s-blade.
  • a spoon or spatula.
  • jar or container with a lid for storing.
Prevent your screen from going dark

Ingredients
  

  • 1 cup or about 12 small dates / approx. 115 g,, pre-soaked until soft and pitted.
  • ยฝ cup or 120ml soak water

Instructions
 

  • Soak fresh dates in water for a minimum of 30 minutes. Once softened remove dates from the water, reserving ยฝ a cup (125ml) of soak water for blending.
  • Make sure that pitts are removed from the dates before you begin, then add pre soaked dates to a blender together with the reserved soak water. Blend until smooth then using a spoon or spatula scrape out the paste into a container.
  • Scrape out the date paste into a container with a lid and store in the fridge in for up to 2 weeks.

Notes

Use pitted dates - remember the dates need to be pitted before blending so as not to ruin your blender. This is easy to do. Just pull each date apart and remove the stone in the middle.ย 
This is best done before soaking. Iโ€™ve done it after soaking and ended up with very sticky fingers.
To soften dates - place them in a small bowl and cover with water. Leave them submerged for a minimum of 30 minutes in hot water. If the dates are quite dry or hard test them after 2-4 hours for softness. How long to leave them depends on how hard they are.ย If Iโ€™m super busy I may leave them in water overnight to blend the following day.
To test them, just squeeze one between your fingers lightly and if itโ€™s squishy it will be ready for blending.
For a thicker paste - use less soak water when blending. I like mine quite thin in consistency since Iโ€™m not using it in dry baking recipes to replace dried sugar.
Did you make this recipe?Please leave a comment below to help other people.


I hope you love this recipe as much as I do.

Iโ€™m off for some tea.

XOXO

Juliette

Lemon Tahini Dressing

February 19, 2021 by Juliette Leave a Comment

A small glass bottle filled with tahini salad dressing.

Easy 5-minute lemon tahini dressing. Rich, creamy, tangy and delicious! Amazing drizzled over giant salads, leafy greens or served with falafel.

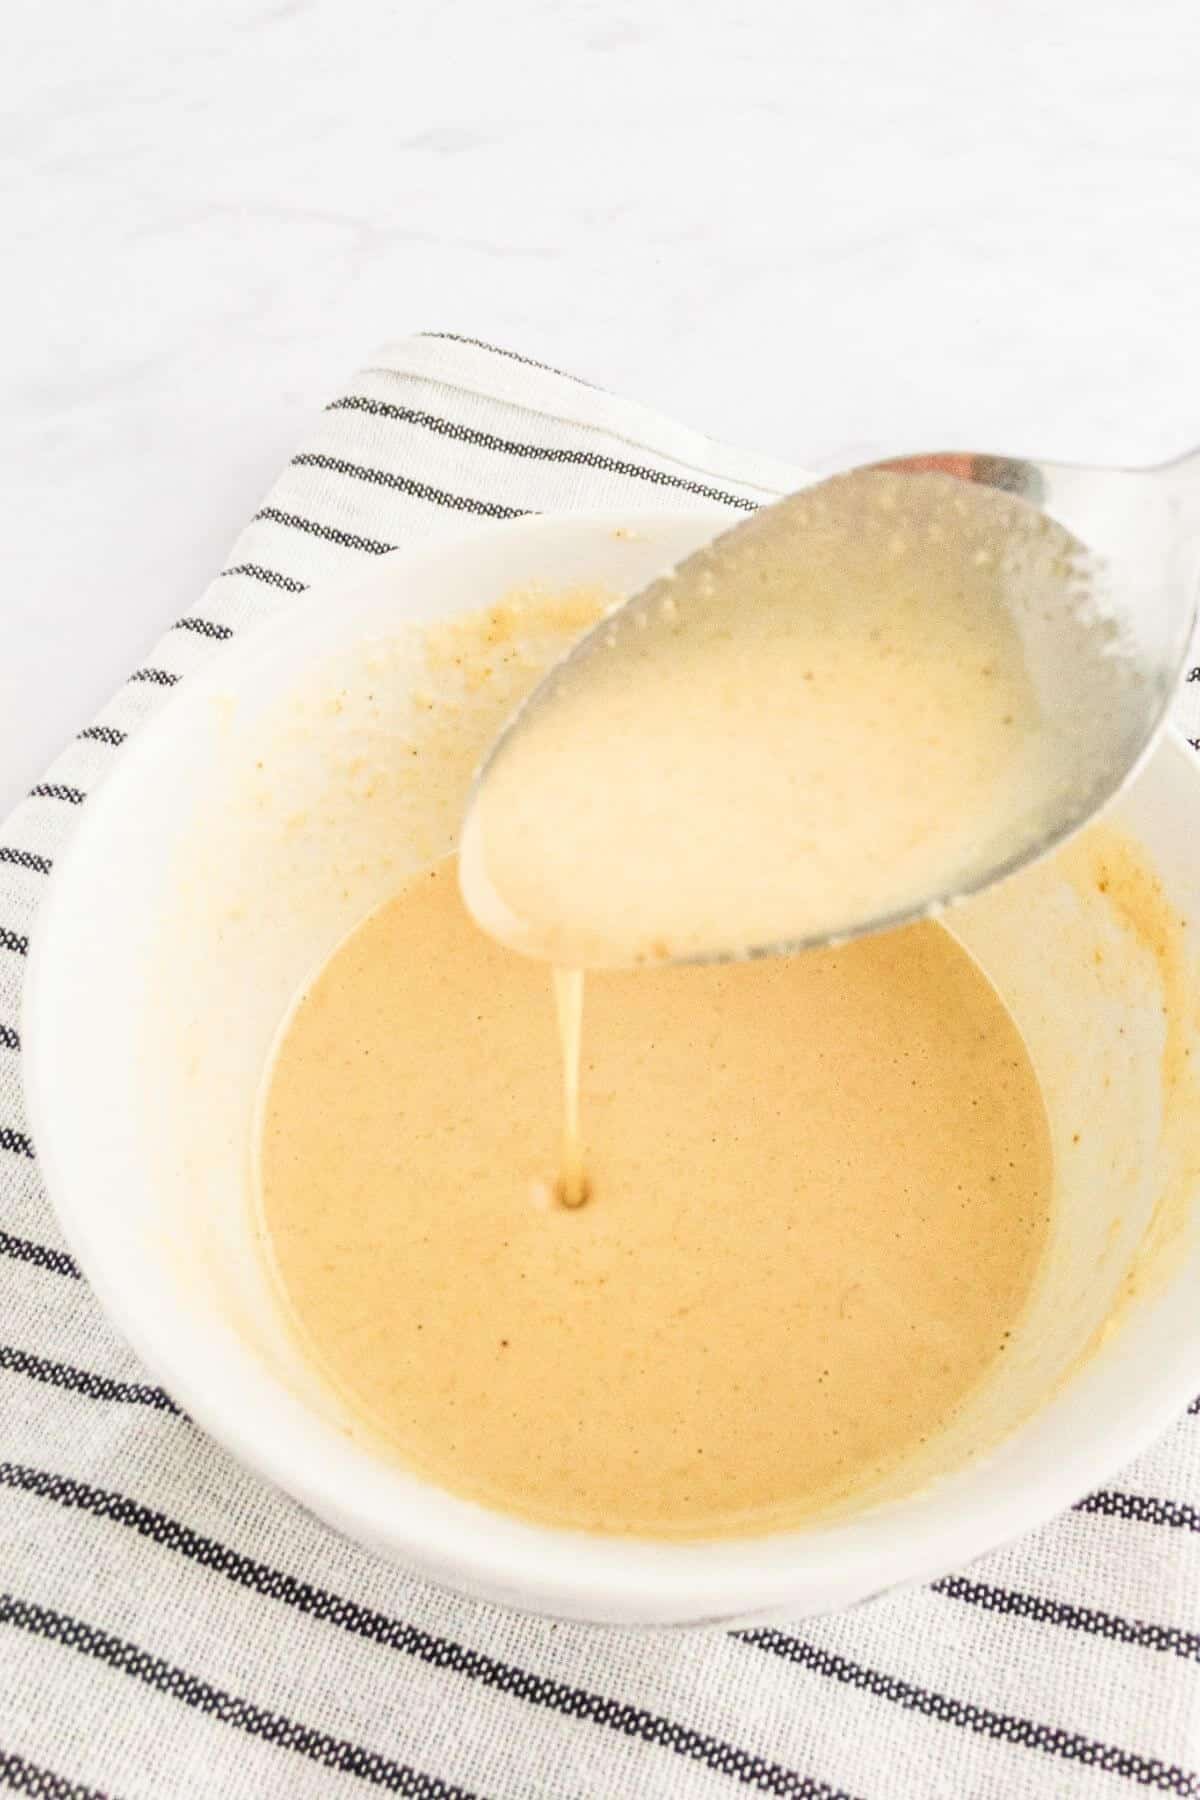
Lemon tahini salad dressing.
[feast_advanced_jump_to]

What is tahini?

Tahini is a paste made from lightly toasted and ground sesame seeds. Itโ€™s a condiment that's widely used in many cuisines worldwide including Middle Eastern cooking, the Eastern Mediterranean and parts of North Africa.

Tahini is a familiar ingredient used in dishes such as hummus, baba ganoush, and very much a part of vegan eating. 

Rich in nutrients like iron, calcium, zinc, folate and many others, tahini is also high in protein.

Although most tahini is made from roasted sesame seeds, you can find certified raw versions in some health stores and stores online.

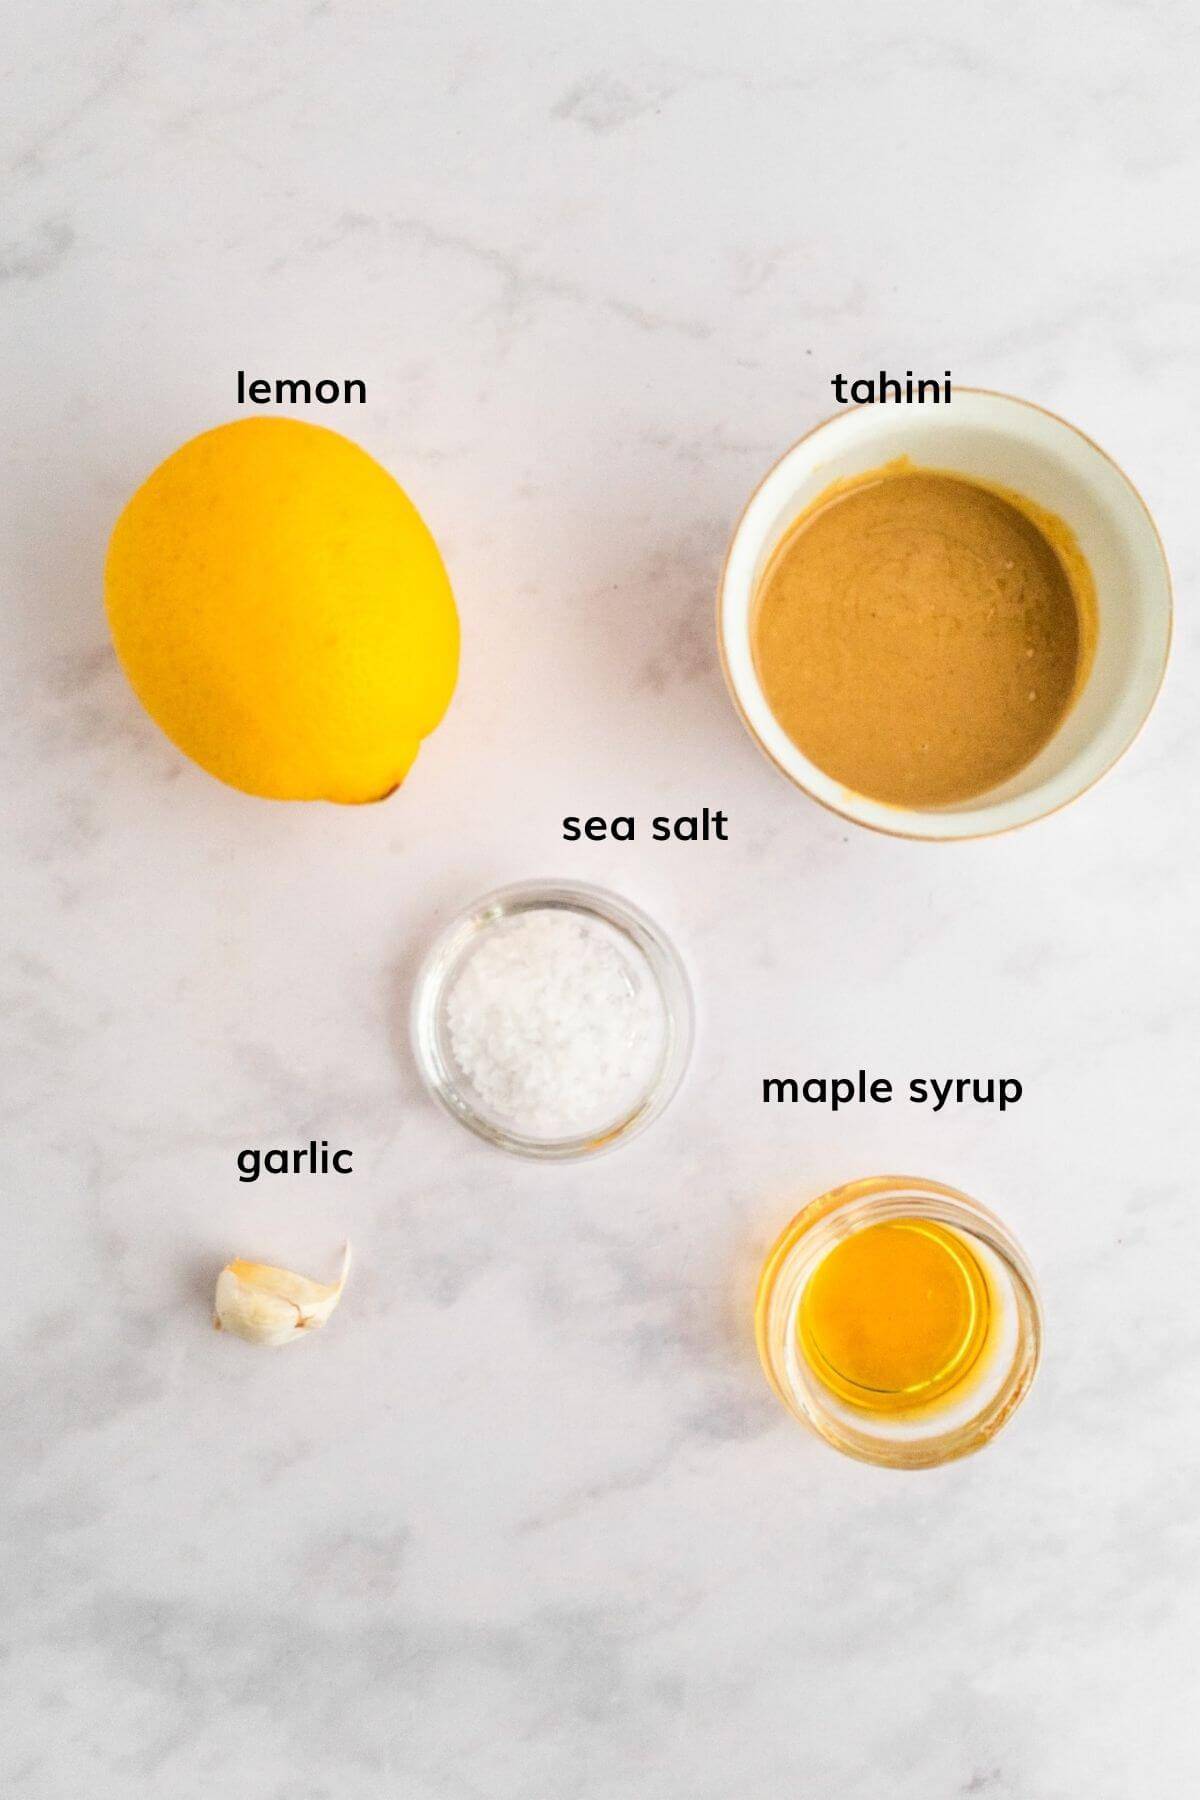
Lemon tahini salad dressing ingredients.

Is tahini dressing healthy?

Yes, this gorgeous tahini dressing (also known as tahini sauce) is gluten-free, oil-free, vegan and made with whole food plant based goodness.

Recipe variations.

Garlic - feel free to add an extra clove to this recipe if you love the flavour of garlic.

Spice - add a touch of ground cumin, cayenne pepper or zaโ€™atar to your own taste.

Citrus - swap the lemon for another citrus fruit like orange juice or lime juice. I find using orange juice is especially good!

Fresh herbs - add finely sliced fresh herbs such as mint, parsley or dill. They all taste delicious in this tahini salad dressing.

Sweet - swap the maple syrup out for date paste or a soaked and pitted date. If you use a date, do make the dressing with a blender to ensure a smooth and creamy finish.

Serving suggestions.

This dressing is a fantastic staple to have on hand and kept in the fridge. Delicious drizzled over:

  • salads
  • wraps
  • vegetable noodles
  • buddha bowls
  • leafy greens
  • used as a dip for raw spring rolls
  • chopped vegetables
  • served with falafel

Other raw salad dressing recipes you may like:

  • cashew mayo
  • tahini miso dressing
  • lemon herb vinaigrette
  • peanut salad dressing
  • hemp seed ranch dressing

Enjoy!

๐Ÿ“– Recipe

A small glass bottle filled with tahini salad dressing.

Lemon Tahini Salad Dressing

Juliette | Flourishing Kitchen
Easy 5-minute lemon tahini salad dressing. Rich, creamy, tangy and delicious! Amazing drizzled over giant salads, leafy greens or served with falafel.
Leave a review
Print Recipe Pin Recipe Save Recipe Saved Recipe
Prep Time :5 minutes mins
Total Time :5 minutes mins
Course: Condiment
Cuisine: Mediterranean
Servings :3

Equipment

  • Blender or a bowl and a spoon for mixing
  • Spatula.
  • Lidded jar.
Prevent your screen from going dark

Ingredients
  

  • 3 tablespoon raw tahini
  • 2 tablespoon lemon juice
  • 1 small garlic clove, minced
  • 1 tablespoon maple syrup
  • ยผ teaspoon sea salt
  • 2-3 tablespoon water

Instructions
 

  • If youโ€™re using a blender add all the ingredients and blend until it reaches a smooth dressing consistency.
  • If you prefer to make this by hand, add the minced garlic and salt to the tahini paste and mix it together until combined.
  • Add the fresh lemon juice, maple syrup and continue to stir. At first, it will thicken but, carry on mixing and it will gradually come together. Add in the water a tablespoon at a time until you reach your desired dressing consistency.
  • Taste test your dressing and if it needs it, add a little more lemon juice a teaspoon at a time or a pinch more salt.
  • With the help of your spatula pour the dressing into a jar or container ready for use. Will keep fresh in the fridge for 3-4 days.

Notes

If you can't find raw tahini use your what's easily available to you or make your own.
Did you make this recipe?Please leave a comment below to help other people.

Hey, did you like this recipe? If so it would mean the world to me if you would please Pin this to your Pinterest boards or even share it on social media so others can find it too.

Iโ€™m off for some tea.

Love raw food.

XOXO

Juliette

mum, dog owner, raw food enthusiast

Peanut Salad Dressing

February 18, 2021 by Juliette 5 Comments

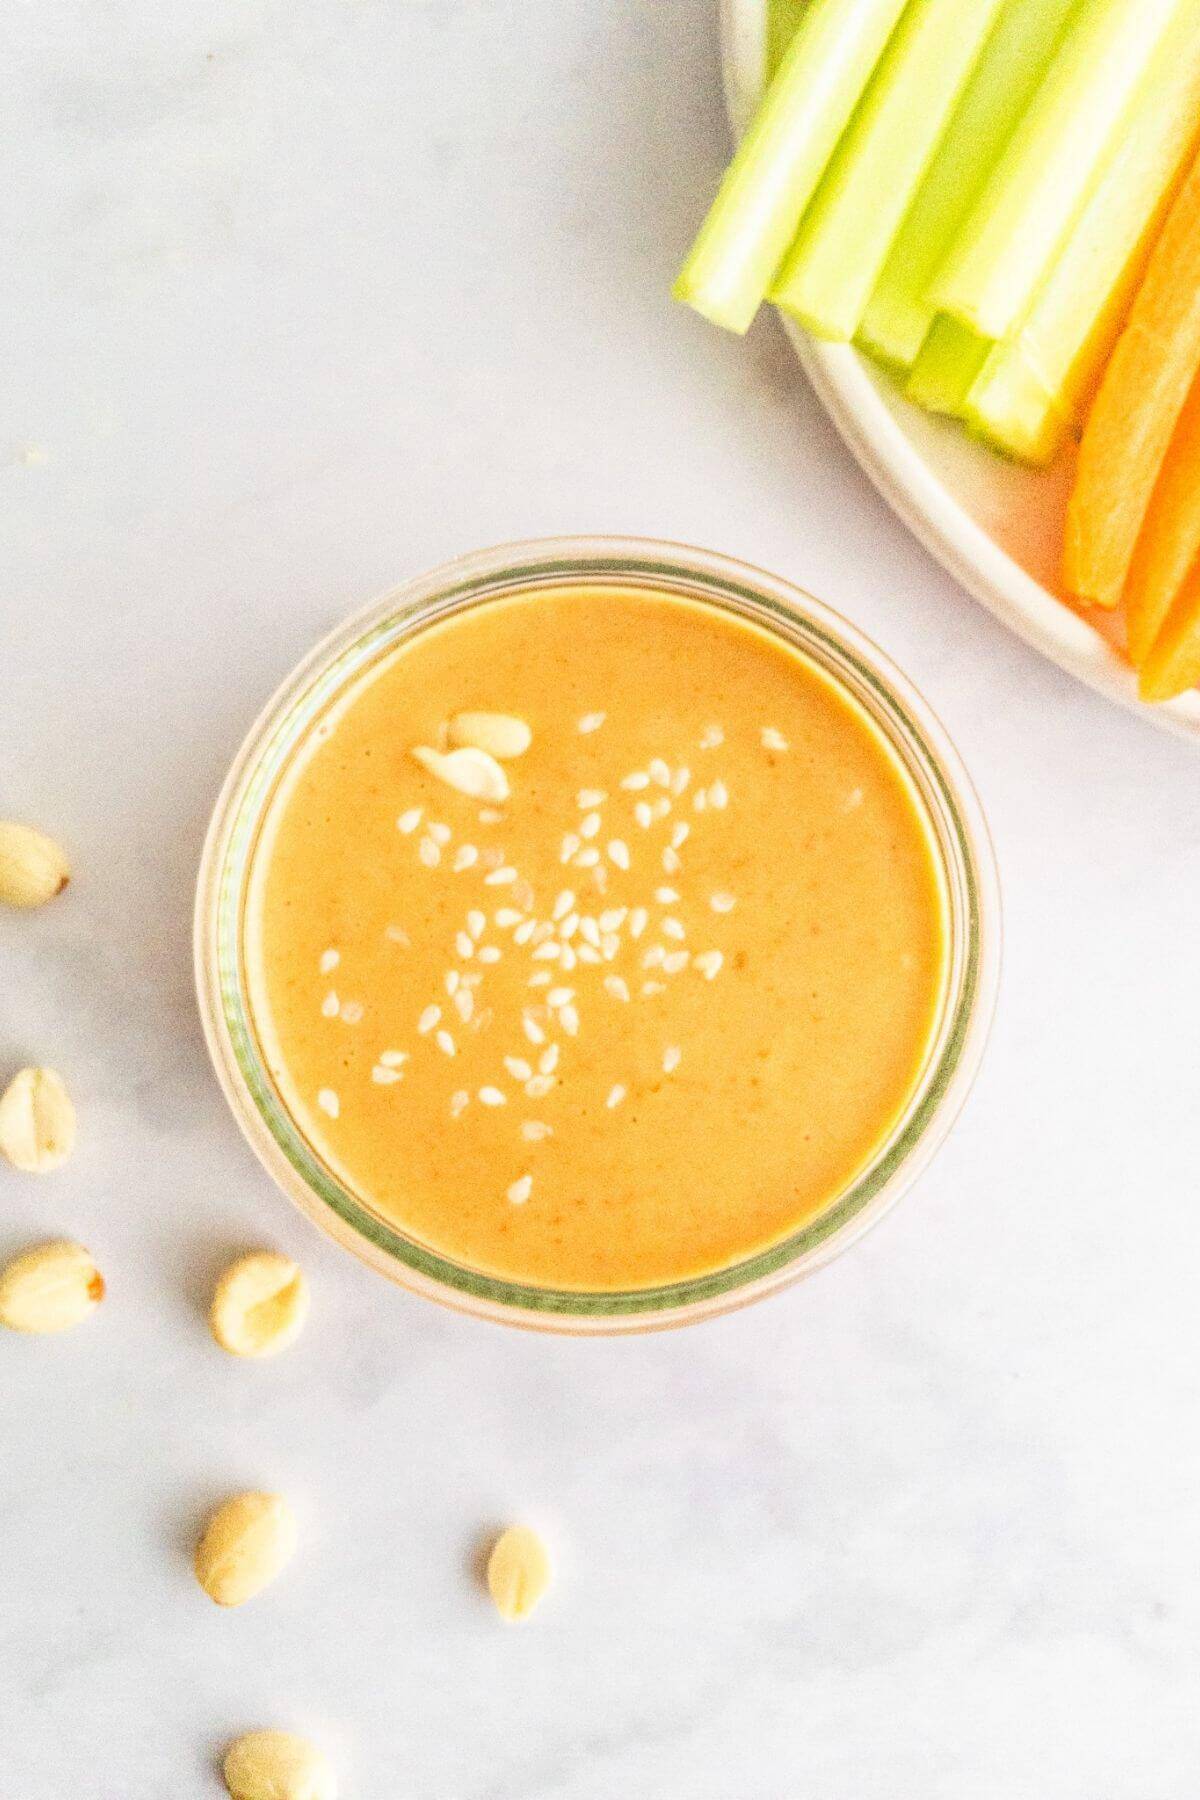
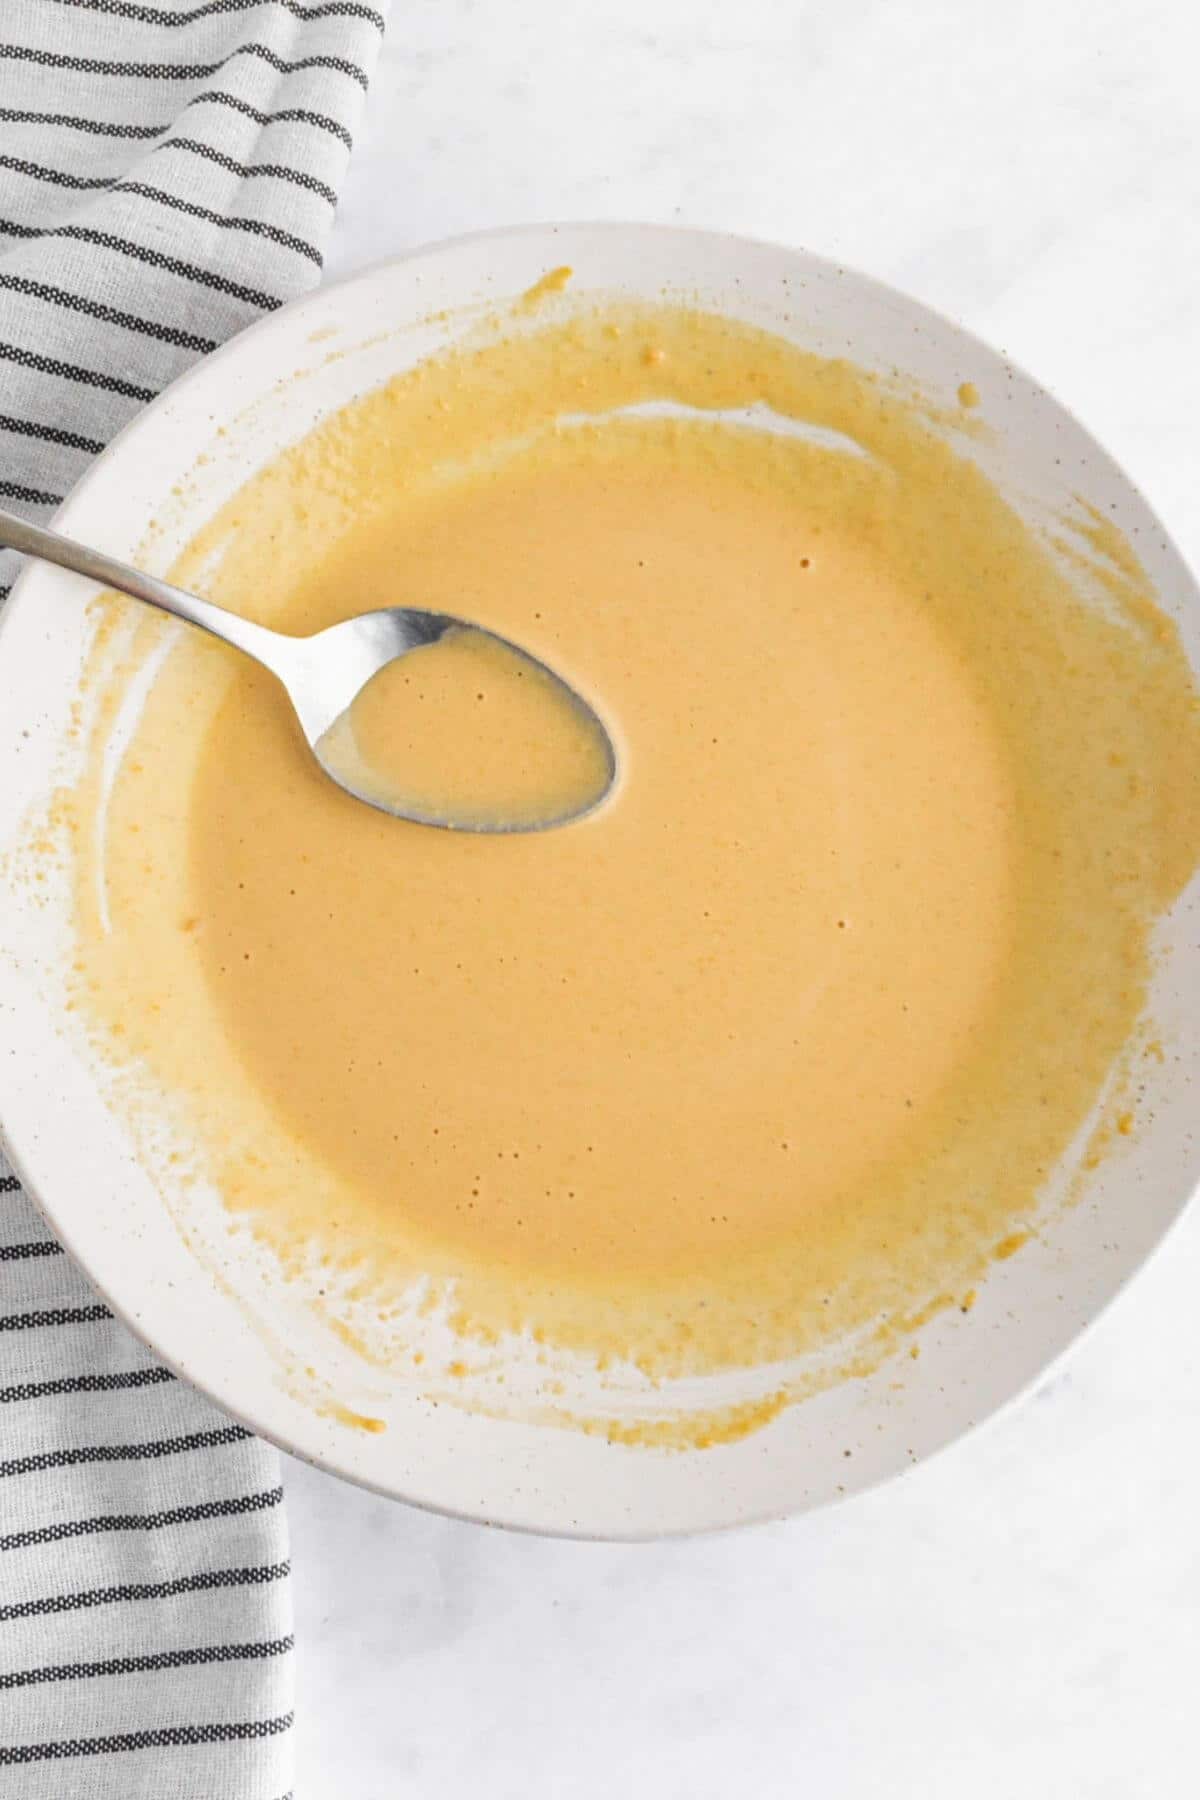
A dish of salad dressing sprinkled with sesame seeds. sprinkled with sesame seeds and peanuts.

Easy homemade peanut salad dressing. Made with fresh ingredients like lime, ginger, and garlic, mixed with creamy peanut butter.  This show-stopping dressing is delicious as a dip or poured over all your favourite veggies, noodles and healthy salads.

Peanut sauce.
[feast_advanced_jump_to]

Ingredients and substitutions.

This gorgeous vegan peanut dressing recipe is gluten-free, oil-free and made with whole food plant based ingredients. Itโ€™s also known as Thai peanut dressing or peanut sauce. 

If you donโ€™t like peanut butter, you could try swapping it for a different nut butter such as raw almond butter or cashew butter. 

Most nut butter is made using roasted nuts so check your product label before purchasing if you want to use raw. Iโ€™m not 100% Raw so choose to use a regular store-bought peanut butter made from whole ingredients.

If you want to go nut-free then you could also use tahini or sunflower butter instead.

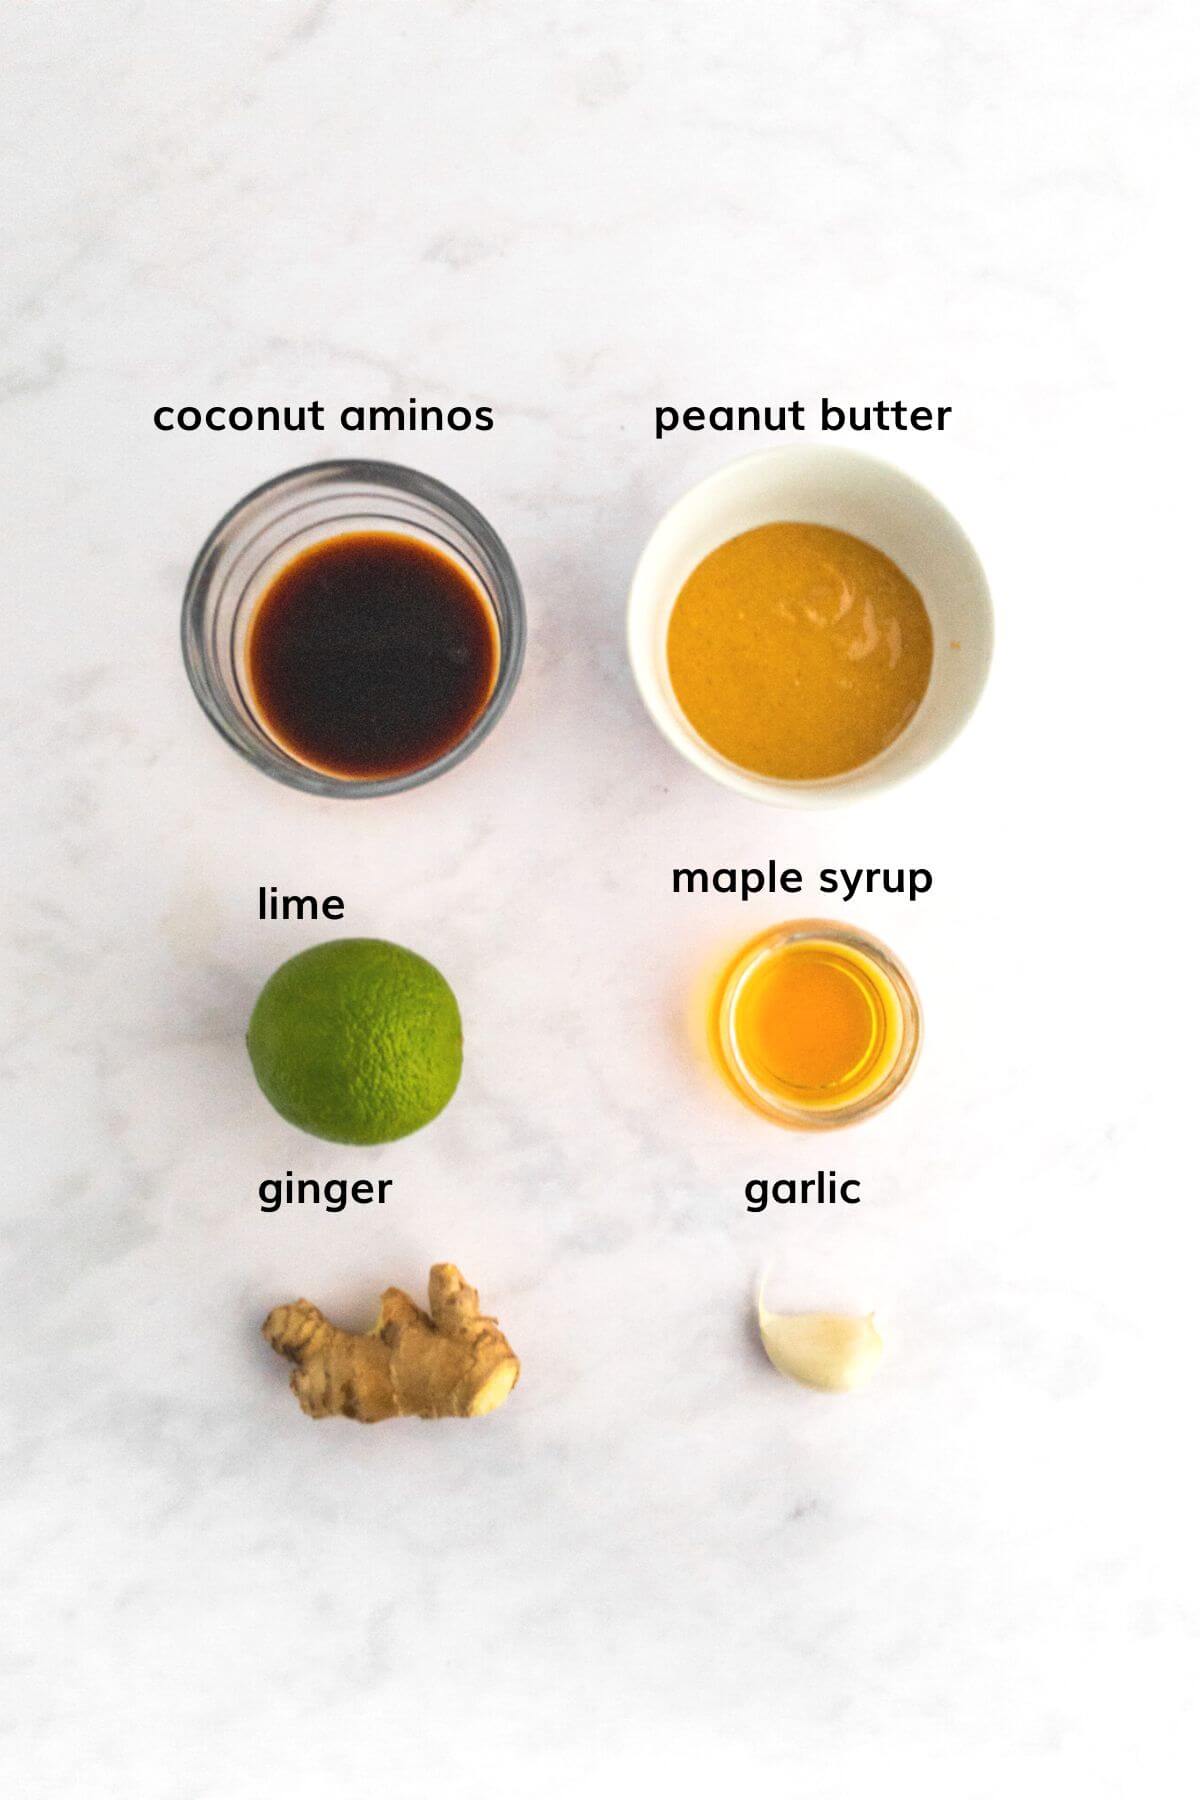
Peanut butter - I prefer to use natural and smooth peanut butter.

Coconut aminos - you could use gluten-free tamari sauce or nama shoyu instead, both work well if you have one of those.

Lime juice - to balance out the sweetness and saltiness and to add that fresh citrus tang. You could swap it with lemon juice if thatโ€™s what you have.

Garlic.

Fresh ginger.

Maple syrup  - you could replace the maple syrup with your preferred sweetener. Date paste or 1-2 soaked pitted dates work well. If you use soaked dates, youโ€™ll need to use a blender to make the dressing smooth.

Water - water is used to thin out the recipe into a salad dressing. You can use less water to keep this as a thicker dip or sauce. 

Peanut salad dressing recipe ingredients.

Why use coconut aminos?

Coconut aminos is a savoury condiment made from coconut vinegar, coconut nectar and sea salt.

Coconut aminos makes a great alternative to soy sauce, tamari sauce or nama shoyu because it has a similar flavour but with its own touch of natural sweetness. Itโ€™s also much the same in colour and texture.

Itโ€™s fast-growing as a popular alternative to soy, tamari and nama shoyu. It works in sauces, dips, dressings and marinades as itโ€™s typically both soy-free and gluten-free.

Its flavour is milder and slightly sweet too. You may need to add more of this ingredient than you usually would when preparing your recipes with tamari, soy or nama shoyu. Taste test what youโ€™re making and add more if your recipe needs it.

Coconut aminos is especially popular with raw foodies because you can buy it raw, fermented and unpasteurized.  It makes a perfect raw food ingredient for many recipes, just like this peanut salad dressing.

Other raw salad dressings you may like:

  • cashew mayo
  • tahini miso dressing,
  • lemon herb vinaigrette
  • peanut salad dressing
  • hemp seed ranch dressing

Or try a homemade raw vegan hummus recipe instead such as this lemon turmeric sprouted hummus or raw beetroot hummus.

What to serve with peanut dressing?

This sumptuous peanut dressing recipe is really versatile and compliments may raw vegan dishes such as:

  • green leafy salads
  • vegetable salads
  • bowls
  • as a dip with chopped vegetables
  • fruits
  • with raw vegan sushi
  • roll-ups
  • spring rolls
  • over kelp noodles
  • or vegetable noodles such as courgette (zucchini), pumpkin or squash.

๐Ÿ“– Recipe

A dish of salad dressing sprinkled with sesame seeds. sprinkled with sesame seeds and peanuts.

Peanut Salad Dressing

Juliette | Flourishing Kitchen
Easy homemade peanut salad dressing. Made with fresh lime, ginger, and garlic then mixed with creamy peanut butter.
5 from 3 votes
Leave a review
Print Recipe Pin Recipe Save Recipe Saved Recipe
Prep Time :5 minutes mins
Total Time :5 minutes mins
Course: Condiment
Cuisine: American
Servings :2

Equipment

  • Chopping board.
  • Paring knife.
  • garlic press
  • fine handheld grater
  • Tablespoon.
  • Bowl.
  • Jar with a lid.
Prevent your screen from going dark

Ingredients
  

  • 2 tablespoon smooth peanut butter.
  • 1 tablespoon lime juice.
  • 1 clove garlic.
  • 1 Inch piece ginger.
  • 1 tablespoon coconut aminos.
  • ยฝ tablespoon maple syrup.
  • 1 - 4 tablespoon water to thin.

Instructions
 

  • Add the peanut butter to a small bowl. Peel the garlic clove and discard the outer skin. Mince the garlic using the garlic crusher or a knife. Add the minced garlic to the peanut butter.
  • Using the back of the spoon, peel the fresh ginger and discard the skin. With the grater, finely grate the ginger until you get 1 tablespoon full. Now add the grated ginger to the bowl.
  • With your paring knife, half the lime and juice one half. This should give you about 1 tablespoon of lime juice. Add the lime juice to the minced garlic, ginger and peanut butter. I like to give it all a good stir now before adding anything else.
  • Lastly, add the maple syrup, coconut aminos and water to the bowl and then mix together thoroughly. Taste test the dressing and add a little more lime, coconut aminos or maple syrup if needed.
  • Pour into your jar for storing. Use within 3 days.

Notes

Once refrigerated this will thicken slightly. In which case you can add 1 teaspoon water and stir to loosen the dressing before using.
The amount of water needed in this recipe depends on how thick your peanut butter is. As it gets toward the bottom of the jar and the nut butter thickens youโ€™ll need to use more water to thin the dressing out.
You may need to use the juice of whole lime if youโ€™re using a small lime. Iโ€™m one of those people who really enjoys lime and so thereโ€™s never enough as far as Iโ€™m concerned. Iโ€™m much the same with ginger too. Just adjust the recipe to suit your own taste.
Did you make this recipe?Please leave a comment below to help other people.


Hey, did you like this recipe? If so it would mean the world to me if you would please Pin this to your Pinterest boards or even share it on social media so others can find it too.

Iโ€™m off for some tea.

Love raw food.

XOXO

Juliette

mum, dog owner, raw food enthusiast

Tahini Miso Salad Dressing

February 13, 2021 by Juliette Leave a Comment

Salad dressing in a bowl.

This tangy tahini miso salad dressing is quick, easy and made with only 4 ingredients. Gorgeous poured over mixed salads, leafy greens and drizzled over vegetables.

A light orange dressing in a shallow bowl with a spoon.
[feast_advanced_jump_to]

Ingredients and substitutions.

This raw vegan salad dressing is gluten-free, oil-free and made with whole food plant based ingredients.

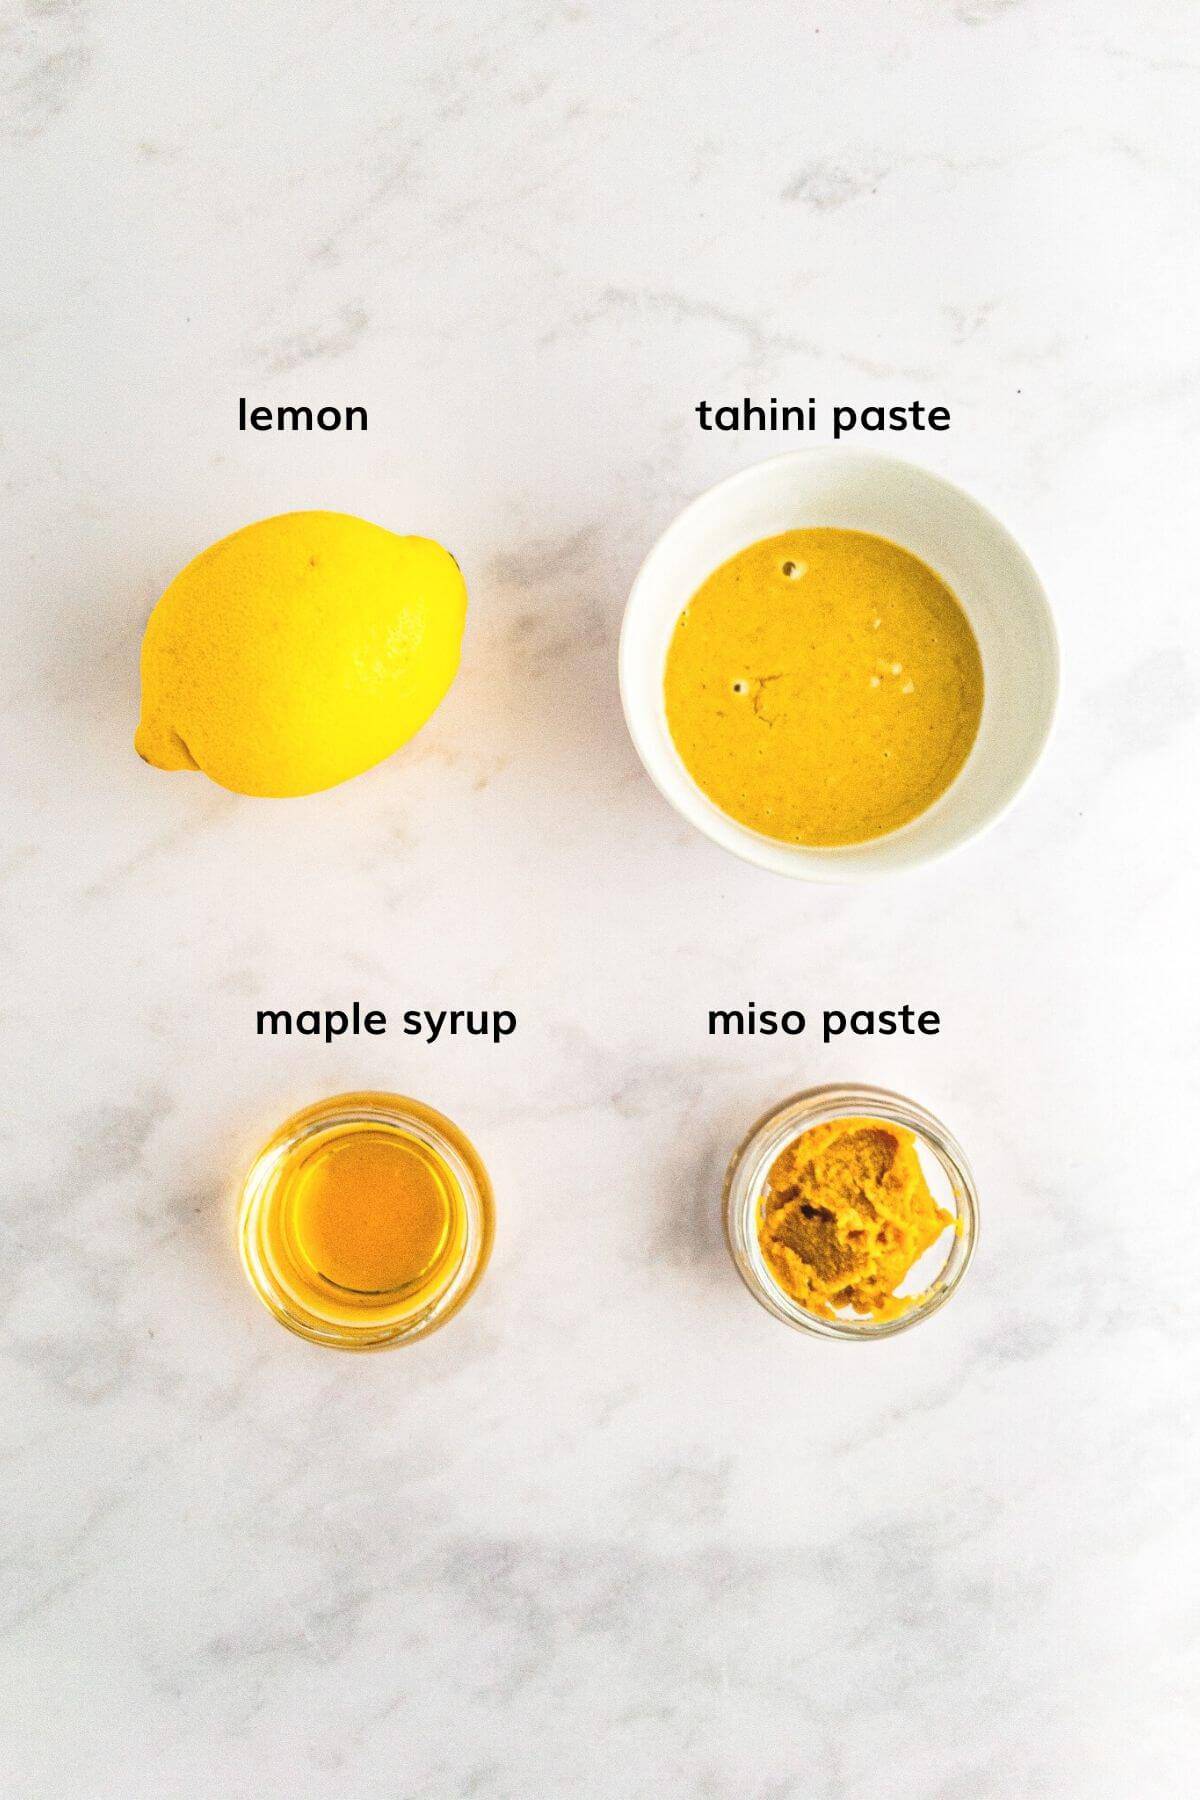
Miso paste - choose the lighter white miso which is sweeter and gentler than its red counterpart which makes it perfect to use in salad dressings. Red miso is stronger in flavour with a much more red, earthy colour. It will have been fermented for longer.

Tahini - thick, creamy and slightly bitter-tasting, blended sesame seeds.

Lemon juice - you need an acid to balance out the bitterness of tahini with the saltiness from the miso. If you prefer you can swap it out for a raw apple cider vinegar.

Maple syrup - to round out the flavour a little more then you have salty, umami, sweet, sour and bitter in your dressing. This vegan salad dressing also works well with a soaked pitted Medjool date or a tablespoon of date paste.

Water - used to thin out the paste into a dressing. Use less water to keep this as more of a dip for chopped raw vegetables. 

I use half a courgette (zucchini) instead. Just peel off the skin, chop and blend it before adding to your dressing. The taste is very mild and works beautifully.

Tahini miso dressing recipe ingredients.

What is miso?

Miso is a traditional food originating from Japan. Itโ€™s condiment thatโ€™s typically made from fermented soybeans.

Miso paste works great in dips, dressings, soups, sauces and marinades by infusing its own unique complex flavours.

Miso has a salty and umami flavour. Umami is one of the five tastes we experience, including bitter, salty, sour and sweet. The umami flavour is often described as deliciously savoury.

I use it in this tahini miso dressing where previously, I was using tamari sauce or coconut aminos. Actually, I find the miso in this dressing works better because it has a gentleness about it.

Hopefully, you will do too.

What is tahini?

Tahini is a traditional condiment from the Mediterranean and the Middle East made from ground toasted sesame seeds. Most commonly known here as an ingredient used with chickpeas in hummus and aubergine in baba ganoush.

Itโ€˜s brilliant drizzled over veggies and used in dips, dressings and sauces.

Most store-bought tahini is roasted, not raw. If you prefer to use raw tahini, please check the item label before purchasing or maybe, make your own.

More delicious vegan dressings:

  • cashew mayo
  • tahini miso dressing,
  • lemon herb vinaigrette
  • peanut salad dressing
  • hemp seed ranch dressing

๐Ÿ“– Recipe

Salad dressing in a bowl.

Tahini Miso Salad Dressing

Juliette | Flourishing Kitchen
This tangy tahini miso dressing is quick, easy and made with only 4 ingredients. Gorgeous poured over mixed salads, leafy greens and drizzled over vegetables.
Leave a review
Print Recipe Pin Recipe Save Recipe Saved Recipe
Prep Time :5 minutes mins
Total Time :5 minutes mins
Course: Condiment
Cuisine: Vegan
Servings :4

Equipment

  • Spoon.
  • Bowl.
  • A jar or container with a lid for storing in the fridge.
Prevent your screen from going dark

Ingredients
  

  • 2 tablespoon tahini.
  • 1 tablespoon sweet white miso.
  • 1 tablespoon lemon juice.
  • 1 tablespoon maple syrup.
  • 4 tablespoon water,, more if needed.

Instructions
 

  • Place all the ingredients into a bowl and stir. At first it will thicken but keep mixing and stirring until any lumps have gone. Stir until it all comes together into a smooth and creamy dressing.
  • Taste test and adjust the flavours as needed.
  • Decant into your jar or lidded container for use.

Notes

Use regular tahini if you can't find a raw version, or make your own.
This dressing will thicken slightly when refrigerated. Do add a teaspoon or two of water to thin it out when using, if you wish too.
Will store in the fridge for 2-3 days.
Did you make this recipe?Please leave a comment below to help other people.

Hey, did you like this recipe? If so it would mean the world to me if you would please Pin this to your Pinterest boards or even share it on social media so others can find it too.

Iโ€™m off for some tea.

Love raw food.

XOXO

Juliette

mum, dog owner, raw food enthusiast

Lemon Herb Vinaigrette (quick and easy)

February 12, 2021 by Juliette Leave a Comment

A bottle of vinaigrette with a bowl of salad and half a lemon.

A zingy, lemon herb vinaigrette. A delicious, simple herb salad dressing that anyone can make. Whizz one up in just a few minutes and drizzle on salads, greens, use as a dip or a marinade for raw veggies.ย  I wouldnโ€™t be without this one!

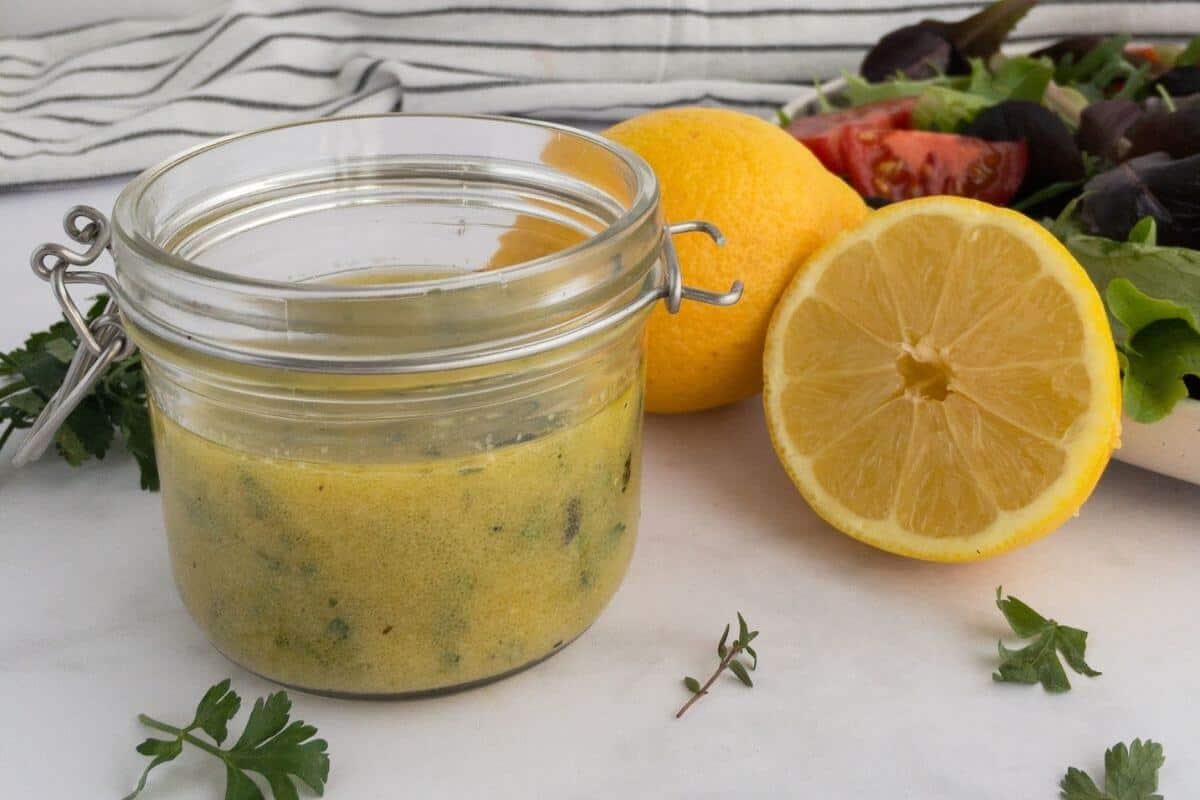
A small jar of vinaigrette net to lemon halves and a bowl of green mixed salad.
[feast_advanced_jump_to]

Ingredients and substitutions.

An easy, winning homemade salad dressing, this recipe is based on French vinaigrette. 

A classic French vinaigrette combines oil, vinegar, salt and pepper using a ratio of 1 part vinegar to 3 parts oil to guarantee its success.

This dressing is versatile and you can add any herbs you like to it. You can even swap out the lemon for a good quality raw vinegar like apple cider vinegar.

I like to make this lemon herb vinaigrette, which has become a staple in my kitchen, for pouring over salads and leafy greens. 

A homemade fresh herb salad dressing for your vibrant bowl of raw food goodness. Itโ€™s especially good in Summer lightly drizzled over sliced tomatoes.

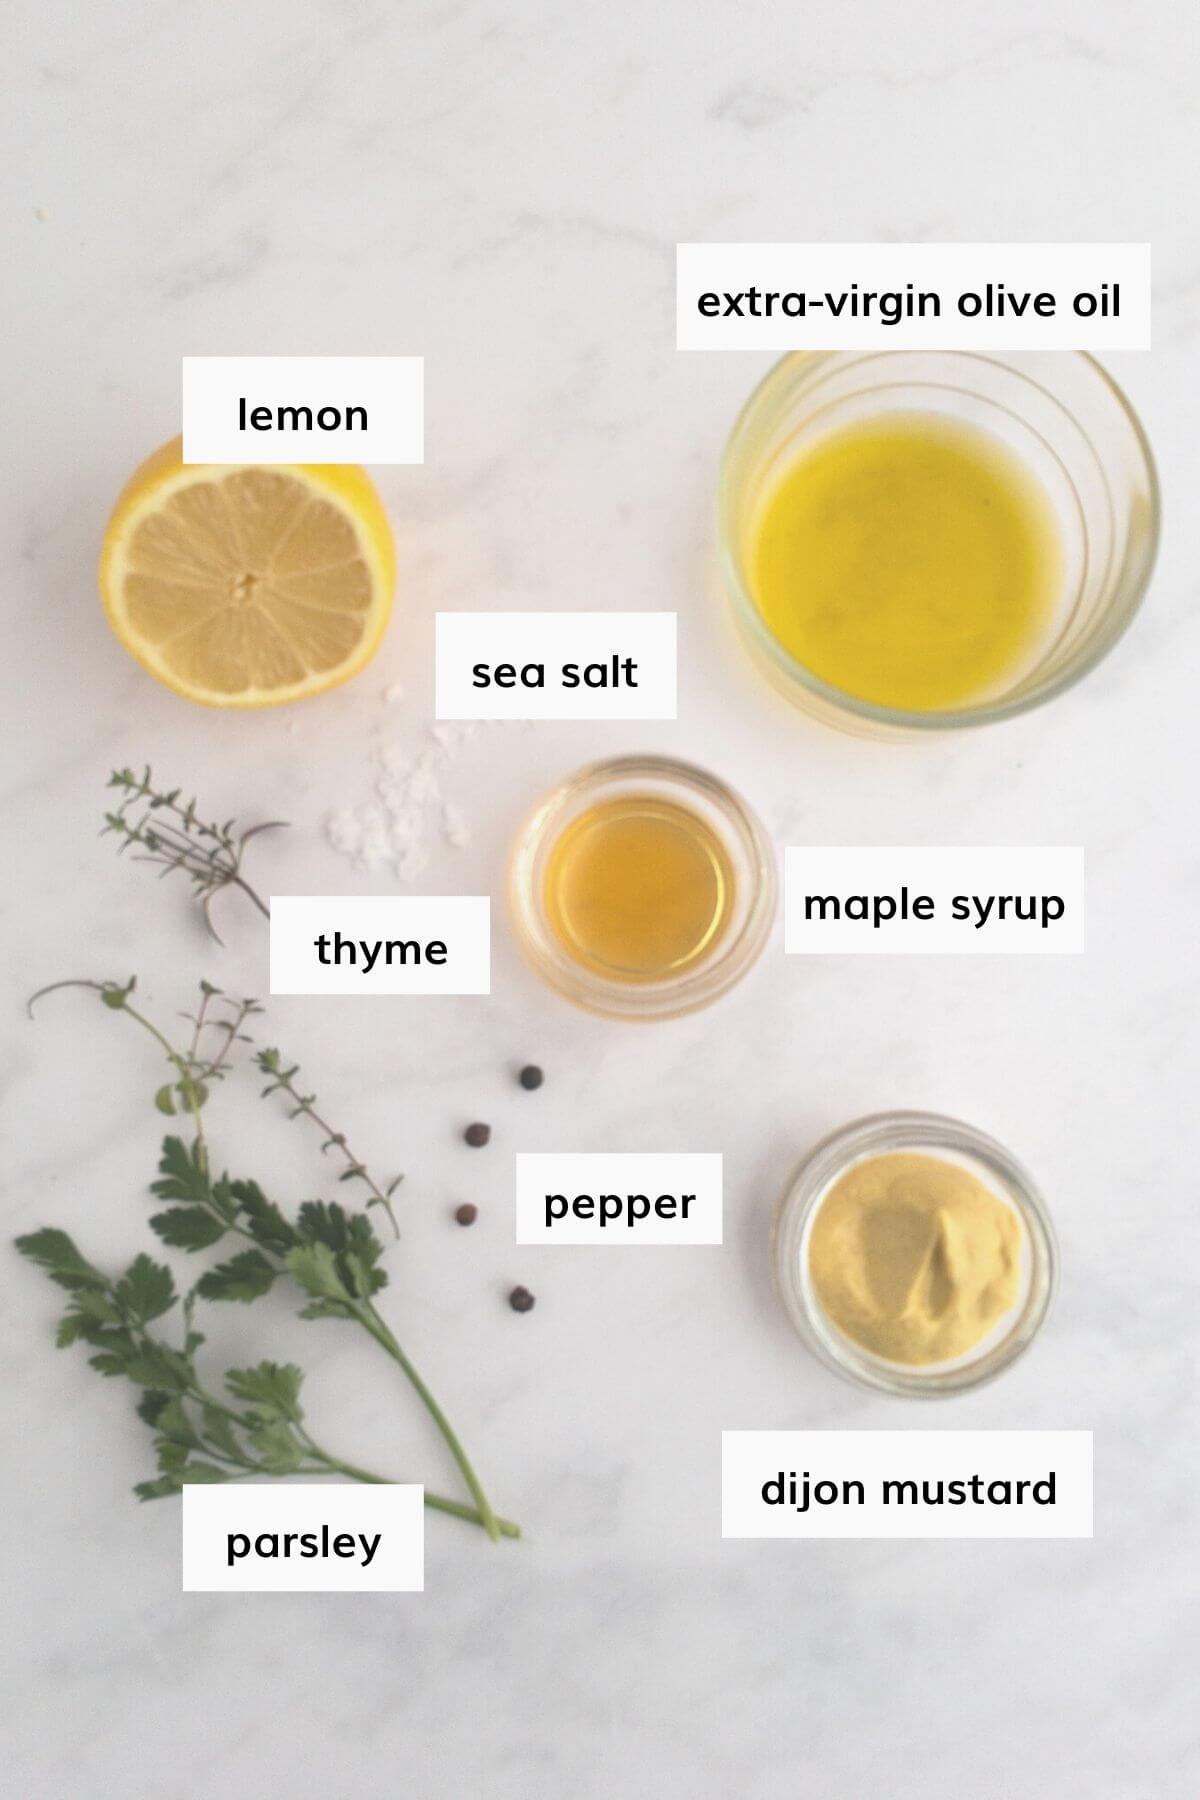
Recipe ingredients for lemon herb vinaigrette laid out and labelled.

Salt - Sea salt and Himalayan salt are both known to have retained their natural minerals compared with table salt, which is stripped of its own natural goodness. I like Cornish sea salt.

Pepper - you can use black or white pepper. Please do use what you prefer.

Lemon juice - substitute with a good quality raw red wine vinegar if you prefer. Itโ€™ll taste just like magic.

Extra virgin olive oil

Dijon mustard

Maple syrup - you can swap it for you preferred sweetener.

Fresh thyme - swap it with dried thyme if this is what you have. I've a small pot of fresh thyme sitting outside of my kitchen door looking beautiful, so this what I'm going with.

Fresh parsley

Salad dressings you may like:

  • lemon tahini dressing
  • peanut salad dressing
  • tahini miso dressing
  • vegan cashew mayonnaise

๐Ÿ“– Recipe

A bottle of vinaigrette with a bowl of salad and half a lemon.

Lemon herb vinaigrette (quick and easy)

Juliette | Flourishing Kitchen
A zingy, lemon herb vinaigrette. A delicious, simple herb salad dressing that anyone can make. Whizz one up in just a few minutes and drizzle on salads, greens, use as a dip.
Leave a review
Print Recipe Pin Recipe Save Recipe Saved Recipe
Prep Time :5 minutes mins
Total Time :5 minutes mins
Course: Condiment
Cuisine: French
Servings :1

Equipment

  • Bowl.
  • fork or whisk.
  • jar with a lid for storing in the fridge.
Prevent your screen from going dark

Ingredients
  

  • 3 tablespoon extra virgin olive oil.
  • 1 tablespoon freshly squeezed lemon juice.
  • 1 teaspoon dijon mustard.
  • 1 teaspoon maple syrup.
  • 1 teaspoon very finely chopped fresh parsley.
  • ยผ teaspoon fresh thyme leaves.
  • A pinch of salt and freshly ground black pepper.

Instructions
 

  • Add salt and pepper to your bowl with the lemon juice and mix for a minute or two.
  • Add in the extra virgin olive oil, the dijon mustard and maple syrup then mix together with a fork or a whisk until fully combined. Youโ€™ll need to watch to see the oil and vinegar are fully emulsified with the mustard and there are no lumps.
  • Stir in the fresh herbs. Taste test and add more seasoning if necessary.

Notes

Serves 1-2 people, depending on the size of your salad.
Did you make this recipe?Please leave a comment below to help other people.


Hey, did you like this recipe? If so it would mean the world to me if you would please Pin this to your Pinterest boards or even share it on social media so others can find it too.

Iโ€™m off for some tea.

Love raw food.

XOXO

Juliette

Modern Vegan Waldorf Salad

February 11, 2021 by Juliette 1 Comment

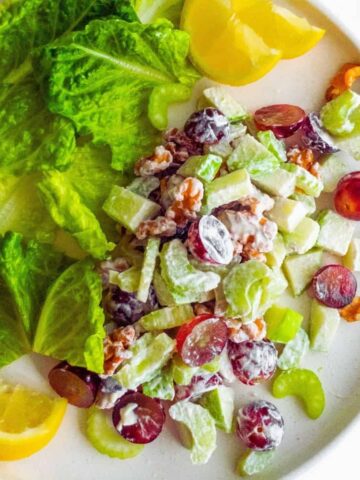
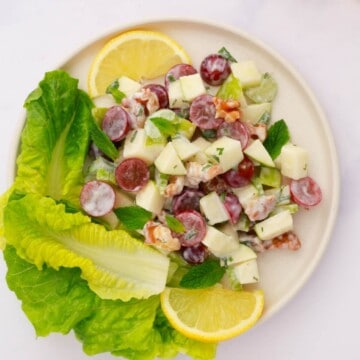
Waldorf salad.

A delicious vegan Waldorf salad that's refreshingly light, crisp and naturally sweet.

Wrapped in a creamy vegan yogurt dressing for a healthy modern Waldorf salad twist. Ready in under 10 minutes.

Made with vibrant, wholesome ingredients, this simple vegan Waldorf salad recipe is perfect for lunches, picnics and buffets.

Serve it alongside leafy greens and a squeeze of lemon juice for an added burst of citrus tang!

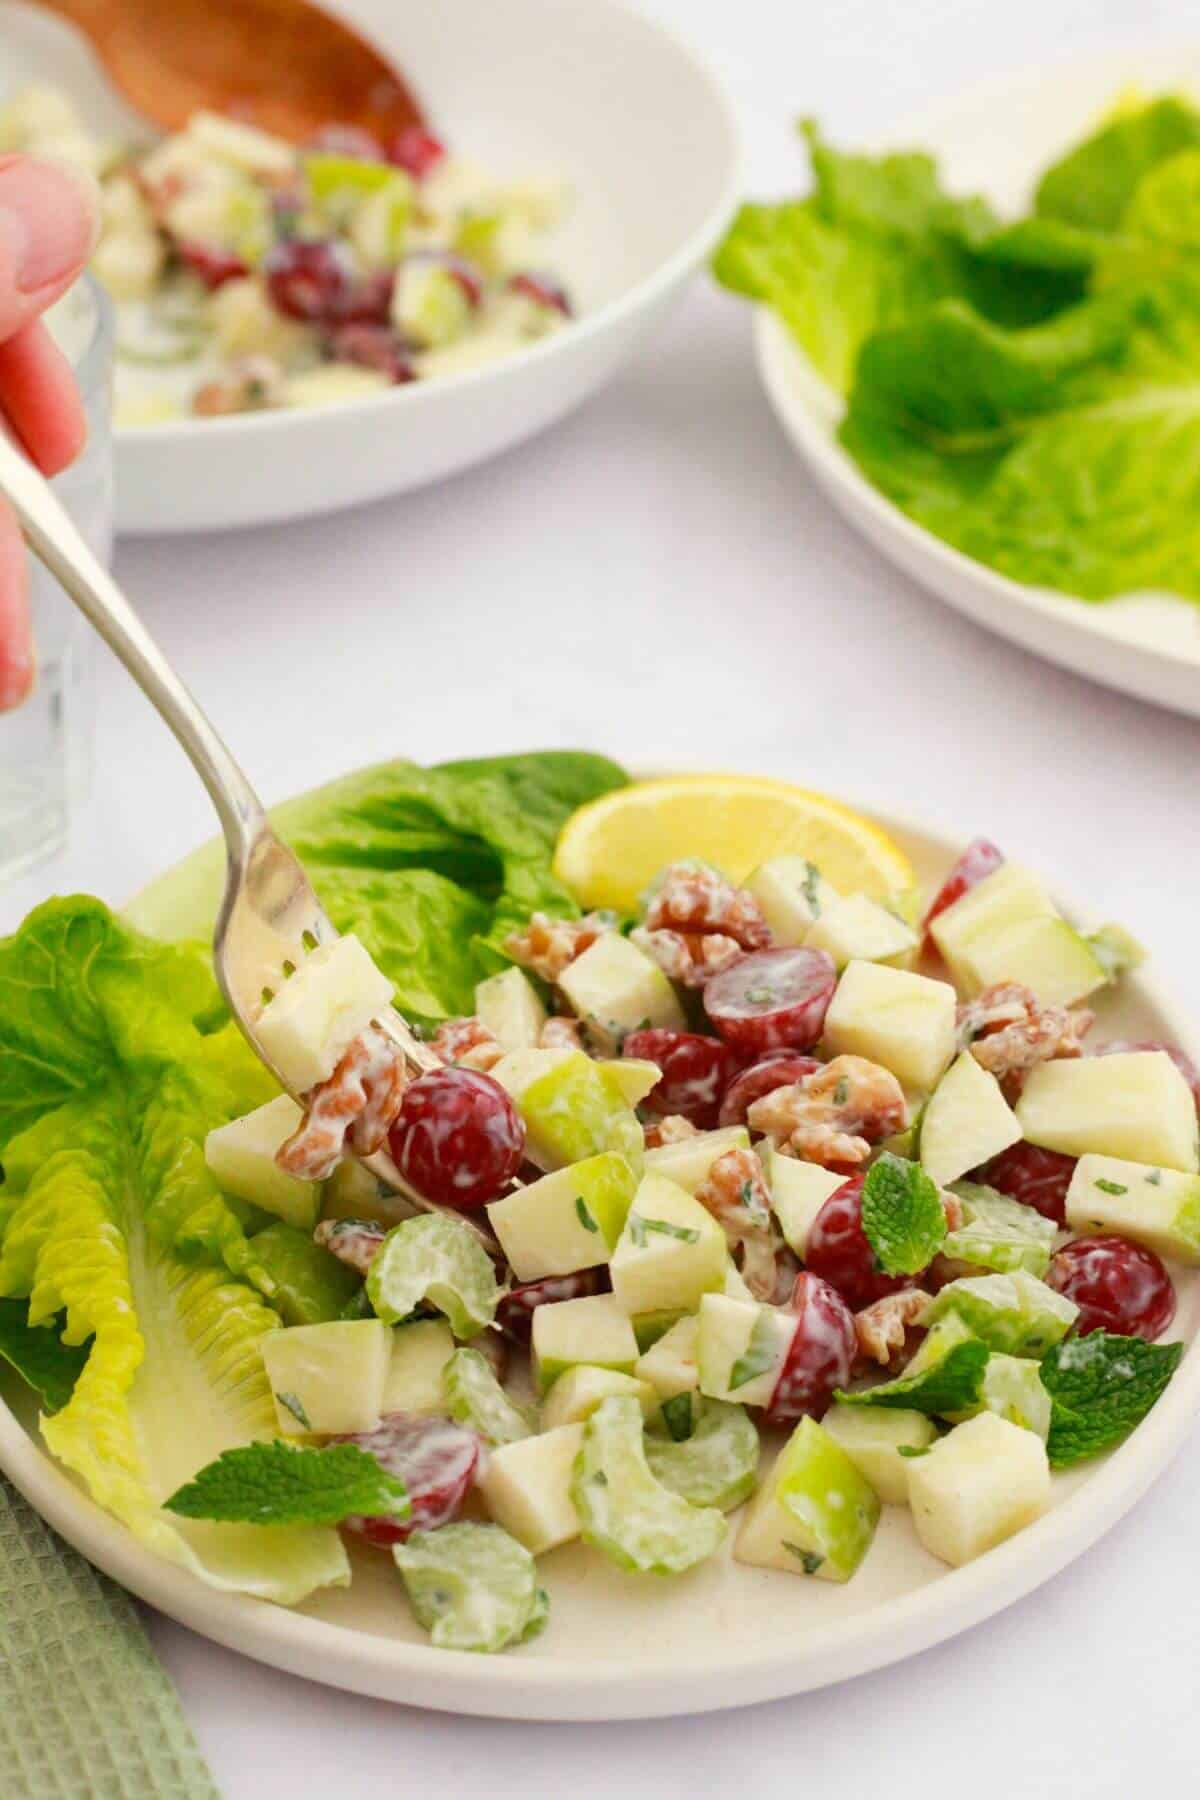
Someone holding a silver fork with Waldorf salad on a small plate filled with salad and leafy greens. A couple of other bowls of salad in the background and a green tea towel to the left of the main dish.

The original salad, which was created at the Waldorf Hotel in New York, is made with rich and creamy mayonnaise. 

My modern version uses yogurt rather than mayonnaise.

A good quality plain yogurt gives this vegan Waldorf salad dressing a light, fresh flavour, beautifully compliments the naturally sweet fruits in this recipe!

[feast_advanced_jump_to]

What youโ€™ll need

This recipe is super speedy and easy to assemble, making it a great reason to try if this is your first time making a vegan Waldorf salad. 

No special equipment needed, just a mixing bowl, a paring knife and a spoon to toss it all together. ๐Ÿ™‚

Ingredients

It's a gluten-free, dairy-free salad with no sweetener and no eggs. 

Apple - I love to use Granny Smith apples in my vegan Waldorf salad for their sweet and slightly tart flavour. 

Grapes - sweet, juicy and full of nutrients. Choose juicy red grapes for colour contrast with the green apple and celery.

If you can find red grapes with seeds, that's even better! Red grapes are rich in some vitamins, minerals and antioxidants including vitamin C, K, A and Resveratrol.

Vegan Yogurt - use a good quality plain vegan yogurt that you like.

Here's my recipe for cashew yogurt made with gut-healthy probiotics for added benefits. Swap the cashew nuts with other raw nuts like raw almonds or macadamia for a fully raw vegan yogurt. 

Fresh herbs - mint and parsley compliment the ingredients really well plus they add a beautiful aroma to the yogurt dressing.

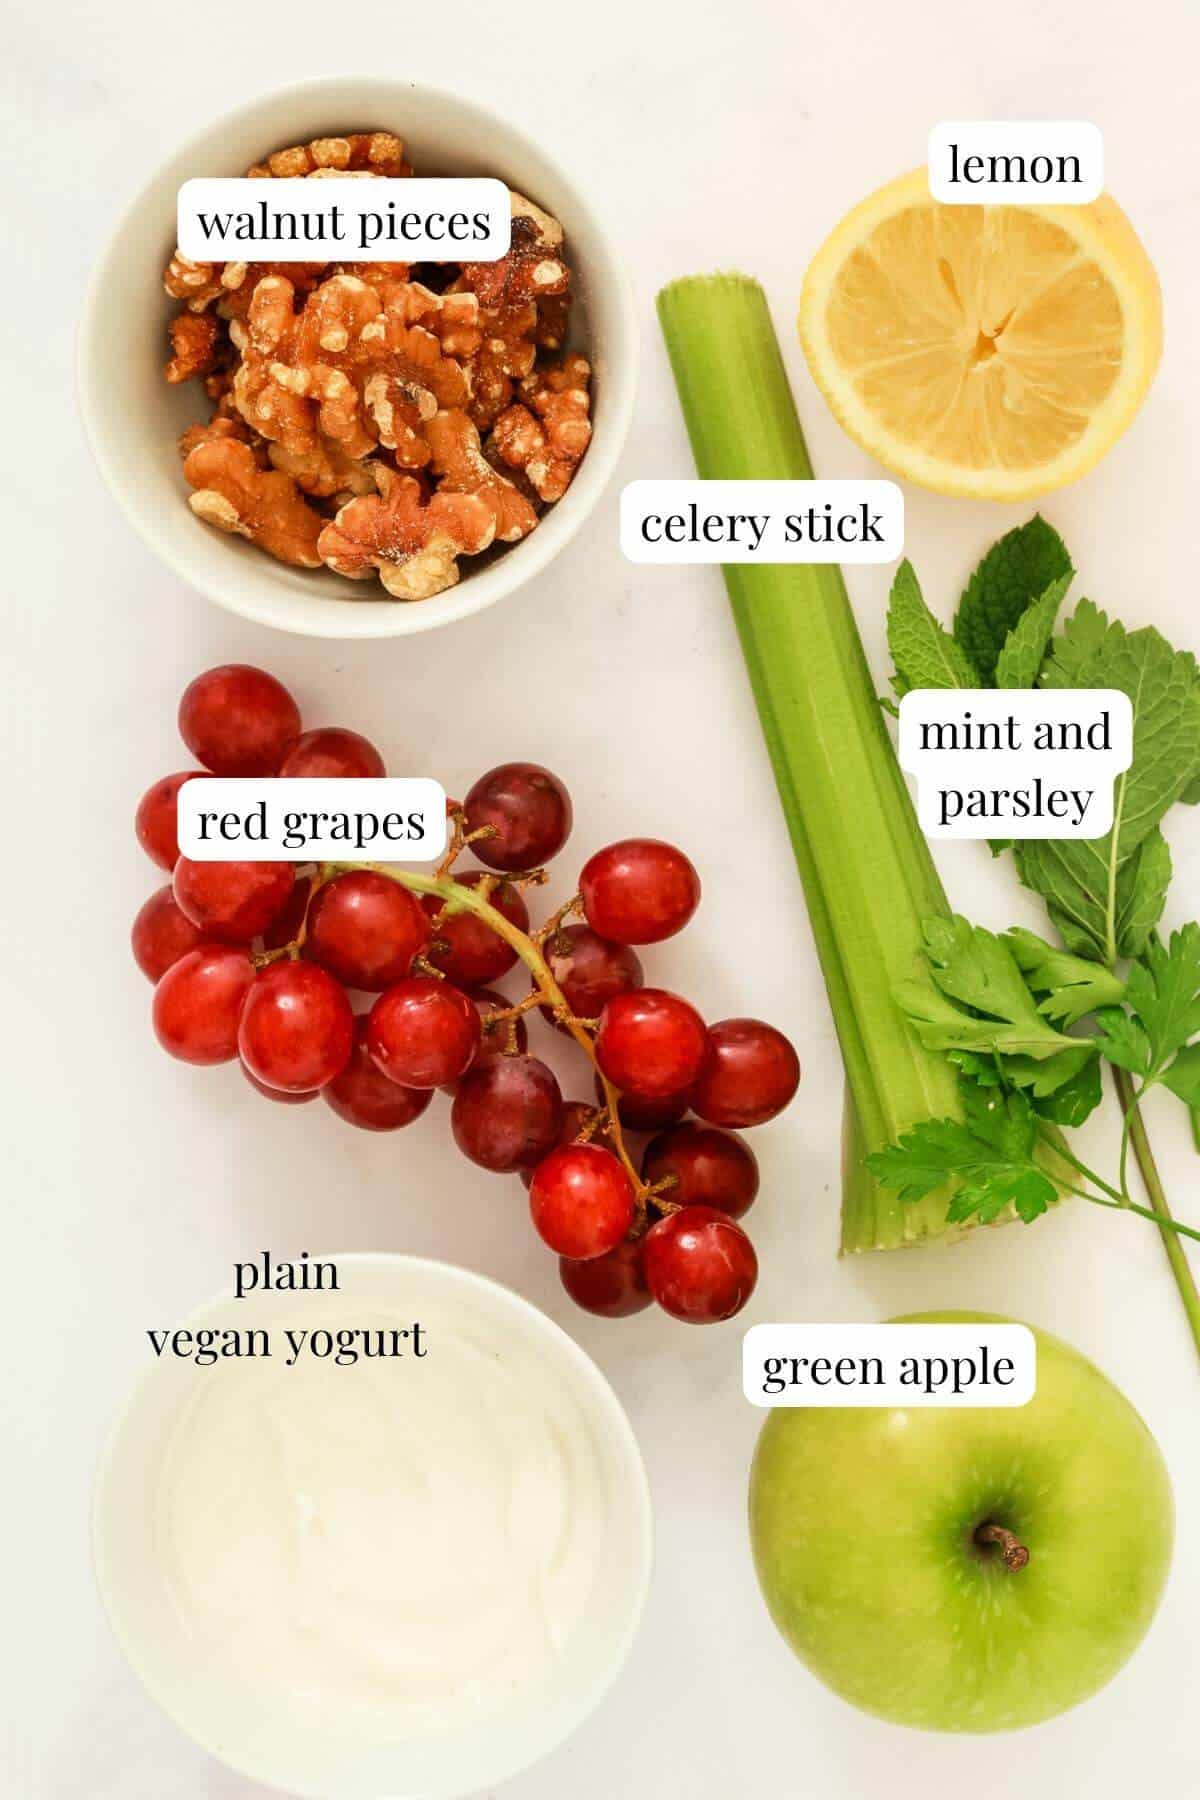
Ingredients for a vegan waldorf salad on a white surface; each ingredient is labelled.

Recipe Steps

A super simple salad with three easy steps as follows:

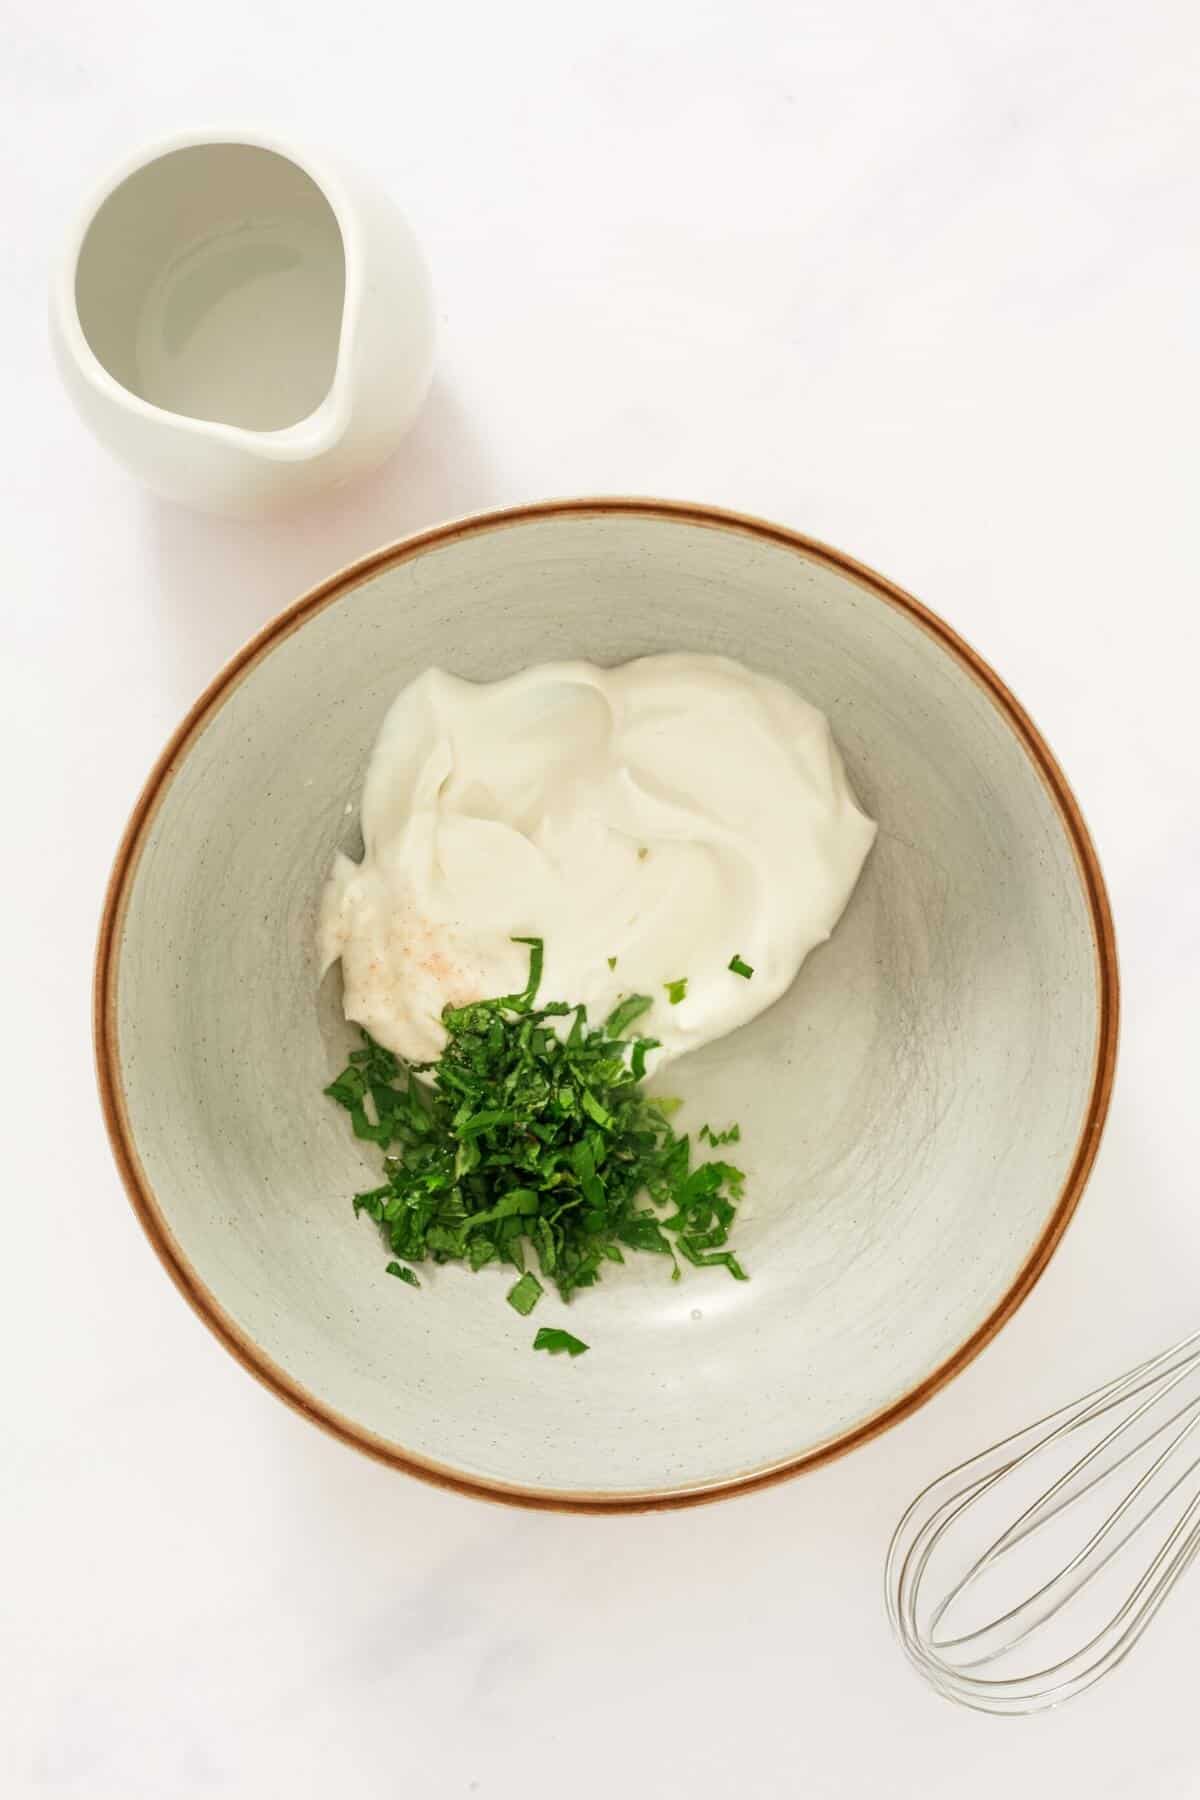
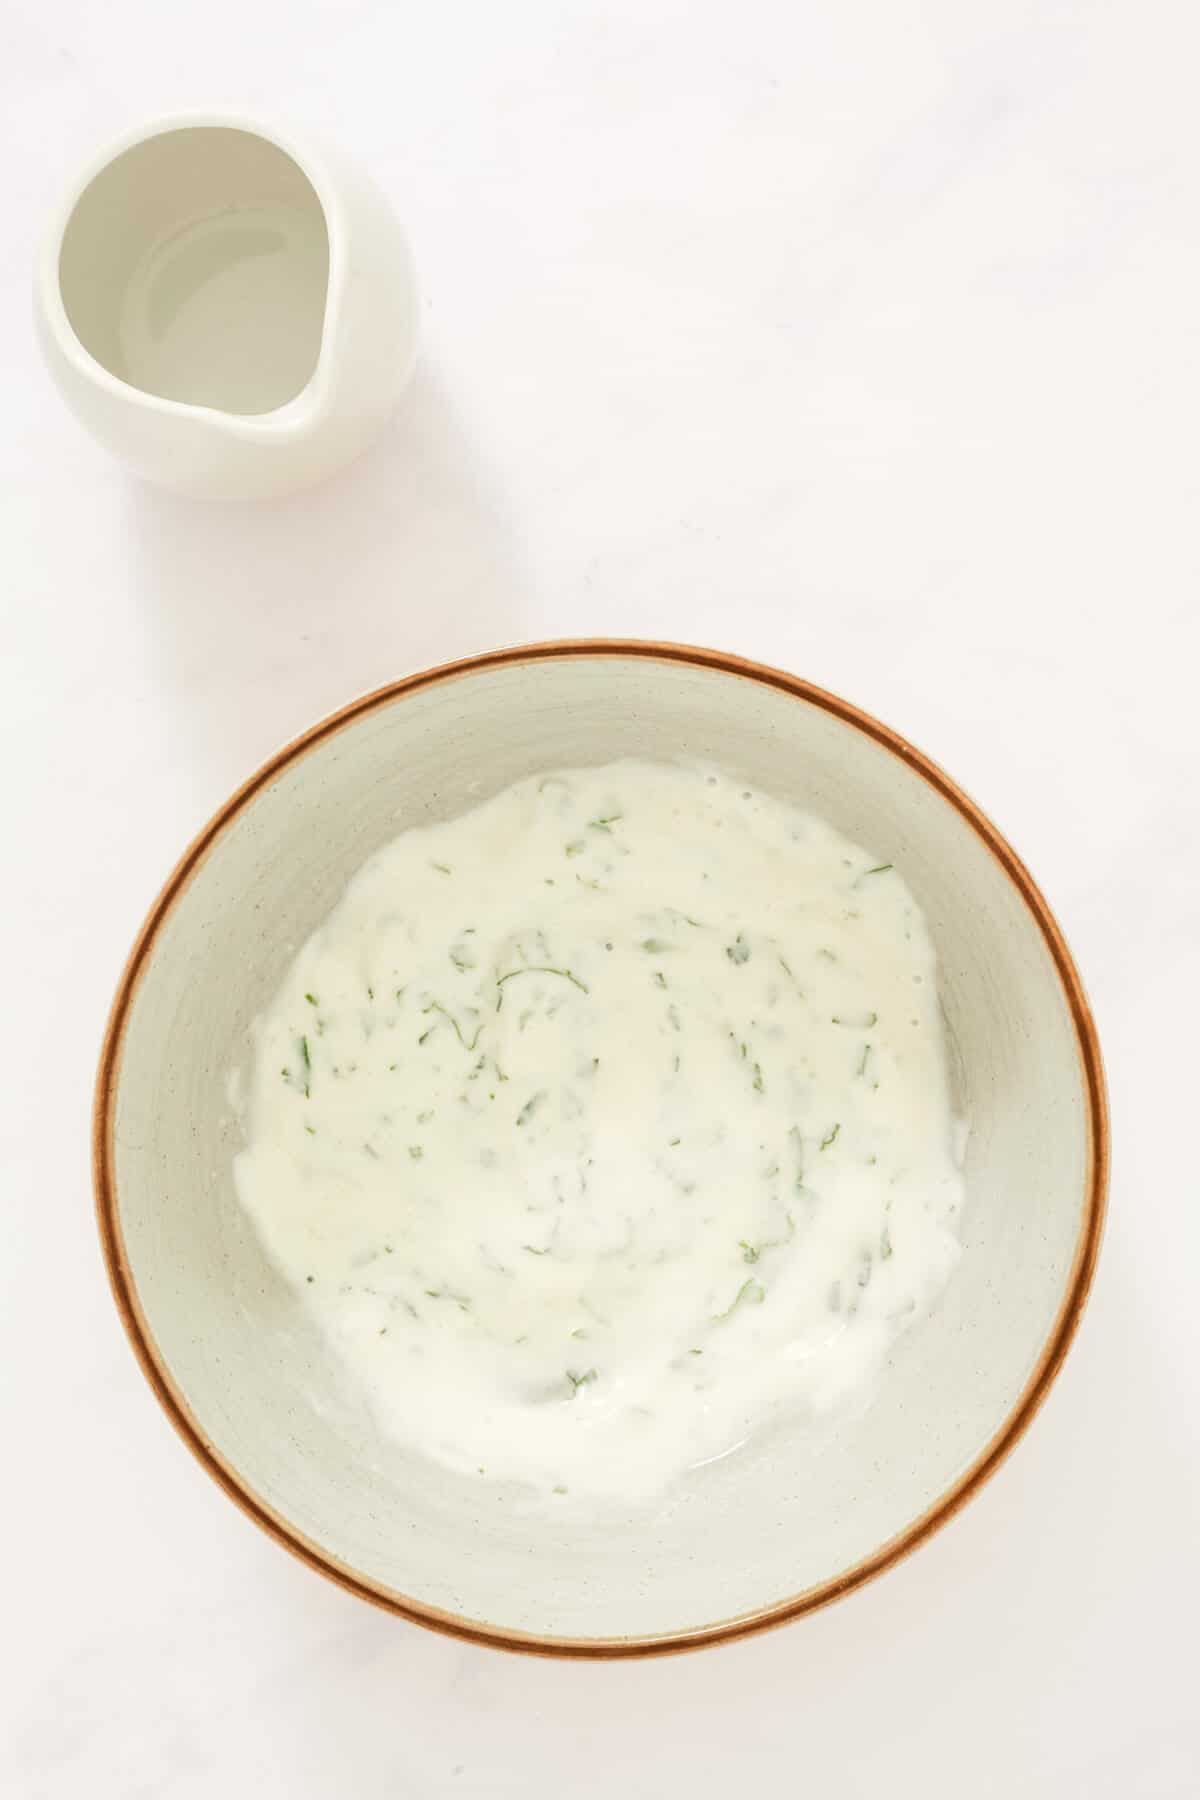
A small bowl and pouring jug sit on a white surface. The bowl contains a little yogurt with some finely chopped fresh herbs plus a pinch of pink salt.

Step 1 - Prepare the dressing by finely slicing the herbs then adding them to a bowl with yogurt and a pinch of salt. Stir together until combined.

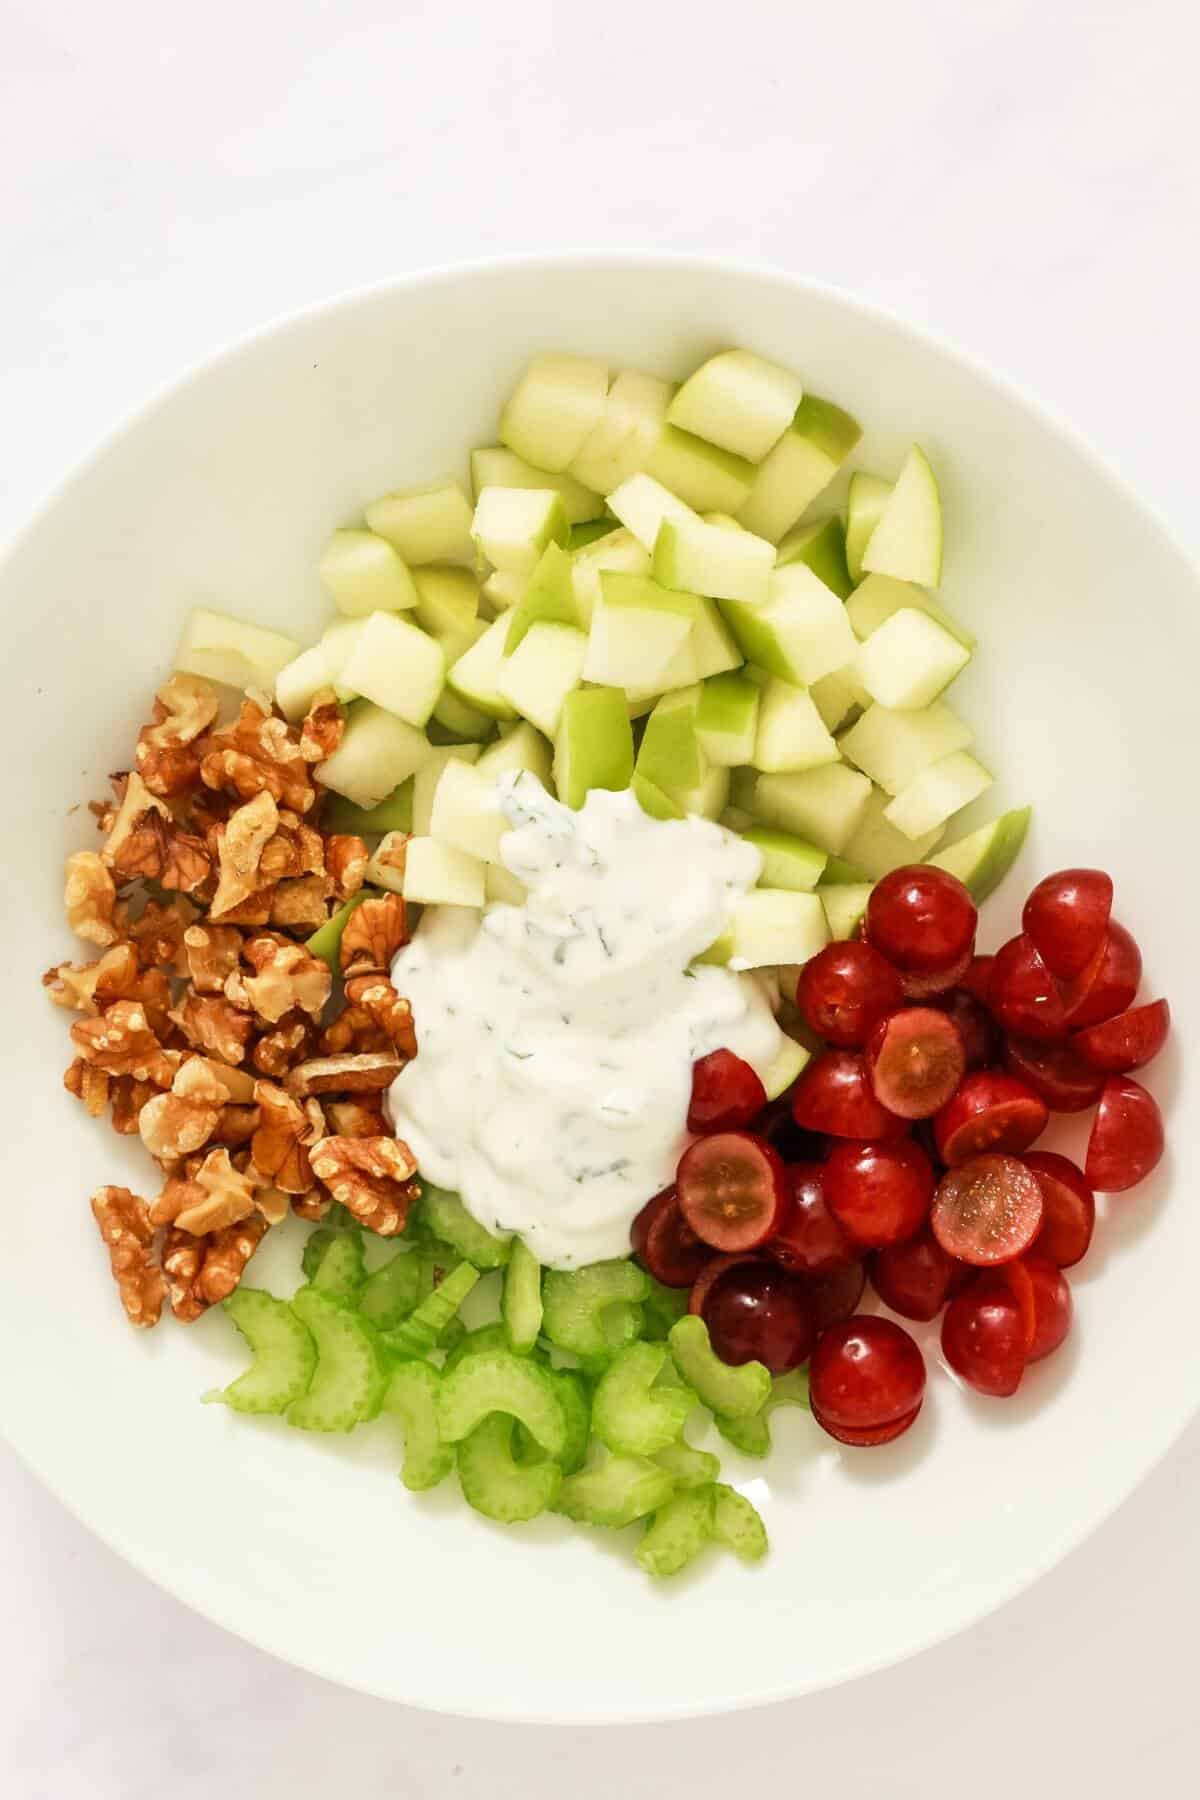
A white bowl contains chopped green apple, celery, halved red grapes, walnut pieces and in the centre of the bowl is a herby salad dressing.

Step 2 - Slice and dice the remaining ingredients, then add them to a bowl.

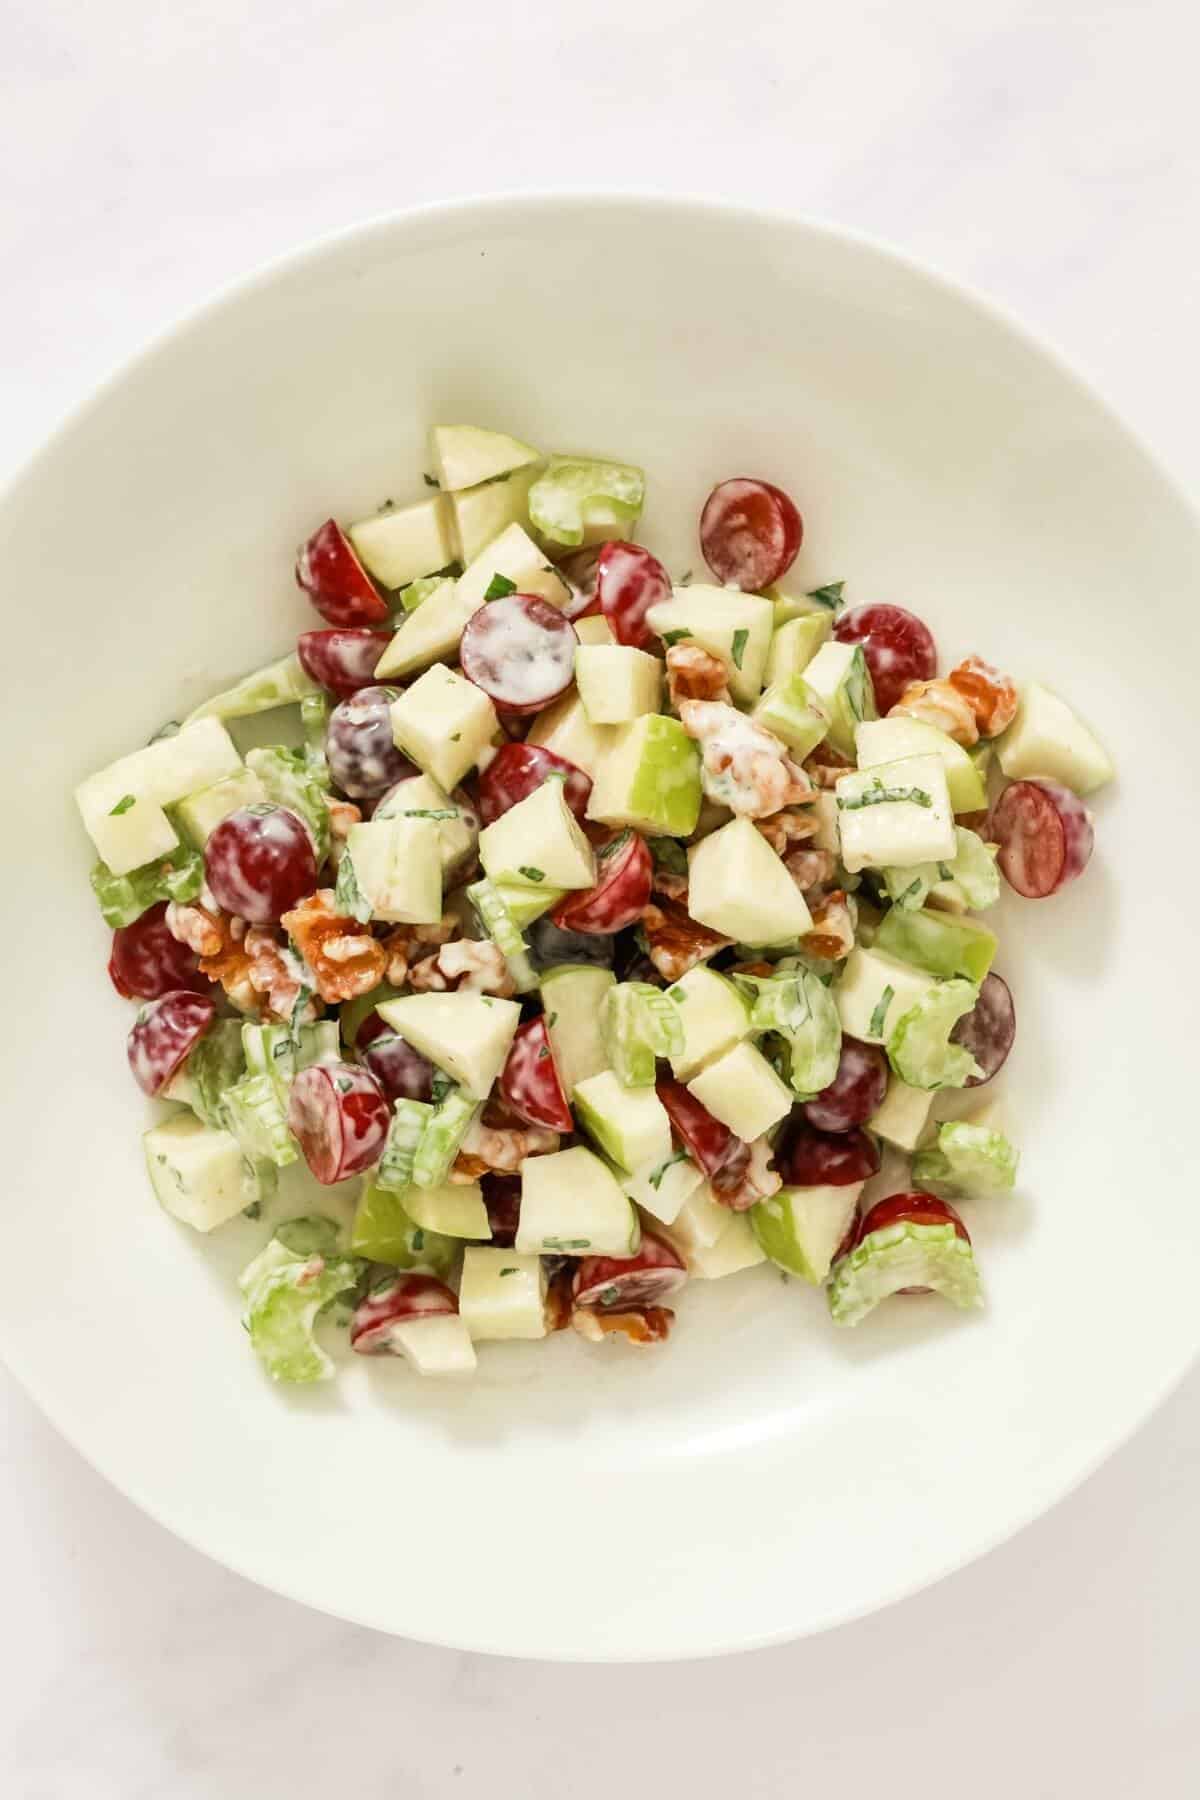
A bowl with sliced red grapes, chopped green apple, sliced celery and walnut pieces coated in a creamy dressing.

Step 3 - Pour the vegan yogurt dressing into the dish and toss together until everything has a light covering of delicious dressing! ๐Ÿ˜€

TIP: Squeeze a little lemon juice over the diced apple to prevent the apple from discolouring.

Substitutions and variations

Mayonnaise - for more of a traditional version, swap out the creamy vegan yogurt for cashew mayonnaise instead.

If you'd like to make your own mayonnaise, then this dairy-free easy cashew mayo recipe is among the most popular recipes on the blog.

To make other variations of this recipe without mayo, try it with different salad dressings.

It's delicious with this hummus salad dressing and this simple lemon herb vinaigrette!

Natural flavours - bring different some more living flavours to your modern Waldorf salad by adding finely chopped fresh herbs like tarragon, dill or basil.

Acid - stir in a little raw apple cider vinegar instead of using lemon juice, for a tangier-tasting dressing.

Raw Nuts - change out the walnuts for pecans, or try using hazelnuts. You could use pumpkin seeds, pistachios, or sunflower seeds for a nut-free version of this recipe.

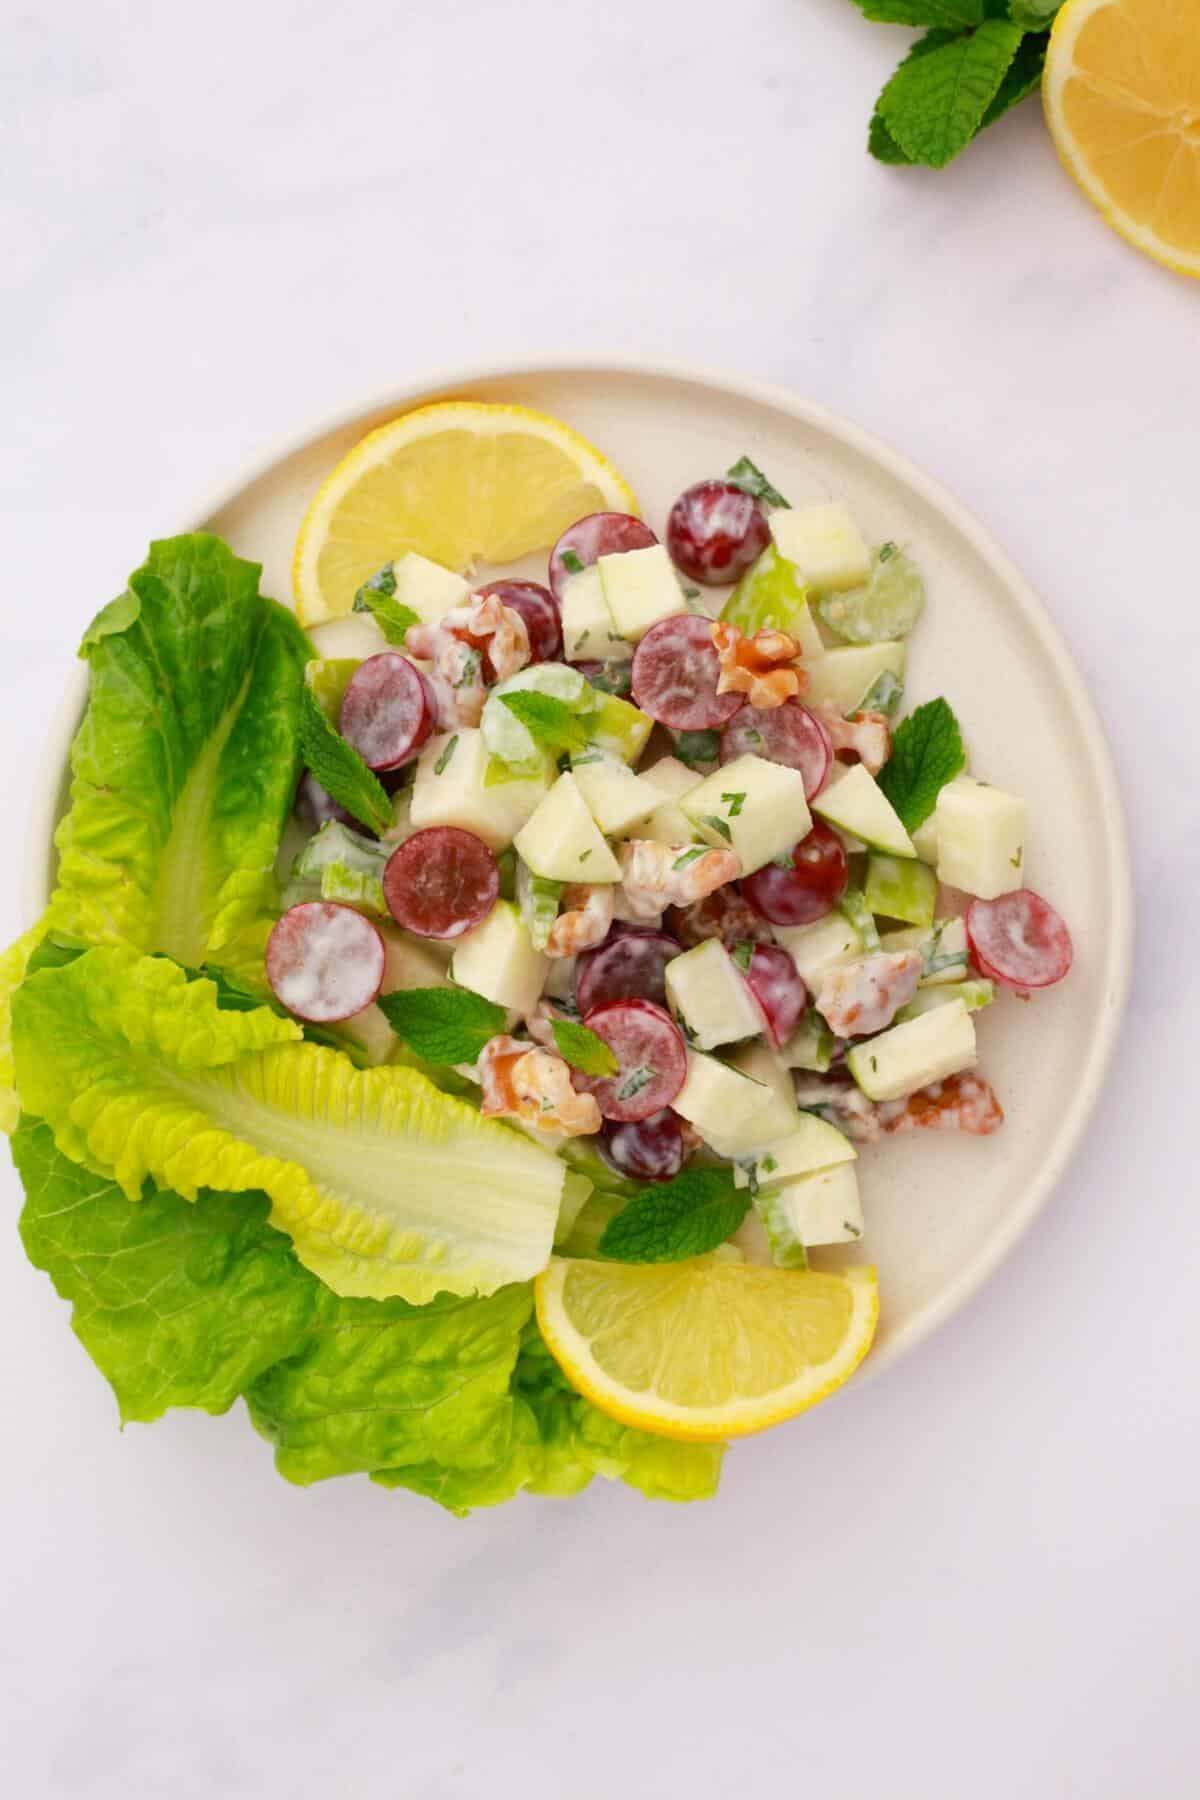
A small plate of Waldorf salad with a few leafy greens, fresh mint leaves and lemon slices. The plate sits on a light marble looking surface.

Serving ideas

As I mentioned, I do love to serve this dish with crisp fresh leafy greens like baby leaf, cos or romaine lettuce.

Wraps - for something a little stronger tasting with more bite, scoop vegan Waldorf salad up into cabbage leaves, collard greens or kale leaves, then roll them up into wraps. ๐Ÿ™‚

Mason jar salads - how about making this gorgeous raw salad into a couple of mason jars salads for lunch instead? 

If you do this, add the dressing first to the bottom of the jar, followed by any grains/chickpeas (if using). Top with apple, celery, then the nuts. 

Add your leafy greens to the top of the jars to keep them fresh and crunchy.

Want something more filling? Make a modern Waldorf salad with chickpeas for a more substantial dish by adding a handful or two of sprouted chickpeas.

If you don't like chickpeas, how about using buckwheat or quinoa instead?

These extra ingredients will add more protein and added nutrients to your meal. Use cooked chickpeas, buckwheat or quinoa instead of sprouted versions if you prefer.

Storing and Leftovers

This yogurt Waldorf salad is best served fresh on the day. Pop any excess or leftovers in a sealed container in the fridge for up to 3 days. 

If you want to meal prep this vegan Waldorf salad, then it's best to add the dressing on the day to prevent it going soggy.

FAQ's

What country is Waldorf salad from?ย 

The original salad was created in America at the Waldorf Hotel in New York.

What nut does Waldorf salad contain?ย 

Traditionally, the nut used in a Waldorf salad recipe is walnuts.

Related Recipes

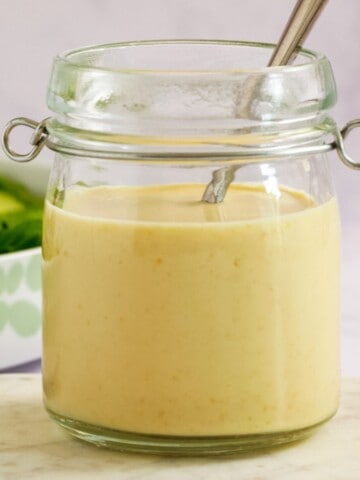
  • A small oopen topped jar filled with salad creamy dressing. A silver spoon sticks up out the top of the jar.
    Hummus Salad Dressing
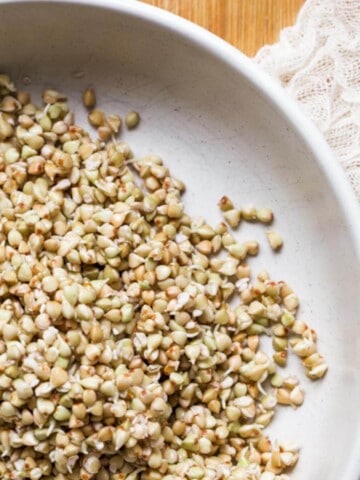
  • A bowl of sprouted buckwheat sits on a wooden surface next to a piece of cheesecloth.
    Sprouting Buckwheat
  • A bottle of vinaigrette with a bowl of salad and half a lemon.
    Lemon Herb Vinaigrette (quick and easy)
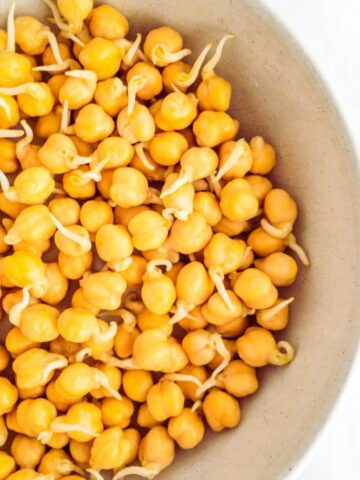
  • A bowl of chickpeas that have been sprouted.
    How to Sprout Chickpeas (the easy way).

๐Ÿ“– Recipe

Modern Vegan Waldorf Salad

Juliette | Flourishing Kitchen
A delicious vegan Waldorf salad that's refreshingly light, crisp and naturally sweet. Wrapped in a creamy vegan yogurt dressing for a healthy modern Waldorf salad twist. Ready in under 10 minutes.
5 from 1 vote
Leave a review
Print Recipe Pin Recipe Save Recipe Saved Recipe
Prep Time :10 minutes mins
Cook Time :0 minutes mins
Total Time :10 minutes mins
Course: Salad
Cuisine: American
Servings :2

Equipment

  • Chopping board.
  • Paring knife.
  • Bowl.
  • Spoon.
Prevent your screen from going dark

Ingredients
  

  • 1 small to medium green apple, Granny Smiths
  • 1 celery stick
  • ยฝ cup (80g) red grapes
  • ยผ cup (30g) walnut pieces
  • Pinch of salt

for the Waldorf salad dressing

  • 2 tablespoons plain vegan yogurt
  • 2 tablespoons fresh mint and parsley, finely chopped
  • 1 tablespoon lemon juice
  • 1 tablespoon water, optional

To serve (optional)

  • handful of cos or romaine lettuce
  • lemon wedges

Instructions
 

  • Prepare the dressing. Finely chop the herbs and add them to a bowl with a pinch of salt and vegan yogurt. Stir together until smooth, creamy and combined. If the dressing looks a little thick, you can thin it with a tablespoon of water.
  • Chop the remaining ingredients. Dice the apple into small 1 cm pieces and discard the core. Slice the celery thinly, about 2mm thick, into little half-moons. Half the red grapes. Break up any larger walnut pieces so they're all nice and small.
  • Toss the salad. Place the celery, fruit and walnuts into a bowl, then pour in the Waldorf salad dressing. Gently toss it together with a spoon until everything is evenly coated with dressing. Do a taste test and add more salt or a squeeze of lemon juice if needed.
  • Serve with lemon wedges and green salad leaves (optional).

Notes

  • Serves 2-3 as a side salad or light lunch when served with leafy greens.
  • Store in an airtight container in the fridge for up to 3 days.
  • An easy vegan cashew yogurt recipe.
ย 
Did you make this recipe?Please leave a comment below to help other people.

Hey, did you like this recipe? If so it would mean the world to me if you would please Pin this to your Pinterest boards or even share it on social media so others can find it too.

Iโ€™m off to make some tea.

Love raw food.

XOXO

Juliette

Easy Cashew Mayonnaise

February 10, 2021 by Juliette 17 Comments

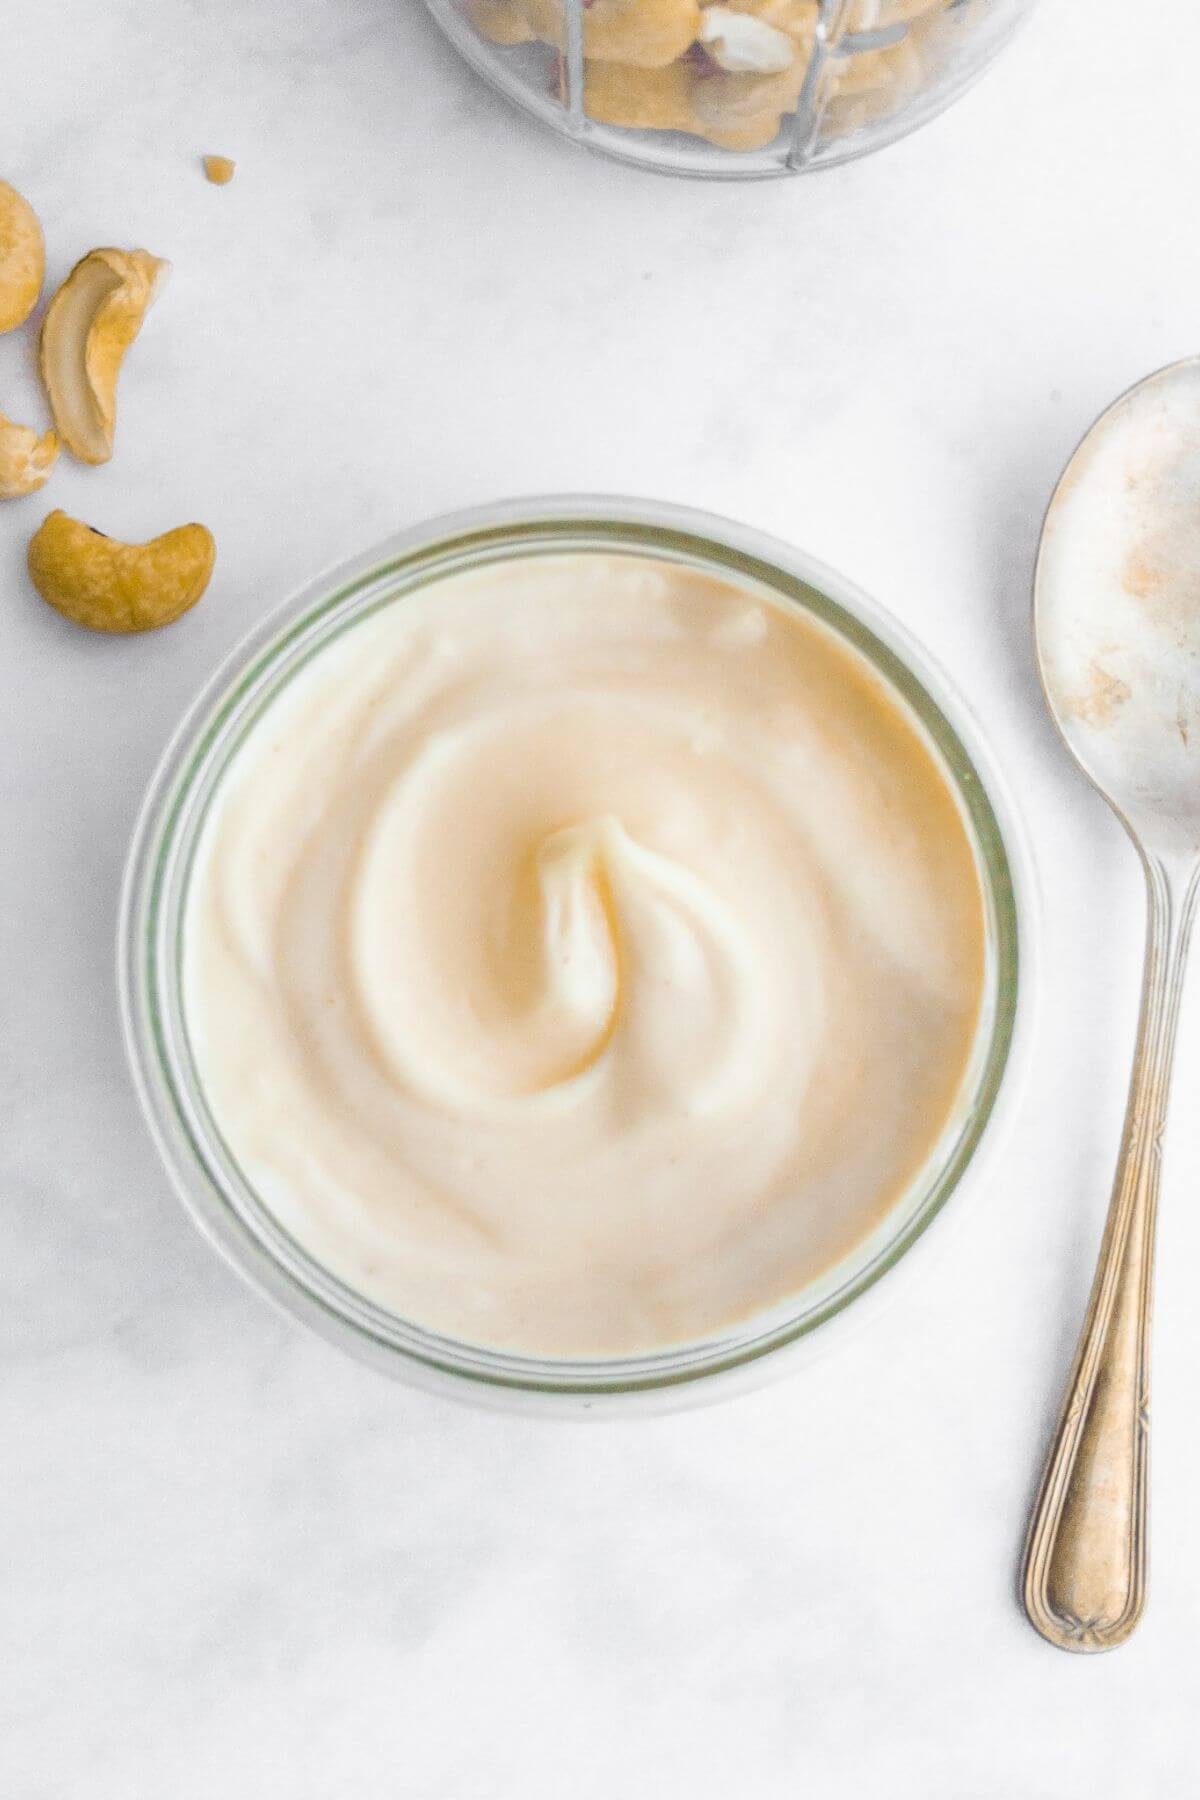
A glass dish filed with cashew mayonnaise.

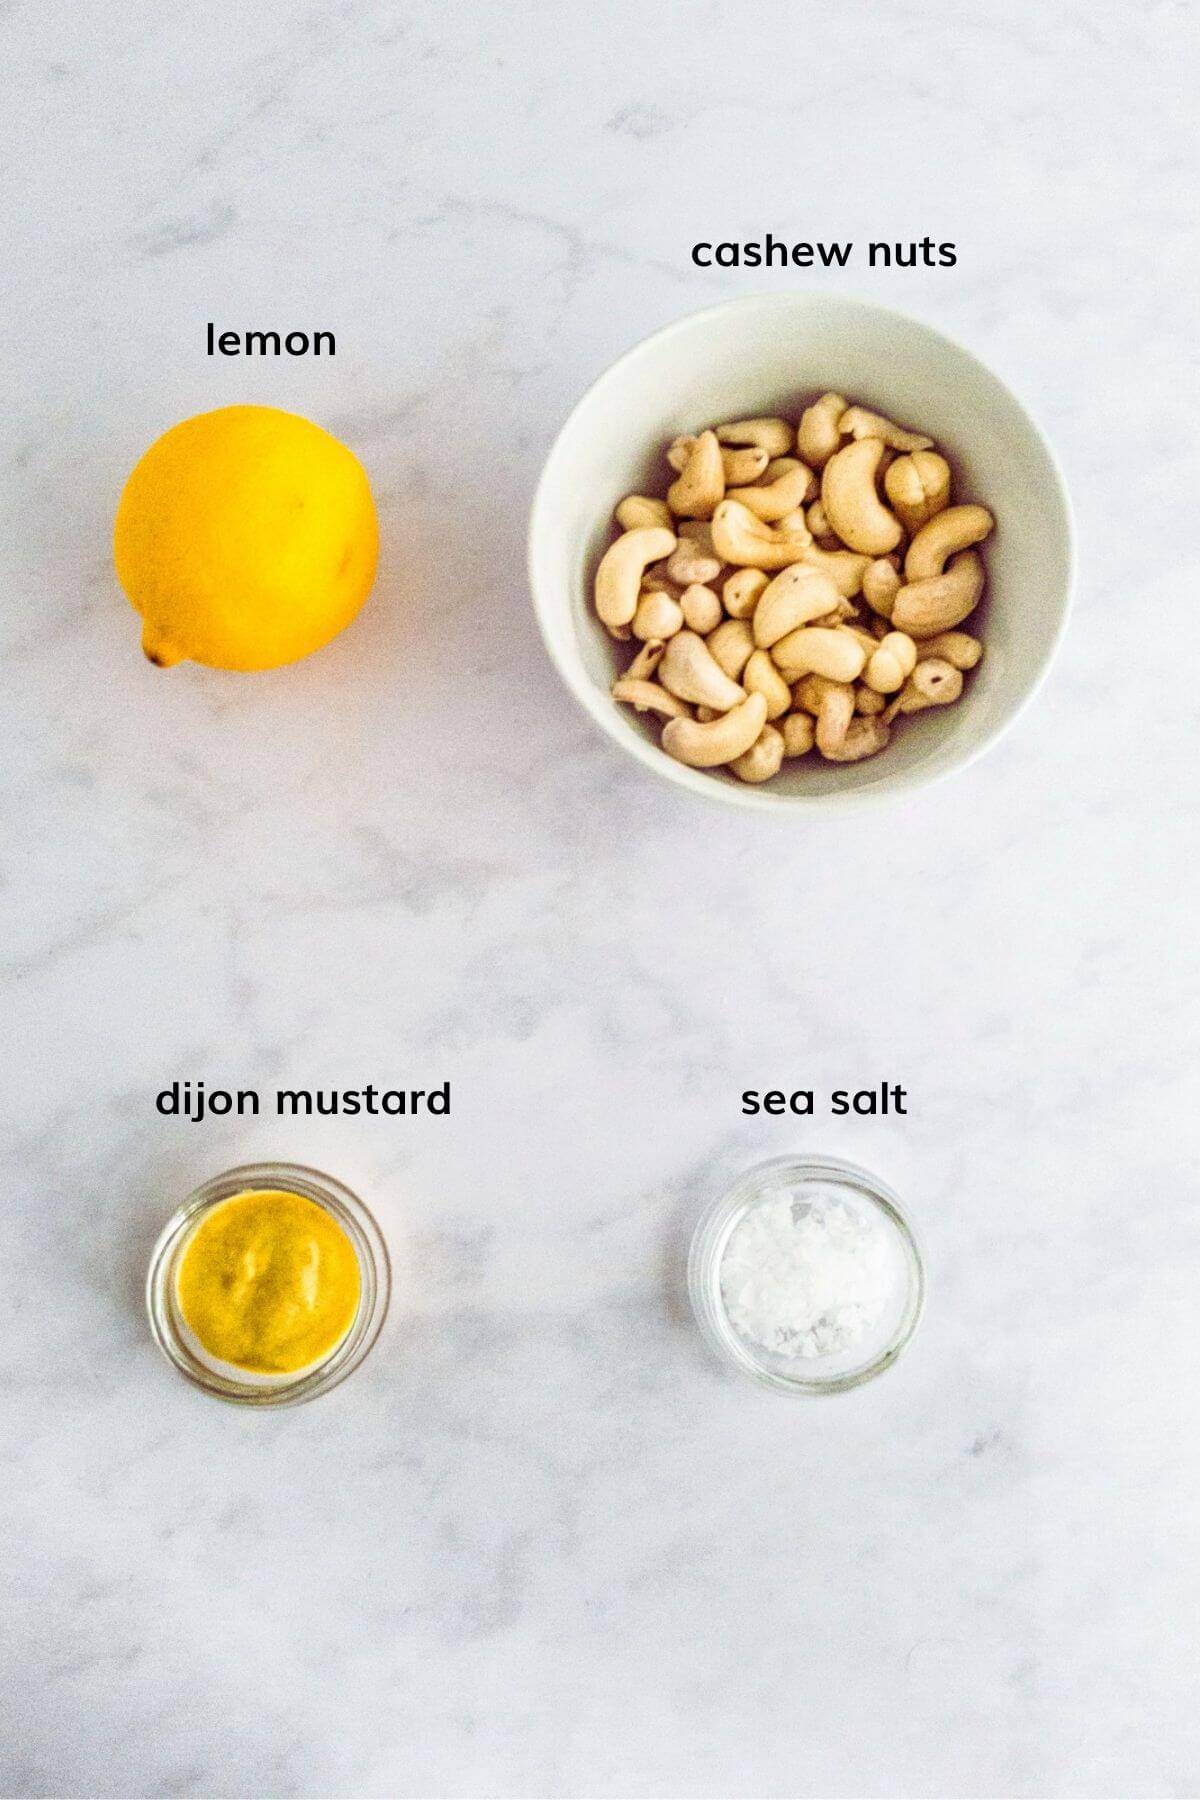
An easy to make vegan cashew mayo that's rich, tangy, creamy and delicious. Made with 4 ingredients.

Cashew mayonnaise in a small jar next to a spoon.

Once youโ€™ve made this vegan cashew mayo recipe, I kid you not, there will be no need to buy regular mayo from the store again because itโ€™s so easy to make your own!

This recipe is vegan, gluten-free, oil-free and made with whole food plant based ingredients. 

The base is created by soaking and blending nuts.

[feast_advanced_jump_to]

Ingredients and substitutions

Cashew nuts or macadamia nuts - using nuts replaces the need for using eggs, which means this is an egg-free mayonnaise recipe. ๐Ÿ™‚

Did you know that cashews are not actually raw? They are roasted and steamed before being shelled. Nevertheless, cashew nuts are widely used by many people in the raw foods community for dressings, dips, sauces, desserts and cheese.

For a truly raw vegan alternative try using soaked macadamia nuts instead.

Using raw macadamias will give you a similarly rich, creamy texture to cashew mayo when blended.

I use cashews here because theyโ€™re more easily available and less expensive than macadamia nuts tend to be. Plus this is what I had at the time.

Lemon juice - if you prefer you could swap this for raw apple cider vinegar. This will give a stronger tasting mayonnaise.

Dijon mustard - tangy, spicy and hot.

Sea salt - I use Cornish sea salt. Feel free to use the pink Himalayan kind if you prefer.

Recipe ingredients to make cashew mayonnaise.

What can you do with cashew mayo?

This recipe makes the most delicious alternative to traditional store-bought mayonnaise and is made with the freshest of ingredients.  

You can use this vegan cashew mayo as a delicious salad dressing, a spread or a dip for sliced vegetables by adding finely sliced fresh herbs, spices or garlic. 

Itโ€™s worth noting that when refrigerated this will actually thicken slightly. To thin it out, add a little water to it, one teaspoon at a time until you get the consistency you prefer.

How to soak nuts for this recipe

Place the nuts into a small bowl or jar and cover with water. Leave them overnight with a lid or a piece of paper towel over the top to keep them clean. Be sure to drain and rinse before using.

If youโ€™re short on time itโ€™s possible to soak the nuts in hot water for 3-4 hours instead. Please note though, this doesnโ€™t always produce the smoothest, creamiest consistency.

An exception might be if you're using a top of the range high-speed blender as they're famed for producing the creamiest raw dressings, smoothies and sauces.

Raw dips and dressings you may like.

Lemon herb vinaigrette

Peanut salad dressing

Lemon turmeric sprouted hummus

Pea and avocado smash

Are cashew nuts good for you?

I prefer this cashew mayonnaise recipe to some of the others you can make at home which might use blended tofu or aquafaba. The reason is that nuts are jam-packed full of nutrients. Notice too that thereโ€™s no oil.

Cashew nuts are a good source of protein, fibre and healthy fats. They're also a source of essential minerals such as calcium, iron, copper, zinc, magnesium, potassium as well as some vitamins.

๐Ÿ“– Recipe

A glass dish filed with cashew mayonnaise.

Vegan Cashew Mayonnaise

Juliette | Flourishing Kitchen
An easy to make vegan cashew mayo that's rich, creamy and delicious. Made with only 4 ingredients.
5 from 8 votes
Leave a review
Print Recipe Pin Recipe Save Recipe Saved Recipe
Prep Time :10 minutes mins
Soaking time :8 hours hrs
Total Time :8 hours hrs 10 minutes mins
Course: Condiment
Cuisine: United Kingdom
Servings :3

Equipment

  • blender
  • citrus juicer
  • jar or container with a lid for storing in the fridge
Prevent your screen from going dark

Ingredients
  

  • ยฝ cup (60g) cashew nuts or macadamia nuts, soaked overnight in water then rinsed and drained
  • ยผ cup (60ml) of water
  • 2 tablespoon freshly squeezed lemon juice
  • ยฝ teaspoon dijon mustard
  • a good pinch of sea salt

Instructions
 

  • Place all the ingredients into your blender and blend together until you have a vegan cashew mayo thatโ€™s beautifully smooth and creamy.
  • Taste test it and if it needs a little more zing, try adding a little more lemon juice or dijon mustard.
  • Decant into your jar or lidded container for use. Freshly made cashew mayo will keep in the fridge for up to 3 days

Notes

For the creamiest cashew mayo you'll need to soak the cashews or in advance (macadamia nuts if you want to a truly raw vegan recipe). I soak the nuts in water overnight.
This recipe makes approximately 120 ml of fresh vegan cashew mayonnaise. Its enough to fit into a little saved herbs and spices jar from the supermarket.
It will keep nicely for up to 3 days in the fridge.
To make a larger batch of cashew mayo, simply double or treble the amounts provided.
Did you make this recipe?Please leave a comment below to help other people.

Like this recipe?

Pin it to your favourite Pinterest food board

Iโ€™m off for some tea.

Love raw food.

XOXO

Juliette

Raw Buckwheat Breakfast with Apple & Raspberries

February 8, 2021 by Juliette 6 Comments

A breakfast cereal made with chopped apple, sultanas and fresh raspberries.

A healthy raw buckwheat breakfast made with wholefoods, topped with crisp and juicy diced apple and gorgeous raspberries. Serve with your favourite plant milk.

Buckwheat breakfast cereal.
[feast_advanced_jump_to]

Ingredients and substitutions

This raw buckwheat breakfast muesli is high in fibre, satiating and absolutely delicious! 

Raw, vegan, gluten-free and dairy-free. Itโ€™s also naturally sweet from the fruit so there's no real need for any added sugar. 

It is really simple to create your own vegan muesli with your favourite breakfast ingredients. I love to use raw buckwheat groats instead of oats. Theyโ€™re rich in nutrients and make a great alternative to many grains if youโ€™re into raw foods.

Make this raw buckwheat breakfast recipe your own by creating your own blend of delectable nuts, fruits and seeds. 

Nuts like pecans, hazelnuts, cashews or almonds. Or you could change the sultanas for another dried fruit like chopped dates, dried apricots or goji berries maybe. There are so many juicy, crispy, crunchy combinations you can create.

  • Apple - fresh, crunchy and hydrating.ย 
  • Sultanas - for added sweetness.ย 
  • Raspberries - use fresh or frozen.
  • Soaked raw buckwheat groatsย  - check the packet says theyโ€™re raw and soak them in water overnight before using.
  • Sunflower seeds - choose raw instead of roasted, without any added oils or flavours.ย 
  • Pumpkin seeds - pumpkin seeds are a terrific source of zinc and other minerals.
  • Flax seeds - are an excellent source of vegan omega-3 and protein with many health benefits.
  • Cinnamon - a sweet and warming spice that compliments sweet and savoury dishes. Especially yummy at breakfast!
Recipe ingredients labelled for raspberry buckwheat muesli.

Tips

Try to avoid the pre-milled varieties of seeds if you want to use the freshest ingredients. Itโ€™s easy to grind them yourself (just before serving) either using your blender or a coffee grinder. 

When youโ€™re out shopping for raw ingredients be sure to check the packaging. Buckwheat groats, for example come in two varieties, toasted and raw.

Toasted buckwheat is called Kasha and is a darker brown in colour than the raw version.

Can you eat raw buckwheat groats?

Yes, soaking the raw buckwheat groats overnight will soften them and make them much easier for our bodies to digest. Buckwheat groats can also be eaten sprouted. I prefer not to wait that long and use them soaked instead. They do make the water a gluey texture after soaking so be sure to rinse and drain them thoroughly before using.

Easy to meal prep?

Yes! If you like to meal prep then itโ€™s really easy to store your preferred breakfast seed and dried fruit mix in a mason jar, for use during the week.

By building up a small pantry of raw ingredients makes it so easy to create your own vegan muesli mix made with your favourite nuts, seeds and dried fruits. 

When you're using pre-soaked buckwheat in recipes remember to store the buckwheat groats separately from your seed mix. You'll need to soak the the groats in a bowl of water overnight then rinse and drain them thoroughly before using. 

The smaller seeds like flax seeds, poppy, sesame and chia seeds do like to fall to the bottom of jars, so remember to give them a little shake or stir before using.

Top your morning cereal with whatever plant milk you have, like my almond or hazelnut milk and then throw on whatever fresh seasonal fruit you like.

I find it simple to use measuring cups instead of scales to weigh everything.

  • ยฝ cup flax seeds
  • ยฝ cup sunflower seeds
  • ยฝ cup pumpkin seeds
  • ยฝ cup sultanas


More raw vegan breakfast ideas

If you love this recipe you may also love my Raw Buckwheat Porridge, or this easy blackberry parfait.

๐Ÿ“– Recipe

A breakfast cereal made with chopped apple, sultanas and fresh raspberries.

Raw buckwheat breakfast muesli with apple and raspberries

Juliette | Flourishing Kitchen
A healthy fresh buckwheat muesli recipe topped with crisp and juicy diced apple and fresh raspberries.
5 from 4 votes
Leave a review
Print Recipe Pin Recipe Save Recipe Saved Recipe
Prep Time :10 minutes mins
Total Time :10 minutes mins
Course: Breakfast
Cuisine: British
Servings :1

Equipment

  • A bowl.
  • Chopping board.
  • A paring knife
Prevent your screen from going dark

Ingredients
  

  • 1 green apple.
  • 1 handful fresh or frozen raspberries.
  • 3 tablespoon buckwheat groats,, pre soaked overnight then rinsed and drained.
  • 1 tablespoon pumpkin seeds.
  • 1 tablespoon flax seeds.
  • 1 tablespoon sunflower seeds.
  • 1 tablespoon sultanas.
  • a pinch of powdered cinnamon.

To serve.

  • plant milk or vegan yogurt of your choice.

Instructions
 

  • Rinse and drain the pre-soaked buckwheat then add to a bowl with the pumpkin, flax and sunflower seeds plus the sultanas.
  • Dice the apple and discard the apple core. Add the apple and raspberries to the bowl and top with a sprinkle of powdered cinnamon.
  • Serve topped with plant milk of your choice.
Did you make this recipe?Please leave a comment below to help other people.

Hey, did you like this recipe? If so it would mean the world to me if you would please Pin this to your Pinterest boards or even share it on social media so others can find it too.

Iโ€™m off for some tea.

Love raw food.

XOXO

Juliette

mum, dog owner, raw food enthusiast

Apple Spinach Smoothie

February 7, 2021 by Juliette 5 Comments

Two glasses of smoothie with lemon slices, hemp seeds, apple and spinach nearby.

A delicious and refreshing apple spinach smoothie made with everyday ingredients. With added hemp seed hearts for an extra creamy hit of protein and omega-3โ€™s.

Whizz up this delicious apple green smoothie in under 5 minutes. 

A small jar of green smoothie with some ingredients nearby; slices of apple, lemon, spinach leaves, fresh ginger and a pinch of hemp seeds.
[feast_advanced_jump_to]

This spinach apple banana smoothie is tangy and filling. Itโ€™s great for breakfast, a mid morning or afternoon snack. Itโ€™s also raw, vegan, gluten-free and dairy free with no added sugar. 

I find that spinach is the perfect leafy green to use in green smoothies as itโ€™s very mild tasting and blends easily with fruits and vegetables. Especially good if you donโ€™t like greens or are just starting out trying green smoothies.

This apple banana spinach smoothie is my absolute favourite smoothie with apples and spinach! I hope you love it as much as I do. ๐Ÿ™‚

What youโ€™ll need

A high-speed blender is perfect for whipping up smoothies and it doesnโ€™t need to be a super expensive one. If you have a food processor with an s-blade that will work too.

Youโ€™ll also need a paring knife to chop the ingredients and a chopping board.

Ingredients

Labelled recipe ingredients for an apple and spinach smoothie, all placed on a white background.
  • Apple - crisp, sweet and delicious. Use any apples. I love the bright green Granny Smith variety with their tangy, slightly sweet flavour. 
  • Hemp seed hearts - these will add a healthy vegan source of omega-3 and protein. Hemp seeds are full of health benefits. They also help to make this one smooth and creamy! ๐Ÿ™‚ 
  • Banana - naturally high in fibre, potassium and vitamin c. Bananas will help to make your smoothie creamy and filling too.
  • Lemon - gives this smoothie its refreshingly tangy, citrus taste. 
  • Spinach - a great source of vitamins K, A and C as well as containing calcium and iron.

Step by Step Instructions

One of the easiest, healthy raw food recipes you can make in the kitchen is a smoothie. Like I said, this one is made with simple, everyday ingredients.

This is my absolute favourite green smoothie and I can't wait to share it with you. Here are the step by step instructions:

A selection of chopped green smoothie ingredients on a white background, including spinach and apple.

Step 1. Chop ingredients

Chopped green smoothie ingredients have been added to a blender, including banana, apple, spinach and ginger.

Step 2. Add to a blender or food processor

Bright green and bubbly, freshly blended green smoothie sitting in the blender.

Step 3. Blend until smooth and creamy

Two glasses of bright green smoothie with recipe ingredients nearby: sliced apple, banana, spinach, lemon slices & hemp seeds.

Pour into a glass or two to serve

Substitutions

Itโ€™s easy to create variations of this green apple spinach smoothie by substituting ingredients, so it never gets boring. Here are some examples:

  1. Instead of spinach try using pak choi or rainbow chard. These are also light and mild tasting which makes them an easy choice for smoothies.
  2. Switch up the citrus flavour by swapping out the lemon with lime or orange.
  3. If youโ€™re not a fan of bananas, try using frozen cauliflower pieces instead. Frozen cauliflower is also mild tasting and adds a creamy texture to smoothies. 
  4. Chia seeds would make a great swap for the hemp seeds as they too are high in protein and omega-3โ€™s. Just 1 tablespoon will work. Remember that chia seeds also help to thicken the smoothie so you may want to thin the smoothie out a little at the end by adding some more water.
  5. Swap water for coconut water or plant milk.
  6. Instead of ginger try fennel.
  7. Do you like superfood powders like maca or spirulina? Try adding them for extra nutritional goodness.
  8. To sweeten this apple spinach smoothie further you might want to add a date. Dates add a whole host of natural goodness as a sweetener. Just remember to remove the pit before popping it into the blender with the rest of your ingredients. 

Storing

This spinach apple smoothie is best enjoyed straight away, or the same day, to benefit the most from the fresh raw ingredients.

If needed, it can be stored in the fridge for a few hours in a lidded container. The lemon juice will help to keep its beautiful bright green colour for a while.

This simple recipe is also great if you're a fan of weekly meal prep too! Just add your chopped ingredients to freezer bags in portion sizes, for use later as a frozen smoothie.

More raw vegan smoothie recipes.

Raspberry pear and buckwheat smoothie.

Mango pineapple smoothie.

Mango spinach smoothie.

Kiwi lime smoothie.

๐Ÿ“– Recipe

Two glasses of smoothie with lemon slices, hemp seeds, apple and spinach nearby.

Apple Spinach Smoothie

Juliette | Flourishing Kitchen
A delicious and refreshing apple spinach smoothie made with everyday ingredients. With added hemp seed hearts for an extra creamy hit of protein and omega-3โ€™s.
5 from 5 votes
Leave a review
Print Recipe Pin Recipe Save Recipe Saved Recipe
Prep Time :5 minutes mins
Total Time :5 minutes mins
Course: Breakfast, Drinks
Cuisine: British
Servings :1

Equipment

  • High speed blender.
  • Chopping board.
  • Paring knife.
Prevent your screen from going dark

Ingredients
  

  • 1 handful of fresh leaf spinach
  • 1 medium banana
  • 1 apple
  • ยฝ inch piece fresh ginger
  • juice of half a lemon
  • 3 tablespoon hemp seeds hearts
  • 1 cup (240ml) water

Instructions
 

  • Peel and slice the banana. Chop and deseed the apple discarding the core. Peel and finely chop the ginger. The ingredients should be small enough that your blender can manage them easily.
  • Place the chopped ingredients into your blender together with the spinach, hemp seeds and lemon juice. Add water then blend everything together until it becomes beautifully smooth and creamy.
  • Pour your into a large glass to serve. Add more water for a thinner smoothie.

Notes

Instead of using a knife you can peel ginger using a teaspoon.ย 
For a thinner smoothie add more water to your preference.
Did you make this recipe?Please leave a comment below to help other people.

Hey, did you like this recipe? If so it would mean the world to me if you would please Pin this to your Pinterest boards or even share it on social media so others can find it too.

Iโ€™m off for some tea.

Love raw food.

XOXO

Juliette

mum, dog owner, raw food enthusiast

Buckwheat Tabbouleh

January 26, 2021 by Juliette Leave a Comment

Buckwheat tabbouleh salad made with soaked raw buckwheat groats, fresh parsley, mint, onion, and tomato, then dressed with lemon juice, olive oil and salt.

This gorgeous tabbouleh recipe uses soaked buckwheat groats instead of bulgur wheat, making it the perfect gluten-free alternative to a classic dish. 

You really canโ€™t go wrong with this salad, itโ€™s an absolute winner! It makes enough for 4 people to enjoy a good serving full and is easy to double or triple if youโ€™re making it to share with friends.

A bowl of bright green chopped herbs salad and buckwheat decorated with two lemon slices.

Itโ€™s light and delicious. The zesty lemon juice lifts the flavours.

Makes a beautiful dish for lunch or dinner, or as a Spring or Summer side dish warm sunny days.

[feast_advanced_jump_to]

What is tabbouleh?

Tabbouleh (also spelled tabouleh, tabbouli and tabouli) is a Middle Eastern salad with fresh parsley being the star of the show. 

Traditionally the ingredients for this salad include soaked bulgar wheat plus very finely chopped mint, parsley, tomato and sweet onion or spring onion.

It's then dressed with olive oil, lemon juice and salt.  

Remember that itโ€™s a parsley salad, so itโ€™s all about the parsley. Itโ€™s very moorish, pretty inexpensive to make as well as quick and easy to do.

You can also make other versions of vegan tabbouleh by replacing the bulgur wheat with sprouted quinoa, sprouted lentils, hemp seeds or raw cauliflower rice.

What to eat with tabbouleh?

This raw tabbouleh is perfect for lunches and dinners served on its own, with pitta or scooped into lettuce leaves like cos, romaine or little gem.

I love this served with hummus, falafel, olives, and Israeli salad.

Buckwheat Tabbouleh is great for sharing. It works well in packed lunches, buffets and picnics with a mezze.

Itโ€™s best served slightly chilled.

Suitable for meal prep?

Yes, this tabbouleh recipe is excellent for meal prep!

You can easily make this in advance and keep it in the fridge for up to 3 days.

Suppose youโ€™re looking for more buckwheat recipes. In that case, you may love this apple and raspberry buckwheat breakfast, raw buckwheat porridge or this blackberry parfait.

Ingredients.

Parsley - gives a mild, slightly peppery flavour. Itโ€™s the central ingredient, so use the freshest parsley you can find.

Mint leaves- fresh and uplifting.

Buckwheat Groats - a slightly nutty flavour, and gluten free.

Tomatoes - many recipes avoid using the insides of tomatoes in tabbouleh, but I love their juiciness. You decide.

Lemon - adds that much-loved fresh citrus tartness.

Extra virgin olive oil - if you prefer, you can omit the oil altogether. Swap it for a little blended celery or courgette instead. They both have a mild flavour and will work well in this dish.

Fresh tomatoes, lemon, mint, parsley, scallions, olive oil, salt and buckwheat siting on a chopping board.

Recipe Steps

There are only a few steps to making this recipe. You'll want to mix up the dressing first. Then follow these two further steps and it's ready.

Two photos: pre-soaked buckwheat in a bowl then mixed with salad dressing and chopped tomatoes.

Step 1. Add chopped tomatoes and half the dressing to the pre-soaked buckwheat.

Two photos: chopped herbs in a bowl then the herbs topped with mixed buckwheat and chopped tomatoes on top.

Step 2. Finely chop the herbs and onion, then top with the tomato mixture and toss lightly until evenly mixed.

Close up of a bowl filled with finely chopped parsley salad, with buckwheat groats and tomatoes.

How to prepare raw buckwheat.

When shopping for buckwheat, be sure to buy the raw kind, not the toasted variety called kasha.

Soak the groats in water for a few hours (4-6 hours is good) to soften them.

I soak them overnight because that's easy. Please donโ€™t eat them without soaking them or cooking them first.ย 

Soaking the groats will make the water gooey, so rinse them thoroughly in a sieve and drain them before using. 

You can use sprouted buckwheat if you prefer. However, Iโ€™d rather not wait that long, so I use soaked buckwheat instead.

If you fancy having a go at sprouting, follow the steps in this simple Sprouting Buckwheat tutorial.

Of course, if you want to cook them, follow the packet instructions, then rinse and drain them really well before use.

TIP:

Youโ€™ll want the soaked buckwheat to be quite dry before using. I tip the groats onto a clean kitchen towel and pat them gently to do this. Now they can soak up some of the flavours from the tomatoes whilst you finely chop the rest of the ingredients.

Chopped fresh parsley salad with mint leaves and buckwheat next to two silver forks.

Other raw vegan salads you may like:

  • peach and watercress salad with chickpeas
  • watermelon chickpea salad
  • asparagus pea shoot salad
  • cauliflower couscous orange fennel salad

FAQ's

Is tabbouleh gluten-free?

Traditional tabbouleh is made with bulgar wheat, which isnโ€™t gluten-free. Instead, you could make a gluten-free tabbouleh perhaps using buckwheat, quinoa, cauliflower rice or lentils.

What is buckwheat tabbouleh?

Itโ€™s a tabbouleh salad made using buckwheat groats rather than the traditional bulgur wheat. Buckwheat can be an excellent alternative to bulgur wheat and itโ€™s gluten-free.

๐Ÿ“– Recipe

Buckwheat Tabbouleh

Juliette | Flourishing Kitchen
Buckwheat tabbouleh salad made with soaked raw buckwheat groats, fresh parsley, mint, onion, and tomato, then dressed with lemon juice, olive oil and salt.
Leave a review
Print Recipe Pin Recipe Save Recipe Saved Recipe
Prep Time :15 minutes mins
Cook Time :0 minutes mins
Pre-Soaking Buckwheat :8 hours hrs
Total Time :8 hours hrs 15 minutes mins
Course: Salad, Side Dish
Cuisine: Middle Eastern, Raw Vegan
Servings :4

Equipment

  • Knife.
  • Chopping board.
  • Kitchen towel.
  • Small bowl for the dressing.
  • Bowl for the salad.
Prevent your screen from going dark

Ingredients
  

  • 1 cup (170g) pre-soaked buckwheat
  • 3 cup (90g) fresh parsley, a big bunch
  • handful fresh mint , plus extra to garnish
  • 3 medium tomatoes
  • 4 spring onions

Dressing.

  • 3 tablespoon extra virgin olive oil
  • ยฝ a lemon, juiced
  • ยผ teaspoon salt

Instructions
 

  • Start by preparing the dressing. Mix the juice of half a lemon with extra virgin olive oil and salt in a small bowl using a whisk or a fork.
  • For the salad: Finely dice the tomatoes and add them to a small bowl with the buckwheat and half the salad dressing. Stir to mix evenly, then place to one side while you chop the herbs.
  • Finely chop the parsley, fresh mint and spring onions. Add them to a big bowl and toss together lightly. Pour over the buckwheat-tomato mixture a little at a time, until evenly combined.
  • Lastly, do a taste test. Adjust the salad with some seasoning and a little more salad dressing, if needed. Store in the fridge (covered) until a few minutes before serving.

Notes

  • Cover and store buckwheat tabbouleh in a suitable container in the fridge for up to 3 days.ย 
  • Use a larger prep knife instead of a small paring knife, as there is lots of slicing and chopping.
  • After soaking the buckwheat, rinse and drain the thoroughly until the water runs clear. Then gently dry the pre-soaked groats with a kitchen towel, being careful not to break them. I find they mush very easily.
  • Use no more than half the dressing initially to keep the salad light in texture. You can always add more before serving.
  • Any leftover salad dressing can be kept in a lidded jar in the fridge for up to 5 days.
Did you make this recipe?Please leave a comment below to help other people.

Food safety

The UK Food Standards Agency recommends people in vulnerable groups always cook any sprouts until steaming hot all the way through before eating them.

This is because sprouts sometimes contain bacteria, which some people may be susceptible to. Vulnerable groups include the elderly, young children, those with a weakened immune system, and pregnant women.

Never eat sprouts or microgreens that look or smell bad or weird. If you're unsure, then throw them out and start again.

Not all seeds or beans are suitable for sprouting or eating raw. Please be sure to check first.

Check the FSA website for more details.

Hey, did you like this recipe? If so it would mean the world to me if you would please Pin this to your Pinterest boards or even share it on social media so others can find it too.

Iโ€™m off for some tea.

Love raw food.

XOXO

Juliette

mum, dog owner, raw food enthusiast

Homemade Muesli with Orange & Pomegranate

January 25, 2021 by Juliette Leave a Comment

Homemade muesli with satsuma, banana slices and pomegranate seeds.

A delicious, easy homemade muesli recipe with orange, pomegranate and pumpkin seeds. Ready in 5 minutes.

Rolled oats topped with pumpkin and pomegranate seeds, sliced banana and satsuma segments.
[feast_advanced_jump_to]

Why make this recipe?

This delicious recipe is full of natural wholefoods and easy to make. Itโ€™s nut-free, oil-free and refined sugar-free. If you use certified gluten-free oats it can also be a great gluten-free breakfast.

I like to use orange, apple and banana in my recipes because theyโ€™re readily available and affordable.

Rather than make muesli with lots of different nuts, seeds and dried fruits, I prefer to use a few select ingredients and then change them up each season so that I never get bored.

I also find that by using fewer ingredients it's helpful to my digestion as there's less work for it to do.

Labelled recipe ingredients for orange and pomegranate muesli on a white background.

Whatโ€™s in this recipe?

Homemade Muesli Ingredients

Oats - I like to use rolled oats that have been certified gluten-free. Rolled oats are not raw. They will have been lightly steamed and/or roasted before rolling.

If you prefer to use steel cut oats please remember to soak them overnight before using in muesli as this will soften them so theyโ€™re easier for your body to digest.

A good raw swap for oats here is to use soaked buckwheat groats or sprouted quinoa. 

Pumpkin Seeds - raw, un-roasted pumpkin seeds (also known as pepitas) are large, flat and dark green in colour. They're rich in magnesium and zinc and high in protein and fibre. Sunflower seeds make a good alternative if you prefer those.

Flax Seeds - a good source of omega-3 minerals and fibre. This is an easy way to include flax seeds in our diets. For better absorption, I like to grind them in my blender just before using. An alternative would be sesame seeds.

Orange - adding citrus fruit like orange, satsuma or clementine will turn your muesli into a juicy, mouth-watering experience. 

Banana - use ripe bananas which have speckled brown skins. The riper the banana is, the sweeter it will be. Bananas are both filling and sustaining which, in my mind, makes them great to eat any time of the day.

Pomegranate Arils - add vibrant pink juicy pops of sweet and slightly tart flavour. Pomegranates are full of vitamins, minerals and antioxidants. I just love pomegranate recipes.

How to make a bigger batch for meal prep.

If you like to meal prep and prefer to make a bigger batch of muesli to enjoy each week, then you can store homemade muesli in mason jars and omit the fruit until itโ€™s time to serve.

A good ratio I find is 1 cup of oats to a quarter cup of mixed seeds. 

  • 1 cup rolled oats
  • ยผ mixed seeds

    or

  • 2 cups rolled oats
  • ยฝ cup mixed seeds

    or

  • 4 cups rolled oats 
  • 1 cup mixed seeds

For other breakfast ideas check out the following recipes:

  • Raspberry buckwheat breakfast smoothie
  • Orange and pomegranate muesli bowl
  • Red berry chia pudding
  • Strawberry coconut chia pudding
  • Blueberry squash smoothie bowl
  • Peach Melba Overnight Oats

๐Ÿ“– Recipe

Homemade muesli with satsuma, banana slices and pomegranate seeds.

Homemade muesli with orange & pomegranate

Juliette | Flourishing Kitchen
A quick and easy homemade muesli recipe with orange, pomegranate and pumpkin seeds.
Leave a review
Print Recipe Save Recipe Saved Recipe
Prep Time :5 minutes mins
Total Time :5 minutes mins
Course: Breakfast
Cuisine: British
Servings :2

Equipment

  • A bowl.
  • Chopping board.
  • A paring knife
Prevent your screen from going dark

Ingredients
  

  • 1 clementine, satsuma or mandarin orange.
  • 1 large banana.
  • 4 tablespoon gluten-free rolled oats., not raw
  • 2 tablespoon pomegranate seeds.
  • 1 tablespoon pumpkin seeds.
  • 1 tablespoon flax seeds.

To serve.

  • your favourite plant milk.

Instructions
 

  • Place the dried seeds and rolled oats into a bowl and lightly mix.
  • Peel and slice the orange and banana into bite size pieces then add to the bowl.
  • Sprinkle over the pomegranate seeds and serve with your choice of plant milk or dairy-free yogurt.

Notes

To soften the oats and seeds a little, let your muesli sit in the plant milk for a few minutes before eating.
Did you make this recipe?Please leave a comment below to help other people.

Hey, did you like this recipe? If so it would mean the world to me if you would please Pin this to your Pinterest boards or even share it on social media so others can find it too.

Iโ€™m off for some tea.

Love raw food.

XOXO

Juliette

Mango Spinach Smoothie

January 18, 2021 by Juliette Leave a Comment

A glass of green smoothie.

A deliciously sweet and tropical mango spinach green smoothie. Ready in 5 minutes. Nutrient rich and easy to make. Perfect for breakfast, at lunch or as an afternoon snack.

A bright green smoothie topped with hemp seeds and a straw.
[feast_advanced_jump_to]

Why make this recipe

This green smoothie recipe is full of natural sweetness and easy to make with only 3 ingredients, not including the water, which is my liquid of choice.

This smoothie recipe is raw, vegan, dairy-free, gluten-free and refined sugar-free. Hemp seeds will add protein, omega-3โ€™s and add to itโ€™s creamy texture.

Green smoothies are known for their nutrient-rich ingredients. I use spinach in this recipe because spinach is light and virtually tasteless when you blend it with fruit. This green smoothie is perfect when craving something sweet and healthy to drink. 

Green smoothie recipe ingredients labelled and on a white background.

How to tell if your mango is ripe

To know if a mango is ripe enough to eat, when you lightly squeeze it there will be some give. 

If a mango feels hard all-round, or even on one side, it won't be ripe. Unripened mangoes will not have the tropical sweet and juicy taste we all love.

If mangoes are very soft or squishy when you squeeze them, theyโ€™ll be overripe. 

Are spinach smoothies healthy?

Including greens like spinach in your smoothies can be really healthy and itโ€™s a great way to get in more nutrients. I find leafy greens to be very grounding and balancing. 

Not only does spinach provide you with vitamins A, C and K, it also contains folate, dietary fibre and minerals iron, calcium and magnesium.

I like to add 2 cups full of spinach to this smoothie as it whips down to nothing very quickly.

Other easy raw smoothies you may like

  • Kiwi lime smoothie
  • Mango pineapple smoothie
  • Raspberry, pear and chia seed smoothie
  • Apple, spinach smoothie

๐Ÿ“– Recipe

A glass of green smoothie.

Mango spinach smoothie

Juliette | Flourishing Kitchen
A deliciously sweet and tropical mango spinach green smoothie. Nutrient rich and easy to make.
Leave a review
Print Recipe Pin Recipe Save Recipe Saved Recipe
Prep Time :5 minutes mins
Total Time :5 minutes mins
Course: Breakfast, Drinks
Cuisine: Vegan
Servings :1

Equipment

  • Small sprinkle of hemp seed hearts to top.
  • You will need
  • High speed blender.
  • 1 serving glass.
Prevent your screen from going dark

Ingredients
  

  • 1 cup chopped mango, or 1 mango cheek, skin and stone removed if fresh.
  • 1 cup or a handful of fresh leaf spinach.
  • 1 chopped banana.
  • 1 cup (240ml) water.
  • 2 tablespoon hemp seed hearts.

Instructions
 

  • Place the ingredients into your blender and blend until smooth.
  • Pour into a glass and sprinkle the top with a pinch of hemp seeds for decoration before serving. Sip and enjoy!

Notes

Add more water to thin the smoothie out if needed.
Did you make this recipe?Please leave a comment below to help other people.

Hey, did you like this recipe? If so it would mean the world to me if you would please Pin this to your Pinterest boards or even share it on social media so others can find it too.

Love raw food.

XOXO

Juliette

mum, dog owner, raw food enthusiast

Mango Pineapple Smoothie

January 14, 2021 by Juliette 2 Comments

A glass of mango smoothie topped with hemp seeds.

This naturally sweet, juicy mango pineapple smoothie is ready in 5 minutes. Tropical fruits are blended with coconut water and a squeeze of lime for a zingy finish.

Hemp seed hearts add creaminess and protein, as well as omega-3's for a beautifully thick, breakfast smoothie or snack.

Mango pineapple smoothie.

This is an absolute winner with everyone in our household! 

I get super excited about this smoothie because it always makes me smile, at any time of the year. 

See how easy it is below, and let's make this.

[feast_advanced_jump_to]

Ingredients you'll need

This simple mango pineapple smoothie is absolutely gorgeous and a total joy to drink! It's also gluten-free, dairy-free and refined sugar-free.

Labelled mango pinapple smoothie ingredients on a white surface.

Check out the recipe Ingredients below:

  1. Mango - creamy, sweet and aromatic
  2. Pineapple - bright, uplifting, tangy sweetness
  3. Hemp seeds - add creaminess, omega-3's and also thickens smoothies
  4. Coconut water for its fantastic flavour and all-round goodness
  5. Lime - just a little squeeze of lime brightens and balances the flavours and adds some citrus zing!

The full recipe card below provides exact quantities. 

Jump to the Recipe Card

Step-by-step instructions with images

Follow the step-by-step instructions below, and visit the recipe card for exact quantities. This recipe is enough to make two small or one large smoothie.

Tropical fruit and hemp seeds in a blender.

Step 1 - Add diced mango, pineapple, banana, shelled hemp seeds and a squeeze of lime to a high-speed blender and top with coconut water.

Smooth and creamy pale yellow liquid in a blender.

Step 2 - Blend it all together until it's smooth and creamy throughout.

Two glasses filled with pale yellow drink and topped with hemp seeds. A few pieces of tropical fruit nearby.

Step 3 - Pour into glasses to serve.

Substitutions and variations

If you love to swap things up a little with your smoothies, check out the suggestions below:

  • Flax seeds and chia seeds are a source of healthy vegan protein and omega-3s and make a great swap for hemp seeds without altering this recipe's flavour.
  • Plant milk - Swap the coconut water out with almond milk, oat milk or coconut milk instead.
  • Orange - Using the freshly squeezed juice of half a small orange makes a fabulous swap for lime zest! You should slightly reduce the amount of liquid you add to the blender.
  • Yogurt - For added tummy-loving goodness, blend in some vegan plain yogurt or make your own cashew yogurt.
  • Oats - Add a couple of tablespoons of gluten-free rolled oats or soaked raw buckwheat groats for a gorgeously thick and satiating breakfast smoothie.

Rolled oats are not considered raw unless specified on the packaging. I like to use organic, gluten-free rolled oats instead of instant porridge oats.

Two glass jars filled with pale yellow coloured drink topped with hemp seeds. Diced pineapple and half a lime by the jars.

Leftovers and storing

This tropical mango and pineapple smoothie is best served immediately or kept in a suitable container in the fridge for 2-3 days.

You may need to give it a stir before drinking if some of the ingredients have seperated during this time.

Freeze any leftovers to save waste and keep your smoothie mixture colourful and nutritious.

Top tips

  1. For a thicker, ice cold smoothie use frozen fruits. I recommend leaving frozen fruits to stand for a few minutes before blending so that they soften a little. You may need to add in more liquid when blending to help things move.
  2. Another great way to thicken smoothies and make them more satiating is to add two tablespoons of rolled oats or soaked raw buckwheat groats. Soak the buckwheat groats for twenty minutes. Rinse and drain well before addding them to the blender with the rest of the ingredients.

I hope that I have answered any questions you may have about this mango pineapple smoothie recipe. I'd love to know what you think if you make it.

If you have any questions, please let me know. Please leave a comment below, or you can find me on Facebook, Instagram, or Pinterest.

F.A.Q's

How can I thicken a smoothie without yogurt or banana?

Add a couple of tablespoons of shelled hemp or flax seeds to thicken, or try rolled oats instead.

How to make the best mango pineapple smoothie

For the best-tasting mango pineapple smoothie, use the freshest ripe fruits you can find and add enough coconut water or plant-based milk to blend until creamy and smooth throughout.

Is pineapple and mango anti-inflammatory?

Studies show that the phytochemicals in mango and bromelain in pineapple have an anti-inflamatory effect on the body.

Related

If you're looking for delicious raw vegan drinks you might try these:

  • Two glasses of smoothie with lemon slices, hemp seeds, apple and spinach nearby.
    Apple Spinach Smoothie
    Cook Time5 Minutes
  • 2 small bottles of milk with paper straws sitting on a plate with some raw hazelnuts.
    Hazelnut Milk Recipe
    Cook Time10 Minutes
  • A glass of green smoothie.
    Mango Spinach Smoothie
    Cook Time5 Minutes
  • A glass of almond milk next to a few whole almonds.
    How To Make Raw Almond Milk
    Cook Time10 Minutes

Pairing

Some of my favourite dishes to go with this mango pineapple smoothie:

  • A bowl of porridge topped with raspberries, sliced pear and sprinkled with flaked almonds and mint leaves.
    Raw Buckwheat Porridge
  • Three blackberry parfaits topped with fresh mint and daisies.
    Blackberry Parfait
  • A breakfast bowl with soaked oats, milk and fresh fruits topped with hazelnuts.
    Peach Melba Overnight Oats
  • Chia pudding topped with strawberries and dessicated coconut.
    Strawberry and coconut chia pudding.

๐Ÿ“– Recipe

A glass filled with mango pineapple smoothie topped with hemp seeds.

Mango Pineapple Smoothie (vegan)

Juliette | Flourishing Kitchen
This sweet & juicy mango pineapple smoothie is ready in 5 minutes. Tropical fruits blended with coconut water and a squeeze of lime for a zingy finish. Add hemp seed hearts for omega-3's and a beautifully thick and creamy morning drink.
5 from 1 vote
Leave a review
Print Recipe Pin Recipe Save Recipe Saved Recipe
Prep Time :5 minutes mins
Cook Time :0 minutes mins
Total Time :5 minutes mins
Course: Breakfast, Drinks
Cuisine: Vegan
Servings :2

Equipment

  • High speed blender.
  • Paring knife.
Prevent your screen from going dark

Ingredients
  

  • 1 cup (240ml) coconut water
  • 1 cup (165g) diced mango.
  • 1 cup (165g) chopped pineapple.
  • ยฝ banana.
  • 2 tablespoon shelled hemp seeds.
  • ยฝ lime, juice of

Toppings (optional)

  • a pinch of shelled hemp seeds

Instructions
 

  • Step 1. Place the mango, pineapple, coconut water, and hemp seeds into the blender. Using a paring knife, slice the lime into two and with your hands squeeze the juice of half a lime into the blender.
  • Step 2. Blend the ingredients together until smooth and creamy throughout.
  • Step 3. Pour into glasses and sprinkle with a pinch of hemp seeds before serving.

Notes

This smoothie makes two small drinks or one medium size drink.
Ensure the chopped pieces of fruit are small enough for your blender to handle.
Variations
  1. To save time buy bags of mixed mango and pineappleย  from the frozen section of the supermarket for use in your smoothies.
  2. For a thicker, more satiating mango pineapple smoothie, consider adding in 1-2 tablespoons of gluten free rolled oats or soaked raw buckwheat groats before blending.
  3. Rolled oatsย are not considered raw unless specified on the packaging.
  4. Yogurtย - For added tummy-loving goodness, blend in some vegan plain yogurt orย make your own cashew yogurt.
  5. Plant milkย - Swap the coconut waterย out withย almond milk,ย oatย milkย or coconut milk instead.
  6. Orangeย - Using the freshly squeezed juice of half a small orange makes a fabulous swap for lime zest! You should slightly reduce the amount of liquid you add to the blender.
Leftovers and storing.
Best when served immediately or kept covered in a suitable container in the fridge for 2-3 days. If the ingredients seperate just give the drink a stir with a spoon before serving.
Freeze any leftovers to save waste and keep your smoothie mixture colourful and nutritious for another time.
Did you make this recipe?Please leave a comment below to help other people.

Kiwi Lime Smoothie

December 18, 2020 by Juliette Leave a Comment

A glass of green smoothie topped with hemp seeds.

A quick and easy kiwi lime green smoothie is refreshingly sweet and tangy. This is a gorgeous vegan green smoothie to try. Made with kiwi fruit, spinach, banana and lime.

A glass of bright green kiwi lime smoothie with a paper straw and hemp seeds.
[feast_advanced_jump_to]

Why make this recipe.

This recipe is full of natural whole-foods. Itโ€™s raw, vegan, dairy-free, gluten-free and refined sugar-free. 

I actually really love green smoothies because theyโ€™re a brilliantly easy way to get more leafy greens into your diet.

Thereโ€™s no added sugar in this recipe, only the naturally occurring sugars from the kiwi fruit and banana.

Spinach has a mild taste and mixes easily with fruits in smoothies. In fact, you canโ€™t really taste the spinach so if youโ€™re feeling iffy about drinking greens, give it a shot. You might be surprised.

Mixing greens with fruit helps your body to absorb its nutrients.

Labelled Kiwi lime smoothie recipe ingredients.

What youโ€™ll need.

To make this gorgeous kiwi lime green smoothie recipe you'll need:

Kiwi - full of nutrients including vitamin C, E and K as well as minerals including zinc, calcium, iron, potassium and magnesium.

Spinach - a nutrient rich and a great source of vitamin K as well as vitamins A, C and minerals iron, magnesium and potassium.

Bananas - a good source of vitamin c, potassium and magnesium. 

Blender: A high-speed blender will make the creamiest smoothie. If you donโ€™t have one, you can use a regular mixer (with the s-blade).The result wonโ€™t be as smooth, but it will still taste delicious! 

If you have a handheld blender for soups and the like, this is also a great alternative.

Paring Knife: I like to use a small paring knife for chopping fruit so that itโ€™s less work for my blender to do its job.

Glasses for serving.

Other fruit smoothies you may like.

  • raspberry pear smoothie
  • pineapple mango smoothie

How to make this raw smoothie.

Did you know? You can eat the skin on kiwi fruit. If youโ€™d like to keep the skin on then do, just wash them like you would do any other fruit before blending.

Add everything to the blender and blend until completely smooth and creamy. 

Pour into glasses to serve. Alternatively, pour into a lidded container and refrigerate until ready to drink.

For a gorgeously cold smoothie use frozen banana and kiwi instead.

๐Ÿ“– Recipe

A glass of green smoothie topped with hemp seeds.

Kiwi lime green smoothie

Juliette | Flourishing Kitchen
A quick and easy kiwi lime green smoothie that's refreshingly sweet and tangy. This is a gorgeous vegan green smoothie to try. Made with kiwi fruit, spinach, banana and freshly squeezed lime.
Leave a review
Print Recipe Save Recipe Saved Recipe
Prep Time :5 minutes mins
Total Time :5 minutes mins
Course: Breakfast, Drinks
Cuisine: Vegan
Servings :2

Equipment

  • High speed blender.
  • Paring knife.
  • Chopping board.
  • 2 serving glasses.
Prevent your screen from going dark

Ingredients
  

  • 1 kiwi fruit, roughly chopped.
  • 1 cup (30g) fresh spinach.
  • 1 cup (240ml) water.
  • 1 ripe banana, roughly chopped.
  • a squeeze of lime.
  • 2 tablespoon hemp seed hearts.

Toppings (optional)

  • 2 thin slices of kiwi fruit.
  • a sprinkle of hemp seeds

Instructions
 

  • Slice the fruit into small enough pieces for your blender to manage. Place the ingredients into your blender, add water and blend until smooth.
  • Pour your smoothies into 2 glasses. Decorate the tops with a slice of kiwi and a light sprinkle of hemps seeds before serving.
Did you make this recipe?Please leave a comment below to help other people.

Hey, did you like this recipe? If so it would mean the world to me if you would please Pin this to your Pinterest boards or even share it on social media so others can find it too.

Iโ€™m off for some tea.

Love raw food.

XOXO

Juliette

mum, dog owner, raw food enthusiast

Raspberry Pear and Buckwheat Smoothie

December 15, 2020 by Juliette Leave a Comment

A glass of red smoothie sprinkled with buckwheat and a fresh raspberry.

This raspberry smoothie is gorgeously pink and sweetened with pear. Chia seeds and buckwheat add protein and make it beautifully thick and creamy.

A glass of raspberry smoothie topped with soaked buckwheat groats.
[feast_advanced_jump_to]

Why make this recipe?

I really love using the seasons as a guide for what to eat. I chose to use later season raspberries here with soft, sweet pears for this pretty autumn smoothie. 

In the UK I find our autumn raspberries are often sweeter than in the Summer. This recipe's natural sweetness means I don't need to add any other form of sugar.

If youโ€™re looking for a raspberry smoothie without a banana this is the one to try. This bright and colourful smoothie is raw, vegan, gluten-free, dairy-free and refined sugar-free.

Are berry smoothies healthy?

Berries are really healthy foods and making smoothies with them is a great way to enjoy them. Berries are full of nutrients like vitamin C, calcium, antioxidants and fibre.

Both pears and berries, including raspberries, contain polyphenols which have an anti-inflammatory effect.

To help keep my berry smoothies healthy I tend to use water as my chosen liquid rather than juice or dairy-free milk. This allows the natural flavours of the berries to shine and keeps my smoothies simple. I like to save the dairy-free milks for making milkshakes.

Raspberry buckwheat smoothie ingredients on a white background.

What makes this recipe high in protein?

Chia seeds: Chia seeds are a good quality source of vegan protein as well as plant-based omega-3 fatty acids. Theyโ€™re used in this recipe as a thickener instead of banana.

Once ground up in the blender, they turn your smoothie creamy and delicious. You can drink this straight away but, if you wait a few minutes after blending, your smoothie will thicken further.

Buckwheat groats: Buckwheat is not related to wheat as itโ€™s not a grass. Itโ€™s actually a seed related to sorrel and rhubarb.

Buckwheat is nutrient rich, high in fibre and protein. It contains minerals including iron, copper, magnesium, manganese, phosphorus, selenium and zinc.

Buckwheat also contains some B vitamins. A ยผ cup soaked buckwheat groats will add approximately 4.8g protein.

If you enjoy this recipe, I think you'll also love my Blackberry Parfait recipe. Or for something savory, try my Ruby Buckwheat Tabbouleh.

Recipe notes and substitutions.

Raspberries: For an ice cold smoothie swap the fresh raspberries for frozen. It often works out more affordable this way too. You could swap the raspberries for any other berry of your choice.

Chia seeds: Swap chia seeds for flax seeds or shelled hemp seeds instead.

Buckwheat groats: Use pre-soaked buckwheat for this recipe. I soak the buckwheat overnight in water to soften them. This makes them much easier for your body to digest. Give them a good rinse with a sieve before using. If you prefer, then use rolled oats which make a great alternative in this recipe.

Other fresh smoothies you may like.

  • kiwi lime smoothie
  • mango pineapple smoothie
  • mango spinach smoothie

๐Ÿ“– Recipe

A glass of red smoothie sprinkled with buckwheat and a fresh raspberry.

Raspberry pear and buckwheat smoothie

Juliette | Flourishing Kitchen
A raspberry smoothie that's gorgeously pink and sweetened with pear. Chia seeds and buckwheat add protein and make it beautifully thick and creamy.
Leave a review
Print Recipe Save Recipe Saved Recipe
Prep Time :5 minutes mins
Soaking :8 hours hrs
Total Time :8 hours hrs 5 minutes mins
Course: Breakfast, Drinks
Cuisine: British
Servings :1

Equipment

  • High speed blender.
  • Paring knife.
  • Chopping board.
  • 1 tall serving glass or jar.
Prevent your screen from going dark

Ingredients
  

  • 1 cup (125g) raspberries.
  • 1 ripe pear.
  • 1 cup (240ml) water.
  • ยผ cup (45g) raw buckwheat groats,, pre-soaked and rinsed overnight.
  • 2 tablespoon chia seeds.

Toppings (optional)

  • 1-2 raspberries.
  • a small sprinkle of soaked buckwheat.

Instructions
 

  • Chop the pear into bite size pieces, discarding the core. Rinse and drain the soaked buckwheat.
  • Place the ingredients into your blender and blend until smooth.
  • Pour your smoothie into a tall glass or jar, then add toppings before serving.
Did you make this recipe?Please leave a comment below to help other people.

Hey, did you like this recipe? If so it would mean the world to me if you would please Pin this to your Pinterest boards or even share it on social media so others can find it too.

Iโ€™m off for some tea.

Love raw food.

XOXO

Juliette

mum, dog owner, raw food enthusiast

Raw Chocolate Hazelnut Milkshake

November 27, 2020 by Juliette Leave a Comment

Two chocolate milkshakes.

This easy to make raw chocolate hazelnut milkshake is rich, sweet, satiating and full of whole food goodness. If youโ€™re looking for something chocolatey give this a try.

Two glasses of chocolate hazelnut milkshake with paper straws.
[feast_advanced_jump_to]

Why make this recipe.

This recipe is full of natural whole foods and easy to make. Itโ€™s

  • raw
  • vegan
  • dairy-fre
  • gluten-free
  • and refined sugar free
  • It can totally fulfill those chocolate cravings and makes a great afternoon treat
  • Itโ€™s thick, creamy and satisfying
  • Making your own milkshakes puts you in charge of the ingredients

Ingredients youโ€™ll need.

  • Hazelnut milk: itโ€™s easy to make your own, hereโ€™s a good recipe for hazelnut milk
  • Cacao powder: for that ultimate raw vegan chocolate taste.
  • Dates: add their own natural sweetness. I use fresh dates, the softer the better.
  • Chia seeds: used here to thicken the milkshake
  • Vanilla extract

Toppings

  1. Grated vegan chocolate
  2. Chopped hazelnuts

How to make this milkshake.

Add everything to the blender and blend until smooth and creamy. I like to use a high speed blender as itโ€™s quick and easy and ensures the chia seeds and dates are fully blended. 

Wait 10-15 minutes so the chia seeds get a chance to thicken your milkshake!

Add toppings. I like to use grated chocolate (vegan of course) and chopped hazelnuts.

Ingredient Substitutions.

Chia seeds: swap then with a chopped frozen banana instead to thicken.

Dates: if you donโ€™t like dates substitute with maple syrup.

Vanilla extract: substitute vanilla paste or vanilla pod seeds.

Cacao powder: is quite strong tasting and some people donโ€™t like it. Instead. substitute cocoa powder or carob powder in the same quantity.

Nut butter: Add in your favourite nut butter like peanut butter or cashew butter for extra flavour.

Nutrition.

  • Cacao is full of nutrients like iron, magnesium, calcium and potassium as well as protein, fat and fibre.
  • Chia seeds make this milkshake protein rich and add natural, vegan omega 3-s. 
  • Chia seeds are also naturally high in fibre and a good source of minerals like zinc, magnesium, calcium and iron.

Other healthy nut ideas you may like.

  • how to make almond milk
  • cherry almond milkshake
  • strawberry coconut chia pudding
  • pecan, pomegranate overnight oats

๐Ÿ“– Recipe

Two chocolate milkshakes.

Raw Vegan chocolate hazelnut milkshake

Juliette | Flourishing Kitchen
A dairy-free chocolate and hazelnut milkshake made that's rich, sweet, satiating and full of whole food goodness. If youโ€™re looking for something chocolatey definitely give this a try.
Leave a review
Print Recipe Save Recipe Saved Recipe
Prep Time :15 minutes mins
Total Time :15 minutes mins
Course: Drinks
Cuisine: British
Servings :2

Equipment

  • High speed blender.
  • 2 serving glasses.
Prevent your screen from going dark

Ingredients
  

  • 2 cups (480ml) hazelnut milk.
  • 4 pitted medjool dates.
  • 4 tablespoon chia seeds.
  • 1 heaped teaspoon cacao powder.
  • ยฝ teaspoon vanilla extract.

Toppings (optional)

  • a pinch of grated chocolate.
  • a pinch of chopped hazelnuts.

Instructions
 

  • Place the ingredients into your blender and blend until smooth. Wait for 15 minutes for the chia seeds to thicken the milkshakes then blend for a few seconds more to loosen the mix.
  • Pour your milkshake into 2 glasses.
  • Add a pinch of chopped hazelnuts and grated raw vegan chocolate to each glass before serving.

Notes

Personal taste is everything so make this recipe your own.
For a thinner consistency, just use less chia seeds or leave them out altogether.
If you prefer a sweeter milkshake add one more pitted date or a tablespoon of maple syrup to the recipe.
If your dates are a little tough, soak them in pre-boiled hot water for 15 minutes before blending. Discard the soak water before using the dates.
Did you make this recipe?Please leave a comment below to help other people.

Hey, did you like this recipe? If so it would mean the world to me if you would please Pin this to your Pinterest boards or even share it on social media so others can find it too.

Iโ€™m off for some tea.

Love raw food.

XOXO

Juliette

Hazelnut Milk Recipe

November 12, 2020 by Juliette Leave a Comment

2 small bottles of milk with paper straws sitting on a plate with some raw hazelnuts.

A gorgeously creamy hazelnut milk recipe, rich in nutrients and made in minutes with soaked raw hazelnuts.

Delicious in your morning cereal, in smoothies and milkshakes, this hazelnut milk is also fabulous in coffee.ย 

You can also use the leftover pulp from this recipe to make your own fabulous raw sweet treats!

2 little bottles of hazelnut milk with white paper staws on a small plate with a sprinkling of raw hazelnuts.

Hazelnuts are often associated with rich desserts, chocolate gifts and that famous brand of chocolate hazelnut spread we all know. 

Theyโ€™re a favourite ingredient in sweet foods at celebrations and on special occasions. And itโ€™s probably because of this that theyโ€™re my absolute favourite nut.

How about you?

[feast_advanced_jump_to]

Recipe ingredients

This simple, homemade hazelnut milk recipe is easy to make with just 3 ingredients:

  1. Raw hazelnuts.
  2. Water. Use bottled Spring water or filtered water for best results.
  3. Pitted dates or maple syrup.

For the full instructions and measurements please see the recipe card below.

Recipe Steps

Follow my easy 4-step method below for how to make this hazelnut milk recipe, with pre-soaked nuts, in 5-10 minutes.

The most difficult bit of making raw nut milk is remembering to soak the nuts.

Soak the nuts for 8-10 hours then rinse and drain before blending.

I like to leave them soaking in a bowl or a mason jar on the worktop overnight, and cover them with a tea towel to keep them clean.

Top down view of raw hazelnuts, a date and some water in a blender.

Step 1 - Add raw pre-soaked hazelnuts, pitted dates and spring water to a blender and blend until smooth.

Milk being poured from a jug into a glasss bowl through a nut milk bag.

Step 2 - Pour the hazelnut milk into a bowl through a nut milk bag or a piece of muslin cloth, to separate the liquid from the pulp.

Milk being strained by hand through a nut milk bag into a glass bowl.

Step 3 - Squeeze the nut milk bag nice and tight right down to the end so you get as much liquid into the bowl as you can.

A small bottle of milk with a paper straw sitting on a marble coaster with hazelnuts nearby.

Step 4. Pour into glasses to serve. Alternatively, pour into a mason jar with a lid and store in the fridge until needed.

Homemade hazelnut milk is best served chilled.

About hazelnuts.

Hazelnuts are also known as cobnuts and filberts. They are native to the UK and grow on trees, among hedgerows and in our woodland areas. 

They're much loved by our wildlife, especially squirrels, and are available in the UK from mid-late autumn.

When you see them, they have a papery outer covering and are light in colour with dark brown skins.

Small and round, once out of the shell theyโ€™re similar in size to chickpeas. 

Homemade hazelnut milk can be a fabulous plant-based alternative to dairy milk and part of a healthy diet.

Hazelnuts can be used in many foods for example:

  • chocolates
  • vegan milk
  • milkshakes
  • butter
  • flour
  • tarts and pastries
  • desserts
Whole hazelnuts.

Pairs well with

Hazelnuts pair well with many other foods and ingredients including:

  • apples
  • pears
  • cherries
  • peaches
  • chocolate
  • pomegranate
  • coffee
  • brussel sprouts
  • kale and cabbage
  • carrots
  • butternut squash

More healthy dairy-free milk recipes:

  • How to make almond milk
  • How to make oat milk
  • Chocolate hazelnut milk
  • Cherry almond milkshake

F.A.Q's

Is it healthy to drink hazelnut milk?

Yes, it can be a healthy plant-based drink as hazelnuts contain a good source of nutrients including protein, fibre, vitamins, minerals, healthy fats and antioxidants.

What is hazelnut milk made of?

A simple hazelnut milk recipe can be made with raw hazelnuts, water and a pitted medjool date.

๐Ÿ“– Recipe

2 small bottles of milk with paper straws sitting on a plate with some raw hazelnuts.

Hazelnut Milk Recipe

Juliette | Flourishing Kitchen
A gorgeously rich and creamy hazelnut milk recipe, rich in nutrients and made in minutes with raw hazelnuts. Use it as a dairy alternative, in smoothies, milkshakes and coffee or pour over your morning cereal.
Leave a review
Print Recipe Pin Recipe Save Recipe Saved Recipe
Prep Time :10 minutes mins
Soaking :8 hours hrs
Total Time :10 minutes mins
Course: Drinks
Cuisine: British, Raw Vegan
Servings :2

Equipment

  • High speed blender.
  • Nut milk bag or cheesecloth.
  • Large mixing bowl.
  • Serving glasses.
Prevent your screen from going dark

Ingredients
  

  • ยฝ cup raw hazelnuts, soaked overnight.
  • 2 cups (480ml) water, filtered, bottled or spring water
  • 1 pitted date.

Instructions
 

  • Blend. Place the pre-soaked hazelnuts, pitted date and water into your blender and blend until smooth.
  • Pour. Pour the liquid through a nut milk bag into a clean bowl, separating the milk from the pulp.
  • Strain. Pick up the nut milk bag and squeeze as much liquid out of the bag as possible, leaving only the hazelnut pulp behind.
  • Serve. Pour into glasses to serve or refrigerate in a mason jar with a lid and serve chilled when required.

Notes

Soaking the nuts softens them and produces a smoother tastier milk.
You can flavour the milk by adding a little vanilla, a pinch of sea salt or some powdered cinnamon.
Store in a suitable container with a lid for up to 3 days.
Did you make this recipe?Please leave a comment below to help other people.

Hey, did you like this recipe? If so it would mean the world to me if you would please Pin this to your Pinterest boards or share it on social media so others can find it too.

Iโ€™m off for some tea.

Love raw food.

XOXO

Juliette

mum, dog owner, raw food enthusiast

Dairy Free Cherry Almond Milkshake

November 5, 2020 by Juliette 2 Comments

Two glasses of frothy fresh pink milkshake with cherries and a paper straw.

A vibrant pink cherry and almond milkshake made with just 3 ingredients. Ready in just over 5 minutes. This dairy free recipe is made with sweet, plump, deep red cherries blended with fresh creamy almond milk.

Cherry milkshake.
[feast_advanced_jump_to]

Why make a dairy free milkshake?

Making your own dairy-free versions means no missing out on your favourite foods.

Dairy-free milkshakes are a great example, easily swapping out dairy milk with fresh creamy plant based alternatives. This recipe uses almond milk.

One of the reasons raw food is so glorious is that what youโ€™re eating is so simple and fresh. More often than not this means less work to do and more time for other things.

This raw vegan milkshake is really enjoyable late morning or as an afternoon pick me up instead of a coffee.

This bright pink shake is bursting with nutrients, sweet and delicious. You can make it in just over 5 minutes - less if you use frozen cherries - and enjoy it any time of the day!

What ingredients are in this recipe?

This easy to make milkshake is made with just 3 ingredients:

  • Cherries - scrumptiously juice, deep red fruit
  • Almond Milk - grab this fresh and creamy homemade recipe
  • Dates - plump fresh dates with their deep rich flavour and sweetness
Ingredients for cherry and almond milk shake.

Types of cherries.

Cherries are divided pretty much into 2 camps - sweet and sour. 

Sweet cherries tend to be eaten raw while the sour varieties are used more widely in cooking. 

How to buy the best cherries.

The best of these little round fruits appear shiny and plump, deep red in colour and firm to touch. 

Buy them with their stalks still attached and the stones in for the fullest flavour. 

Summer cherry varieties are available from June in the UK & are at their peak in mid July.

Are cherries good for us?

Bursting with nutrients, cherries are a good source of phytochemicals, fibre, antioxidants, vitamins & minerals including vitamin C, vitamin A, calcium, iron, potassium, copper and manganese. 

Their nutritional qualities are perfect for supporting our bodies in being healthy. 

How to prepare fresh cherries. 

Clean cherries in fresh water and allow to drain before using. Remove the stalks and the stone in the middle before serving.

Itโ€™s totally worth buying a cherry stoner to โ€œpopโ€ the stones out which makes them much quicker to prep. 

Fresh cherries will keep for up to 5 days in the fridge and will happily freeze really well too.

Other healthy fresh fruit ideas you may like.

  • how to make almond milk
  • apple pomegranate pecan overnight oats
  • red berry chia pudding
  • strawberry coconut chia pudding

What other flavours pair well with cherries?

Cherries are just divine in recipes teamed up with flavours such as chocolate, vanilla, apples and almonds. 

Theyโ€™re often cooked but absolutely delicious served fresh and raw in salads, fruit smoothies, fruity water, with overnight oats for breakfast or for dessert teamed up with banana nice-cream, in coconut yogurt and yes even turned into popsicles!

๐Ÿ“– Recipe

Two glasses of frothy fresh pink milkshake with cherries and a paper straw.

Dairy free cherry almond milkshake

Juliette | Flourishing Kitchen
Dairy-free cherry almond milkshake. Made with bright red cherries, creamy almond milk and sweetened with dates.
Leave a review
Print Recipe Save Recipe Saved Recipe
Prep Time :5 minutes mins
Total Time :5 minutes mins
Course: Drinks
Cuisine: British
Servings :2

Equipment

  • A blender.
  • 2 small glasses for serving.
Prevent your screen from going dark

Ingredients
  

  • 1 cup (240ml) almond milk.
  • 1 cup (150g) fresh or frozen sweet cherries, de-stoned.
  • 1-2 pitted dates,, to sweeten.

Instructions
 

  • Place the ingredients into your blender and blend until smooth.
  • Pour divided into 2 small glasses to serve.

Notes

For a thicker milkshake then try adding a few slices of frozen banana, a tablespoon of almond butter or 2-3 small frozen cauliflower florets to your recipe before blending.
Or you could add a couple of tablespoons of hemp seeds or flax seeds instead which will add some plant based omega 3.
Any of these ingredients will increase the nutrients of your milkshake too.
This recipe is also delicious made with frozen cherries and a drop or two of vanilla extract.
Did you make this recipe?Please leave a comment below to help other people.

Hey, did you like this recipe? If so it would mean the world to me if you would please Pin this to your Pinterest boards or even share it on social media so others can find it too.

Enjoy your cherry almond milkshake? Please let me know by commenting below.

Iโ€™m off for some tea.

Love raw food.

XOXO

Juliette

mum, dog owner, raw food enthusiast

Raw Cauliflower "Fried" Rice

October 1, 2020 by Juliette 2 Comments

A bowl of cauliflower rice with diced vegetables, lentils and tomatoes.

Jump to recipe

Fresh and spicy raw cauliflower โ€œfriedโ€ rice made with chilli, lemongrass, lime and ginger. Ready in under 10 minutes!

A bowl of cauliflower rice with diced vegetables, lentils and salad and wood utensils.
[feast_advanced_jump_to]

What does cauliflower rice taste like?

It has a very mild taste and will mix easily with other flavours, herbs and spices. Cauliflower rice has a light and slightly grainy texture. I love to use raw cauliflower rice as a substitute for cooked rice in dishes.

One of the joys of raw foods is that it can allow you to be very creative. You can use herbs and spices to recreate many of the flavours used in cooked dishes at home.

If your body enjoys cruciferous vegetables then you may want to try this vegetable and cauliflower โ€œstir fryโ€.

Itโ€™s not the same as cooked rice of course but, itโ€™s similar enough to be enjoyed with no cooking and I LOVE it!

Related recipes:

  • How to make cauliflower rice.
  • Cauliflower couscous salad.

Why make this dish?

I love this vegan cauliflower rice dish because itโ€™s so easy to make and absolutely choc full of flavour without being overpowering.

Itโ€™s spicy and tangy from the chilli, the lemongrass and ginger. Itโ€™s citrus-y from the lime juice, a little salty from the coconut aminos.

The chopped cherry tomatoes, cucumber and carrot add their own juicy sweetness.

You can make this in the morning while getting the kids ready for school. Or whip it up the night before, when you know the following dayโ€™s going to be crazy busy. 

Keep it in a container covered and refrigerated until needed or enjoy it straight away. In fact, leaving it allows time for the flavours to develop more.

It also makes a fab quick lunch or packed lunch.

Prepped ingredients - chopped vegetables, grated cauliflower, lentil sprouts and chilli in a bowl.

Recipe variations.

Swap the sprouted lentils for cooked lentils. This works really well too with other protein sources like cooked edamame, broad beans, tofu, chickpeas or tempeh.

- Add a pinch of mixed seaweed flakes to replace the flavour of fermented shrimp paste which is used in cooked nasi goreng recipes. 

- Use up leftover veggies. Itโ€™s a great way to use up leftover veggies at the end of the week.

- Add Add fresh herbs - such as fresh mint or coriander.

- Add spices like fresh garlic, galangal, dried chilli for a deeper chilli flavour.

- To serve 2 people generously, add a few handfuls of leafy greens like bok choy or choy sum served on the side with an additional squeeze of lime.

- If you like dressings then this peanut sauce will be a lovely addition to this recipe.

Nasi Goreng.

This easy cauliflower rice recipe is inspired by the Indonesian stir fried rice dish called Nasi Goreng. Translated, Nasi literally means โ€˜riceโ€™ and Goreng means โ€˜friedโ€™.

Traditionally, a sambal is made from mixed spices, herbs and fermented fish paste, then added to the fried rice. Vegetables and a fried egg top the rice and the whole dish is served with fresh tomato and cucumber.

Itโ€™s common to use chilli, shallots, garlic, galangal or ginger, lime, lemongrass and sweet soy sauce (kecap manis) for this dish and there are many variations.

This version uses raw cauliflower instead of rice and I replace the fried egg with sprouted lentils.

Lentils are very easy to sprout yourself indoors, or you can purchase them from supermarkets / health food stores nationwide. 

Iโ€™ve add chopped vegetables and spices to the cauliflower rice rather than making a sambal, to pull it all together quickly. 

๐Ÿ“– Recipe

A bowl of cauliflower rice with diced vegetables, lentils and tomatoes.

Raw cauliflower "fried" rice

Juliette | Flourishing Kitchen
Fresh and spicy raw cauliflower โ€œfriedโ€ rice made with chilli, lemongrass, lime, ginger and coconut aminos.
5 from 1 vote
Leave a review
Print Recipe Pin Recipe Save Recipe Saved Recipe
Prep Time :15 minutes mins
Total Time :15 minutes mins
Course: Main Course
Cuisine: Vegan
Servings :2

Equipment

  • Handheld grater, or a food processor with an s-blade.
  • Paring knife.
  • Chopping board.
  • medium size bowl.
  • Small bowl
  • Fork or spoon.
Prevent your screen from going dark

Ingredients
  

  • ยฝ a small cauliflower broken into florets (about 2 cups)
  • ยฝ cup (about a handful) lentil sprouts.
  • ยผ of a medium size English cucumber.
  • 1 small carrot.
  • 6 cherry tomatoes.
  • ยผ cup (36g) fresh peas.
  • ยฝ cup (50g) fresh sliced green beans.

Spices

  • 1 spring onion.
  • 1 small red chilli.
  • ยฝ lemongrass stalk.
  • 1 cm thick piece ginger.
  • juice of ยฝ lime.
  • 2 tablespoon coconut aminos or use tamari soy sauce.

Instructions
 

  • Pulse the cauliflower florets in your food processor (or use a handheld grater) until the cauliflower resembles rice. Spoon the riced cauliflower into a medium size bowl.
  • Finely grate the ginger and finely slice the lemongrass. Put these into a small bowl and add the coconut aminos and freshly squeezed juice of half a lime. Give it all a stir then pour over the cauliflower rice and mix it all through to distribute the flavours evenly.
  • Chop the carrot, tomatoes, cucumber and green beans into small bite size pieces. Finely slice the onion and red chilli. Add to the bowl with fresh peas and lentil sprouts.
  • With a fork or spoon stir everything together so that it's evenly mixed throughout with the spices, the lime juice and coconut aminos. Do a taste test and adjust the dish to your preference before serving.
Did you make this recipe?Please leave a comment below to help other people.

Hey, did you like this recipe? If so it would mean the world to me if you would please Pin this to your Pinterest boards or even share it on social media so others can find it too.

Enjoy your spicy raw cauliflower โ€œfriedโ€ rice for lunch or for dinner.

Iโ€™m off for some tea.

LOVE RAW FOOD

XOXO

Juliette

mum, dog owner, lover of raw food

Raw Cauliflower Couscous Salad with Orange and Fennel

September 8, 2020 by Juliette Leave a Comment

Cauliflower couscous with a green salad and slices of orange.

Raw cauliflower couscous makes an easy fast alternative to rice. Team it up with fresh herbs, a delicious citrus orange and fennel salad for lunch or dinner. Ready in 10 minutes and fabulously DELICIOUS!

Orange slices with a fresh herb cauliflower couscous, olives and leafy greens.
[feast_advanced_jump_to]

What is raw cauliflower couscous?

Cauliflower couscous is also known as cauliflower rice. Itโ€™s makes a great alternative to rice dishes, made with just raw cauliflower. This is my go to raw vegan alternative to cooked rice. 

If you havenโ€™t tried it before I recommend giving it a go. It was a game changer for me trying to find a good reliable rice alternative. 

What else is in this recipe?

  • Orange - fresh, sweet, tart and deliciously juicy citrus.
  • Pea shoots and mixed baby greens - fresh, delicate, tender, crisp and earthy.
  • Fennel - aromatic with a light, sweet and slightly anise flavour.
  • Mixed whole olives - green and black olives marinated in a little oil provide a wonderful saltiness, softness and their slight bitterness we all love.
  • Lemon - adds a tangy, sharp, citrus flavour to the cauliflower rice.
  • Fresh parsley and mint - earthy fresh herb flavours to elevate your dish.
  • Spring onions - crisp, and lightly pungent onion flavour.

How to make a herb cauliflower couscous.

Simply breakup the raw cauliflower into florets and pop them into your food mixer.

Pulse them slowly until you can see the cauliflower starts to resemble grains of couscous. Try not to over pulse the cauliflower or it will result in a mush.

Remove the couscous from the food mixer and add to a bowl. Scatter with finely chopped fresh herbs of your choice and spring onions.

Pour over the juice of half a lemon and stir it all together so it becomes light and airy and the herbs and onion are evenly distributed throughout.

Season with salt and freshly ground pepper to taste.

If you enjoy cauliflower you may like to try my recipes Cauliflower Rice and Cauliflower "Fried" Rice.

Cauliflower couscous and chopped fresh herbs.

How to slice an orange into rounds.

The best way I know of to slice the orange into rounds is to start by slicing off a little peel from the top and bottom first.

This way the orange will sit on your chopping board without rolling around.

Itโ€™s easier to slice if you use a small serrated paring knife. 

Holding the orange firmly just slice the peel from the top of the orange around and down to the bottom. Try to keeping the oranges natural shape as much as possible working with the knife carefully and working around the pith.

Take as much of the pith as you can without cutting into the orange itself.

Once you've removed the orange peel and pith, slice the orange into rounds. Try not to slice the rounds too thinly as you might find the orange collapses and the slices wonโ€™t keep their beautiful shape.

How to prepare the salad.

The orange fennel and olive salad couldnโ€™t be simpler to prepare.

To begin with thereโ€™s no dressing as the orange adds both citrus and sweetness and itโ€™s own juice.

For this recipe the base of the salad is a selection of baby leafy greens. I chose pea shoots, baby red chard and spinach.

I feel baby greens work particularly well with this dish. Of course, please feel free to choose your own mix.

Cut out the hard centre from the fennel and discard. Slice the fennel into matchstick style pieces so theyโ€™re nice and thin. The finely sliced fennel adds just a hint of liquorice flavour. 

Donโ€™t be put off by the fennel if youโ€™ve not tried it in a salad before. I avoided fennel for years then was blown away when I recently discovered it!

Peel and slice the orange into rounds. Olives add that wonderful saltiness and their own natural fat to the salad.

All thatโ€™s left is to serve up the entire dish.

Add the leafy greens to your plate. Then follow with your orange slices on top.

Scatter the fennel across the salad and pop a few pieces in amongst the salad leaves and the orange so that itโ€™s well distributed.

Add the olives around the plate. Garnish with fennel fronds if you have them and season with sea salt and freshly ground pepper if youโ€™d like to.

To complete the whole dish spoon the herby raw cauliflower couscous over one side of the plate and tucked a little under the salad.

Your gorgeous raw cauliflower salad is ready to enjoy. Yum!

๐Ÿ“– Recipe

Cauliflower couscous with a green salad and slices of orange.

Raw cauliflower couscous with orange fennel salad

Juliette | Flourishing Kitchen
Raw cauliflower couscous makes an easy fast alternative to rice. Team it up with fresh herbs, a delicious citrus orange and fennel salad for lunch or dinner.
Leave a review
Print Recipe Pin Recipe Save Recipe Saved Recipe
Prep Time :10 minutes mins
Total Time :10 minutes mins
Course: Main Course, Salad
Cuisine: Vegan
Servings :1

Equipment

  • Food processor with an s-blade.
  • Chopping board.
  • Paring knife, serrated if possible.
  • Spoon.
  • Bowl.
  • Plate to serve.
Prevent your screen from going dark

Ingredients
  

  • ยฝ-1 pack of baby leaf salad with pea shoots (approx. 40g).
  • 1 ยฝ cups cauliflower florets (about 2 handfuls).
  • 1 medium orange.
  • ยฝ small fennel.
  • ยฝ cup (small handful) mixed whole olives.
  • juice of ยฝ lemon.
  • A small handful in total of fresh mint and parsley leaves.
  • 2 spring onions.
  • salt and freshly ground pepper to taste.

Instructions
 

  • Top and tail the spring onions then finely slice. Cut the middle from the fennel and discard. Slice remaining fennel into matchsticks sized pieces and reserve for later with fronds. Peel the orange then slice into rounds. Finely chop the fresh herbs.
  • To make the couscous add the cauliflower florets to a food processor with an s-blade and pulse for a few seconds each time until the cauliflower resembles couscous or rice.
  • Into a medium sized bowl add the couscous and top with the finely sliced fresh herbs and spring onions. Pour over the juice of half a small lemon then stir together so that it's light and airy in consistency all the way through. Add salt and pepper to taste.
  • To serve, put some of the cauliflower couscous onto a plate. Add salad leaves slightly to one side, then top the leaves with orange slices. Sprinkle the whole plate with fennel and lacy fennel fronds. Scatter over a few olives. Season to taste.

Notes

I keep a little of the orange juice from my chopping board to pour over the salad before serving. I don't feel like it needs a salad dressing. What do you think?
Keep back a few freshly chopped herbs to sprinkle over the greens just before serving.
The olives in this recipe are Italian mixed olives marinated in Sicilian lemon oil as they compliments the couscous perfectly. I prefer to use whole olives rather than the pitted ones for this recipe. Please choose whichever olives you prefer.ย 
For slightly spicier lemon flavour you could add a pinch of sumac to the couscous. I also like to add salt and pepper to the salad to taste.
This dish keeps well when covered and stored in the fridge for 1-2 days.ย 
Did you make this recipe?Please leave a comment below to help other people.

Hey, did you like this recipe? If so it would mean the world to me if you would please Pin this to your Pinterest boards or even share it on social media so others can find it too.

Iโ€™m off for some tea.

LOVE RAW FOOD

XOXO

Juliette

mum, dog owner, lover of raw food

Healthy Chocolate Bliss Balls Recipe

October 17, 2018 by Juliette 2 Comments

Ball shaped chocolate and coconut snacks.

These easy to make chocolate coconut balls are really fun to make and your kids will love them too. Ready in around ten minutes these little chocolate energy balls are gorgeously squishy and melt in the mouth.

Little balls of chocolate covered in dessicated coconut on a white background.

If you have a sweet tooth and are looking for something thatโ€™s easy-to-make from healthy raw ingredients then you wonโ€™t be disappointed. ๐Ÿ˜

Theyโ€™re totally lovely with an afternoon cuppa, or as a cheeky snack after dinner (I love them on a Friday night at home with a movie).

And by the way, these also make gorgeous chocolate gifts for birthdays, valentines, Easter, Christmas or any excuse actually, either wrapped up in a pretty box or you could fill a jar with them instead and tie with a ribbon. 

If youโ€™re starting a raw food diet but are worried about introducing raw food to your kids or your partner, then making raw treats and desserts and is an easy way to show them how wonderful raw foods can be.

This coconut chocolate bliss balls recipe is the first raw treat that I ever made, back in 2011 and I still enjoy these at home on a regular basis.

Are energy balls good for you?

Energy balls make a wonderful and very portable snack made from healthy whole food ingredients.

Also known as protein balls, energy bites or bliss balls theyโ€™re usually made with dates to sweeten and include nuts or seeds which are full of healthy fats and protein.

Their whole food ingredients make them a great occasional snack, dessert, sweet treat or pre-workout alternative to many highly sweetened processed foods on the market.

Close up of a chocolate ball shaped snack rolled in coconut pieces.

How long do chocolate coconut balls last?

You can keep energy balls in the fridge for up to 3 days in an airtight container or for up to 1 month in the freezer. Defrost thoroughly before eating.

Recipe Ingredients.

This recipe uses just 5 ingredients:

  • Cacao powder : Cacao is the less processed and raw version of cocoa powder and it has a stronger, richer in flavour. It's also slightly more bitter than cocoa. Of course, you can use cocoa powder for this recipe if you prefer.
  • Zamali or Medjool dates: Slice dates lengthways and pop out the seed in the middle before using them. Dates are very sweet and full of nutrients including protein, zinc, calcium, iron, phosphorous, potassium, vitamin A and more as well as being high in fibre.
  • Desiccated coconut: Desiccated coconut is simply shredded and dried coconut. I use the unsweetened variety. It works great in raw energy balls as well as granola, cheesecake and for making other sweet treats. Although itโ€™s high in saturated fats coconut is also nutrient rich.
  • Ground Almonds: Use raw ground almonds if you can get them. I use leftover ground almonds from when I make almond milk. The pulp freezes well if you can't use it straight away. Almonds add a light buttery flavour to these energy balls and are full of vitamins, minerals, protein and fibre as well as being high in unsaturated fats.
  • Virgin Coconut oil

More raw sweet treat ideas.

If you like this healthy chocolate balls recipe, please also check out my other sweet ideas:

  • Strawberry and Coconut Chia Seed Pudding
  • Red Berry Chia Pudding with Almond Milk
  • Raw Raspberry Lemon Cheesecake

๐Ÿ“– Recipe

Ball shaped chocolate and coconut snacks.

Healthy chocolate energy balls recipe

Juliette | Flourishing Kitchen
Ready in around ten minutes these little chocolate energy balls are gorgeously squishy and melt in the mouth. Made with raw cacao, dates, ground almonds and dessicated coconut.
5 from 1 vote
Leave a review
Print Recipe Save Recipe Saved Recipe
Prep Time :10 minutes mins
Total Time :10 minutes mins
Course: Snack
Cuisine: Vegan
Servings :7

Equipment

  • Food processor with an s-blade.
  • Chopping board.
  • Large plate.
  • Teaspoon.
  • Measuring Cup.
  • Kettle.
Prevent your screen from going dark

Ingredients
  

  • 1 tablespoon cacao powder,, or cocoa if you find raw cacao too strong.
  • 1 cup Medjool or Zamali dates (about 12)
  • ยฝ cup (50g) desiccated coconut.
  • ยฝ cup (50g) ground almonds.
  • 2 tablespoon water.
  • ยผ cup (25g) desiccated coconut for rolling.

Instructions
 

  • Remove the pits from the dates then add them to a small bowl. Pour over some just boiled water from the kettle and allow them to soak for about 5 minutes to soften. Then drain, saving about 2 tablespoon of the soak water for later.
  • Into the food processor add ยฝ cup desiccated coconut, ground almonds, pitted dates, cacao powder and the soak water you saved. Mix for a couple of minutes until it all comes together and is completely smooth.
  • To make the energy balls, you'll need to use a teaspoon and your hands for rolling. But first, spread the remaining ยผ cup of desiccated coconut onto a large plate. Dip your teaspoon into the food processor and take out a heaped teaspoons worth of mixture. Now roll the mixture into a ball with your hands. It's all pretty delicate and squidgy in texture at this point.
  • Set down the rolled balls onto the plate and roll them over the dessicated coconut to cover. You should be able to make about 18-20 little balls. Store them in a sealed container in the refrigerator, for up to 3 days.
Did you make this recipe?Please leave a comment below to help other people.

Hey did you find this post useful? If so it would mean the world to me if you would please Pin this to your Pinterest boards or even share it on social media so other people can enjoy it too.

Iโ€™m off to make some tea!

XOXO

Juliette

mum, dog owner, lover of raw food

Butternut Squash Mango Smoothie Bowl

October 10, 2018 by Juliette Leave a Comment

A bowl of mango smoothie topped with banana, autumn berries.

A beautiful bright orange squash and mango smoothie bowl topped with fresh berries, banana and hemp seeds. Creamy and delicious.

A bowl of mango smoothie topped with berries and hemp seeds.

I added a tablespoon of hemp seed hearts to add a slight nuttiness, protein and omega-3โ€™s.

This is sure to cheer you up for breakfast when the weatherโ€™s a wee bit chilly, or on a rainy day! Itโ€™s quite filling with the protein from the hemp seeds and the banana.

Why A Butternut Squash Smoothie Bowl?

Butternut Squash is one of those vegetables that excite me about the arrival of autumn and the colder months in our calendar.

Soft and creamy and ever so vibrant in colour theyโ€™re a true comfort food. Yet I canโ€™t finish a whole one in a week on my own, so I decided to see what theyโ€™re like in a smoothie bowl.

Theyโ€™re mild in flavour and adding mango gives this a gorgeous deep orange colour and sweet tropical flavour that we all love.

Using a squash is a great way to add a mild tasting vegetable to a smoothie or a smoothie bowl.

The same shape as a butternut squash, you could also use a coquina squash which is slightly darker in colour and the taste is sweeter too.

The wonderful thing about smoothie bowls of course is that you get all the sweet creaminess of a smoothie and you can use toppings to add in different textures and flavours.

Close up of a smoothie topped with fresh berries, banana slices and hemp seeds.

Other ingredients.

Mango: mango provides a very sweet, juicy tropical flavour to this smoothie bowl. Theyโ€™re highly fragrant and also rich in vitamin A, C and minerals folate and copper.

Banana: banana really thickens up this smoothie bowl while adding fibre, potassium, vitamins C and B6.

Blueberries: blueberries add a beautiful deep blue contrast to the vibrant orange of this smoothie bowl and are an excellent form of vitamin C, fibre and antioxidants. They also add a slightly sweet and sharp little pop to this dish!

Blackberries: blackberries appear in UK hedgerows from late June to November. Like blueberries, blackberries are rich in anthocyanins which give them their deep blue colour and are full of nutrients like vitamins A, C, E and B vitamins.

Hemp Seeds: the addition of hemp seeds adds more protein to this smoothie as well and omega-3โ€™s, fibre and other important nutrients including calcium, iron, phosphorus and zinc.

Topping ideas

  • Raspberries
  • Goji Berries
  • Pumpkin seeds
  • Sunflower seeds
  • Shredded coconut / coconut flakes
  • Cashew nuts
  • Pecan Nuts
  • Coconut yogurt

More vegan breakfast ideas.

If you like this squash and mango smoothie bowl for breakfast, please also check out my other breakfast ideas:

  • Strawberry and Coconut Chia Seed Pudding
  • Red Berry Chia Pudding with Almond Milk
  • Overnight Oats with Apple, Pomegranate & Pecans

๐Ÿ“– Recipe

A bowl of mango smoothie topped with banana, autumn berries.

Butternut squash and mango berry smoothie bowl

Juliette | Flourishing Kitchen
A beautiful bright orange squash and mango smoothie bowl topped with fresh berries, banana and hemp seeds. Creamy and delicious.
Leave a review
Print Recipe Save Recipe Saved Recipe
Prep Time :5 minutes mins
Total Time :5 minutes mins
Course: Breakfast, Drinks
Cuisine: Vegan
Servings :1

Equipment

  • Blender or food processor.
  • Sharp knife.
  • Chopping board.
  • Small bowl
Prevent your screen from going dark

Ingredients
  

  • 1 cup (140g) butternut squash.
  • 2 bananas.
  • ยฝ a mango.
  • ยฝ cup (240ml) almond milk.
  • small handful of blueberries.
  • small handful of blackberries
  • 1 tablespoon hemp seeds.

Instructions
 

  • Peel and chop the squash and mango into bite sized pieces. Peel and slice the bananas, reserving half of one until later.
  • Place the remaining banana into the blender together with the chopped butternut squash, mango and almond milk. Blend until smooth and pour into a small bowl.
  • Top the smoothie mix with the remaining banana then add the blackberries, blueberries and hemp seeds. Serve.

Notes

You can easily use frozen fruit now that itโ€™s available in most supermarkets. I love to buy both mixed & single fruits in bags from the frozen section.
Did you make this recipe?Please leave a comment below to help other people.

Hey did you find this post useful? If so it would mean the world to me if you would please Pin this to your Pinterest boards or even share it on social media so other people can enjoy it too. ๐Ÿ™‚

Iโ€™m off to make some tea!

XOXO

Juliette

Overnight Oats with Apple, Pomegranate & Pecans

September 25, 2018 by Juliette Leave a Comment

Overnight oats topped with apple slices and pomegranate seeds.

Served with apple, pomegranate and pecan nuts this overnight oats recipe is prepped in 5 minutes.

A small bowl of overnight oats topped with pomegranate seeds and apple slices.
[feast_advanced_jump_to]

If you want something light to eat in the mornings thatโ€™s satiating, fruity and delicious then overnight oats gives you all three.

Before trying overnight oats I was a committed porridge oats enthusiast. Porridge was my go-to breakfast for years (until I discovered raw foods).

Why this recipe ?

Overnight oats are very simple to make. The base recipe take less than 5 minutes. 

Theyโ€™re perfect for meal preparation and stay fresh for up to 3 days in the fridge.

Overnight oats are flexible too, as you can add any non dairy milk to the oats.

Every season I change up my recipe by using different fruit, nuts, seeds or dried fruits. You can create literally any combination your imagination allows. 

I like to add sweeteners that are made from whole food ingredients like coconut sugar, maple syrup or lucuma powder. You also sweeten with vanilla, date syrup, even make your own date paste.

What oats do you use? 

I used large organic wholegrain rolled oats for this recipe, and usually theyโ€™ve been steamed so theyโ€™re not strictly raw. You can use finer oats if you prefer. 

To keep to the strictly raw theme you might choose steel cut oats which are oat groats that have been sliced into 2 or 3 pieces. They have a chewier texture than rolled oats. They're are usually raw, but to be 100% sure you please check the package or confirm with the manufacturer.

If you can find them, sprouted oats are more nutritious as the process of sprouting helps to make the vital nutrients more available, the texture softer and easier to digest.

Are overnight oats healthy?

Oats, traditionally used to make healthy breakfasts are whole grain, rich in fibre, vitamins, minerals and a good source of plant based protein.

This dish should be satiating enough to see you through until lunch time.

Soaking the oats overnight breaks down phytic acid found on grains, which can make the nutrients more difficult to absorb. 

Do you eat overnight oats hot or cold?

Overnight oats are traditionally eaten cold from the fridge. Of course you can warm them in a pan if youโ€™d like to but you may as well make porridge instead, which of course isnโ€™t raw but still provides a great tasting breakfast. 

How do you make overnight oats taste better?

The beautiful thing about overnight oats is that you can add many other ingredients to this dish to make them even more delicious. Add your favourite nuts and seeds, dried fruit and fresh fruit as well as plant based yogurts or even nut butters like peanut butter or almond butter.ย 

What else is in this recipe?

Apple: Apples are available all year round in the UK but of course theyโ€™re at their best in autumn when theyโ€™ve just fallen from the tree. We use apples from one of our English family apple trees as much as we can when they fall and they have a wonderful slight tartness to them. This is why I like to add a little maple syrup to the recipe. The rest of our apples are made into apple sauce or apple cider vinegar.

Pecans: Choose raw unsalted nuts. Pecans go well in cakes and cereal as well as salads and are rich in oleic acid, which is considered a healthy fat.

Pomegranate: Pomegranate seeds add delicious sweetness and a beautiful vibrant red pop of jewels to the oats and chia seeds.

Chia Seeds: Chia seeds will add creaminess and help the overnight oats hold together as they swell up in the milk. They also add in omega-3โ€™s, additional protein, fibre and nutrients like calcium, phosphorus and potassium.  

Cinnamon: this aromatic sweetly flavoured spice is used in both sweet and savoury dishes and accompanies oats and apples beautifully.

If you love overnight oats, you may also love this Peach Melba Overnight Oats recipe.

More plant-based breakfast ideas.

If you like this squash and mango smoothie bowl for breakfast, please also check out my other breakfast ideas:

  • Strawberry and Coconut Chia Seed Pudding
  • Red Berry Chia Pudding with Almond Milk
  • Mango Squash Smoothie Bowl

๐Ÿ“– Recipe

Overnight oats topped with apple slices and pomegranate seeds.

Apple, pomegranate and pecan overnight oats

Juliette | Flourishing Kitchen
A fruity, sweet and comforting overnight oats topped with apple, pecans and pomegranate seeds. Perfect for breakfast to fuel your day.
Leave a review
Print Recipe Save Recipe Saved Recipe
Prep Time :5 minutes mins
Soaking time :8 hours hrs
Total Time :8 hours hrs 5 minutes mins
Course: Breakfast
Cuisine: British
Servings :1

Equipment

  • Breakfast bowl.
  • Chopping board.
  • Paring knife.
Prevent your screen from going dark

Ingredients
  

  • ยฝ cup (45g) oats.
  • ยพ cup (175ml) almond milk or your favourite plant milk.
  • 1 tablespoon chia seeds.
  • 1 teaspoon maple syrup.
  • ยฝ an apple.
  • 1 tablespoon chopped pecans.
  • 1 tablespoon pomegranate seeds.
  • a pinch of cinnamon.

Instructions
 

  • Put the oats into a bowl and pour over the almond milk, chia seeds, maple syrup and stir until evenly combined.
  • Cover and place in the refrigerator overnight.
  • In the morning remove the overnight oats from the refrigerator. Chop or slice the apple into pieces, discarding the seeds. Top the oats with fruit, pecans and a light dusting of cinnamon powder before serving.
Did you make this recipe?Please leave a comment below to help other people.

Hey did you find this post useful? If so it would mean the world to me if you would please Pin this to your Pinterest boards or even share it on social media so other people can enjoy it too. ๐Ÿ™‚

Iโ€™m off to make some tea!

XOXO

Juliette

mum, dog owner, lover of raw food

Red Berry Chia Pudding

September 12, 2018 by Juliette 6 Comments

A small glass of chia pudding topped with fresh and frozen berries.

This deep red berry chia pudding takes only 10 minutes to prepare and is highly nutritious. Delicious either as a quick breakfast or soft puddingy dessert.

A glass filled with chia pudding and fresh berries.
[feast_advanced_jump_to]

This berry chia pudding recipe needs only a small amount of natural sweetener as the almond milk has a mild sweetness to it already. The slightly sharp berries with creamy sweet chia seed base go beautifully together.

These little puddings make just the most perfect, nourishing raw breakfasts and I think they show how quick and easy eating raw food can be.

When youโ€™re curious about how to start a raw food diet, realising how easy it is to make delicious raw food recipes like this is such a game-changer.

It all becomes very do-able.

Why is chia seed pudding healthy?

The reason why chia seed pudding is considered healthy is partly due to the nutritional content of the chia seeds.

Chia seeds are packed full of nutrients and are especially rich in vitamins, minerals, fibre, omega 3 fatty acids and protein.

They absorb many times their weight in liquid when soaked or ground and this creates a light jelly-like texture. It makes them perfect for puddings which you can top with beautiful healthy ingredients like fruit.

What is the ratio of chia seeds to liquid?

For this recipe which makes 2 servings, use 4 tablespoon chia seeds per 1 cup of plant milk.

To make one serving, half the ingredients. You can easily double the recipe to make additional servings.

  • 1 serving - 2 tablespoon chia seeds, ยฝ cup liquid
  • 2 servings - 4 tablespoon chia seeds, 1 cup liquid
  • 3 servings - 6 tablespoon chia seeds, 1 ยฝ cups liquid
  • 4 servings - 8 tablespoon chia seeds, 2 cups liquid


How do you thicken chia seed pudding?

To thicken just add more chia seeds. I find between 3-4 tablespoon in total per cup of milk works great for most chia pudding recipes.

The pudding doesnโ€™t thicken instantly as it needs time to absorb the liquid to change consistency. This is why this dish makes such a great food prep recipe as you can leave it overnight in the fridge to thicken.

If you want to enjoy this recipe straight away then you can grind the chia seeds up first in a high speed blender before adding the liquid. Youโ€™ll have your pudding in just a few short minutes.

What other ingredients are in this recipe?

  • Almond Milk: Almond milk makes a great creamy alternative to dairy and if you make your own plant milks you forgo any nasty ingredients that some brands add in. Homemade plant milks always taste so much better too!
  • Mixed Red Berries: Fresh or frozen, berries add that special something to many recipes as well as adding important nutrients like antioxidants, vitamin C, and the natural fibre that our bodies need. Berries are also on Dr Gregorโ€™s Daily Dozen Checklist, which is totally checking out. You can download the app on your mobile for free.
  • Maple Syrup: I use maple syrup as my sweetener of choice as it contains some minerals, as well as tasting delicious, of course. If you prefer then use a different sweetener instead like date paste.
  • Vanilla Extract: Adds a beautiful rich intense flavour and smell to puddings, cakes and custards. I use extract as it's a great alternative to buying vanilla pods, which can be expensive.

Toppings ideas.

  • Almond butter
  • Peanut butter
  • Cinnamon powder
  • Cacao Powder
  • Cacao Nibs
  • Desiccated Coconut
  • Flax Seeds
  • Sesame Seeds

More raw plant-based breakfast ideas

If you like this red berry chia pudding recipe for breakfast, please also check out my other breakfast ideas:

  • Strawberry and Coconut Chia Seed Pudding
  • Butternut Squash Mango Smoothie Bowl
  • Overnight Oats with Apple, Pomegranate & Pecans
  • Peach Melba Overnight Oats

๐Ÿ“– Recipe

A small glass of chia pudding topped with fresh and frozen berries.

Red berry chia pudding

Juliette | Flourishing Kitchen
Red berry chia pudding filled with all your favourite berries. Delicious either as a quick breakfast or soft puddingy dessert.
5 from 6 votes
Leave a review
Print Recipe Save Recipe Saved Recipe
Prep Time :10 minutes mins
Resting time :8 hours hrs
Total Time :8 hours hrs 10 minutes mins
Course: Breakfast
Cuisine: Vegan
Servings :2

Equipment

  • Measuring jug.
  • Fork.
  • Small bowl
  • 2 small glasses.
Prevent your screen from going dark

Ingredients
  

  • 1 cup (240ml) almond milk or your favourite plant milk.
  • 4 tablespoon chia seeds.
  • ยฝ teaspoon vanilla extract.
  • 1 tablespoon maple syrup or date paste.
  • 1 cup (150g) mixed fresh or frozen berries., defrosted

Instructions
 

  • Pour almond milk into the measuring jug. Add chia seeds, vanilla and whisk together with a fork, so that there are no lumps.
  • Divide into 2 glasses and allow to sit in the refrigerator overnight, so the chia seeds can soak up the plant milk.
  • In the morning remove the puddings from the fridge. Mash half the berries together in a small bowl, add the maple syrup plus 2 tablespoon chia pudding (1 tablespoon from each glass) then stir.
  • Divide the pink mixture equally over the top of each pudding. Top with the remaining mixed fruit then serve.

Notes

How about adding an extra topping such as chopped hazelnuts, cacao nibs or hemp seeds sprinkled over the top before serving?
You can double or triple this chia seed and almond milk mixture to make more servings.
At the beginning of the week, I pour the mixture into individual serving size glasses then keep them covered with plastic wrap in the fridge. Just add your favourite fruit toppings in the morning and youโ€™re done!
Did you make this recipe?Please leave a comment below to help other people.

Hey did you find this post useful? If so it would mean the world to me if you would please Pin this to your Pinterest boards or even share it on social media so others can find it too.

Iโ€™m off to make some tea!

Juliette

mum, dog owner, lover of raw food

Green Pea and Avocado Smash

August 29, 2018 by Juliette 8 Comments

Avocado pea dip on a plate with slices of celery, carrot and radishes.

This smashed green pea and avocado smash really brightens up lunches! Great as a spread or a dip. Creamy avocado mixed with the freshest english garden peas, chipotle chilli flakes and lime.

A plate of vegetable sticks served with a pea and avocado dip and lime wedges.

Ah! - the humble garden pea. Available all year round and stored in freezers everywhere. Theyโ€™re a reliable favourite in our family, thatโ€™s for sure.

Bright green, sweet with a little bite when eaten uncooked, theyโ€™re especially lovely if you pick them from the garden in Summer.

At one point they were the only vegetable my kids would reliably eat without pulling a face (I canโ€™t be alone in that, right?).

This recipe is really easy to prepare if you donโ€™t have much time. Great on the go packed with cruditรฉs into your lunch box.

[feast_advanced_jump_to]

Why a Pea and Avocado Recipe?

Avocado on toast used to be a favourite of mine for a quick breakfast, lunch or snack. Giving up bread made me think of what else I might do so I created a dip.

Using peas with avocado is a great way to add in more nutrients. Protein from the peas definitely makes this more satiating.

Adding the peas stretches out the healthy fat in the avocado. It makes the avocado go further.

Serving suggestions.

  1. Afternoon Snack: Yes, you could absolutely add it to your mixer with a little water and blend into a creamy dip for tortillas, crackers and veggies. Makes a great afternoon snack.
  2. Quick Lunch: How about adding this to your favourite wrap stuffed with salad leaves, vegan cheese and your favourite dressing? Yummy for lunch.
  3. Dinner for Two: Add a little water and lime juice to the dish and stir through to make a gorgeous slightly chunky sauce. Top the sauce with a few halved fresh cherry tomatoes plus a crushed garlic clove. Finally, stir through 2 bowls of your favourite vegetable noodles. Thatโ€™s a light dinner for two.

More raw dips and dressings you may like:

  • Raw Beetroot Hummus
  • Lemon Turmeric Hummus
  • Peanut Salad Dressing
  • Raw Vegan Mayonnaise

Change up the Flavours.

If you want to mix up the flavours to create new versions for yourself here are some suggestions:

  • Add garlic or garlic powder.
  • Swap the chipotle chilli flakes with little chopped fresh chilli.
  • Swap the coriander leaf with mint, parsley or basil.
  • Replace the lime with lemon juice.
  • Add a few microgreens to top when serving.


๐Ÿ“– Recipe

Avocado pea dip on a plate with slices of celery, carrot and radishes.

Pea and Avocado Smash

Juliette | Flourishing Kitchen
Creamy avocado mixed with the freshest english garden peas, chipotle chilli flakes and lime.
5 from 5 votes
Leave a review
Print Recipe Pin Recipe Save Recipe Saved Recipe
Prep Time :10 minutes mins
Total Time :10 minutes mins
Course: Side Dish
Cuisine: British, Vegan
Servings :3

Equipment

  • Chopping board.
  • Paring knife.
  • a small bowl.
  • a fork.
  • a citrus juicer.
Prevent your screen from going dark

Ingredients
  

  • 1 cup (145g) fresh peas
  • 1 ripe avocado.
  • 1 lime.
  • 2 spring onions.
  • few sprigs of fresh coriander.
  • ยฝ teaspoon chipotle chilli flakes.
  • a pinch of sea salt.

Instructions
 

  • Top and tale the spring onions and finely slice them. Finely chop the coriander. Juice the lime.
  • Slice the avocado into 2. Discard the seed and skin. Mash with a fork.
  • Add peas to the mashed avocado. Give them a really good smash with your fork so they are mostly crushed but still keep some of the texture. Stir.
  • Add the spring onion, lime juice and chipotle flakes to the bowl. Stir then taste. Add sea salt to your own liking.

Notes

Serve on a large plate with slices of lemon and a mixed selection of sliced vegetables. For this recipe I used sliced carrots, celery and purple radishes.
I like to keep back a little spring onion, salt, coriander and chilli flakes while making this dish and then sprinkle them on top just before serving because it looks so pretty.
This dish keeps well when covered and stored in the fridge for 2-3 days.
Did you make this recipe?Please leave a comment below to help other people.

The original recipe.

This recipe has been updated. In my original recipe this dish was created using a blender. It made a pretty good garden party raw vegan dip / side. Almost like a smooth and creamy pea guacamole.

I re-created it when my food processor broke. I really love itโ€™s more chunky texture and consistency, the sourness of the lime juice and the taste from the sea salt flakes. It all fits very well together as a light a bright green pea spread thatโ€™s very easy to make for a quick lunch. It also goes brilliantly on crackers and toast!

I just love it and I hope you will too.


Hey, did you like this recipe? If so it would mean the world to me if you would please Pin this to your Pinterest boards or even share it on social media so others can find it too.

Enjoy your spicy pea and avocado mash for lunch, as a snack, or turn it into a sauce and enjoy it for dinner.

Iโ€™m off for some tea.

LOVE RAW FOOD

XOXO

Juliette

mum, dog owner, lover of raw food

Strawberry and coconut chia pudding.

August 8, 2018 by Juliette Leave a Comment

Chia pudding topped with strawberries and dessicated coconut.

Fresh summer strawberries and tropical coconut make this chia seed pudding irresistible for breakfast as well as dessert. Rich in omega-3, protein and fibre. 

A bowl of creamy chia pudding sprinkled with coconut and halved fresh strawberries.

A deliciously fruity and light raw vegan recipe, made with just 5 ingredients.

Making chia seed puddings is so quick and easy that I regularly whip up a batch and pop them in the fridge overnight.

I can hardly wait for morning to enjoy them for breakfast!

[feast_advanced_jump_to]

What can you do with chia seeds?

Chia seeds are hugely versatile as a food and are really popular with raw foodies because of this, and also because of their naturally rich nutrient content.  This includes being high in natural plant protein. 

They become gelatinous when wet and can absorb up to 27 times their weight in water. Ideally they should be soaked before consuming.

Here are some wonderful things you can do with chia seeds:-

  • Make raw chia seed jams, spreads, dips and chia puddings.
  • Make crackers, wraps, raw breads, burgers, falafel and raw pizza base.
  • Add raw chia seeds to smoothies, dressings, granola bars and cereal. 
  • You can also add them in water to soak before drinking.
  • Sprout raw chia seeds to grow your own microgreens.
  • Use them as an egg replacer in some recipes like cakes for example.

What do chia seeds and chia pudding taste like?

Chia seeds are neutral in flavour when you soak them in water so you do need to add flavours to them to enjoy them at their best. 

If youโ€™re making a chia seed pudding you can add different fruits, jams, nut butters, seeds and more to create delicious flavour combinations you'll love.

When they're soaked they plump up and taste smooth and creamy in texture. Chia pudding is somewhat similar to tapioca pudding. Perfect for breakfast, loved as a snack and even makes a wonderful dessert.

What is the correct ratio of seeds to liquid?

I typically like to use the ratio of 4 tablespoon chia seeds per 1 cup of plant milk. This makes 2 servings. You can make more by increasing the ingredients proportionately. 

If you plan to enjoy these weekday mornings and love your food prep you can easily make a big batch and store them in the fridge.

Soaking time.

You should soak chia seeds for a minimum of 3 hours for them to fully absorb the liquid theyโ€™re sitting in. They can be left overnight to soak in the refrigerator to keep fresh, which makes them brilliant for food prep. 

You can whip up a batch of plain chia pudding for the week in just a few minutes. It keeps well in the fridge for up to 3 days. 

All you need to do is turn the pudding out into a bowl, add your favourite fruit and any other toppings before serving.

I can make these while getting the kids ready for school in the mornings. If I need to have breakfast on the go I can put the pudding in a lidded container and bring it with me. 

Itโ€™s easy.

Basic chia pudding recipe.

You can make a basic chia pudding in 3 steps.

  1. Add chia seeds to your preferred plant milk and stir thoroughly. 
  2. Leave the chia seeds for 5 minutes then stir again to make sure the chia seeds don't form a clump at the bottom of your jar. For best results allow the chia seeds to swell  in the plant milk for a minimum of 3 hours, preferably overnight.
  3. Add your favourite fruit and toppings before serving. 

Is it good for you?

Chia seeds are very popular in the raw food community because theyโ€™re versatile and filled with nutrients. 

Chia Seeds Nutrients per 1oz 

Protein rich - chia seeds contain over 4.7g of protein per 1oz (just over 2 tbsp). Useful to know if your diet is vegan, vegetarian or plant based. 

Rich in fibre - with 9.75g soluble fibre per oz. Fibre plays an important role in keeping our digestive systems healthy (source). 

Omega-3s - according to this article, gram for gram chia seeds contain more healthy omega-3 fatty acids than salmon. 

Good source of other nutrients including:

  • Calcium 
  • Copper 
  • Zinc
  • Magnesium
  • Phosphorus 

Other recipe ingredients.

Almond milk - almond milk makes a great creamy alternative to dairy and if you make your own plant milks you forgo any nasty ingredients that some brands add in. Swap it out with your favourite plant milk.

Strawberries - I love to use fresh strawberries in this recipe. Feel free to use whatever fresh fruits you have around instead.

Banana - Creamy, sweet and full of natural goodness.

Maple Syrup - If you prefer then leave this out or use a different sweetener instead like date paste for example or stevia leaf.

Desiccated or shredded coconut - I like to use unsweetened desiccated coconut to top this recipe as it looks so pretty and the texture and aroma add that special something.

Alternative toppings and flavours.

You could try adding these ingredients to create your own chia pudding recipes:

  • Cashew butter and raspberry chia jam.
  • Kiwi fruit and chopped apple.
  • Blueberries, banana and cinnamon.
  • Pomegranate seeds with pineapple.

More raw vegan breakfast ideas.

If you like this strawberry chia pudding recipe for breakfast, please check out my other breakfast ideas:

  • Red berry chia pudding
  • Butternut squash mango smoothie bowl
  • Raspberry, apple and buckwheat breakfast bowl

๐Ÿ“– Recipe

Chia pudding topped with strawberries and dessicated coconut.

Strawberry and coconut chia pudding

Juliette | Flourishing Kitchen
Fresh summer strawberries and tropical coconut make this chia seed pudding irresistible for breakfast as well as dessert.
5 from 1 vote
Leave a review
Print Recipe Save Recipe Saved Recipe
Prep Time :10 minutes mins
Soaking time :3 hours hrs
Total Time :3 hours hrs 10 minutes mins
Course: Breakfast
Cuisine: Vegan
Servings :2

Equipment

  • medium jar + lid.
  • blender / mixer.
  • Fork.
  • Chopping board.
  • Paring knife.
Prevent your screen from going dark

Ingredients
  

  • 4 tablespoon chia seeds.
  • 1 cup (140g) strawberries.
  • 1 cup (240ml) almond milk or your favourite plant milk.
  • 1 tablespoon maple syrup.
  • 1 tablespoon desiccated coconut.

Instructions
 

  • Pour almond milk and maple syrup into a blender with half the strawberries and blend until smooth. Transfer the liquid into your jar.
  • Add chia seeds to the jar and whisk with a fork to mix. Leave for 5 minutes, give it another stir so that the chia seeds donโ€™t clump together at the bottom.
  • Allow to sit in the fridge covered for a minimum of 3 hours or overnight so the chia seeds can soak up the milk.
  • In the morning, remove the jar from the fridge. Divide into 2 serving bowls. Slice the strawberries and add to the chia puddings. Sprinkle with desiccated coconut before serving.

Notes

This recipe works with any plant milk. If you use tinned coconut milk this may produce a thicker creamier pudding and you can thin this out using a little water or other plant based milk by adding a tablespoon at a time until you get the consistency you prefer.
I like to use maple syrup as itโ€™s easily available and my kids love it. You can easily swap this with date paste, stevia leaf, coconut sugar or sweetener of your choice.
If you dislike the texture of the seeds in this pudding try blending them with the almond milk and strawberries to make a smoother pudding.
Did you make this recipe?Please leave a comment below to help other people.

Recipe Notes

This recipe has been updated 15/10/20

This recipe works with any plant milk. If you use tinned coconut milk this may produce a thicker creamier pudding and you can thin this out using a little water or other plant based milk by adding a tablespoon at a time until you get the consistency you prefer.

I like to use maple syrup as itโ€™s easily available and my kids love it. You can easily swap this with date paste, stevia leaf, coconut sugar or sweetener of your choice.

If you dislike the texture of the seeds in this pudding try blending them with the almond milk and strawberries to make a smoother pudding.

Have a lovely day! Iโ€™m off for some tea.

love raw food

XOXO

No bake raspberry lemon cheesecake

August 1, 2018 by Juliette Leave a Comment

A vanilla cheesecake topped with fresh raspberries and edible flowers.

A vanilla cheesecake topped with fresh raspberries, lemon zest and daisies.

๐Ÿ“– Recipe

A vanilla cheesecake topped with fresh raspberries and edible flowers.

No bake raspberry lemon cheesecake

Juliette | Flourishing Kitchen
Rich and creamy, no-bake raspberry lemon cheesecake. Perfect for Summer garden parties and picnics.
Leave a review
Print Recipe Save Recipe Saved Recipe
Prep Time :30 minutes mins
Freezing :2 hours hrs
Total Time :2 hours hrs 30 minutes mins
Course: Dessert
Cuisine: Vegan
Servings :12

Equipment

  • 8 inch cake tin.
  • Parchment paper.
  • A blender.
  • Food processor with an s-blade.
Prevent your screen from going dark

Ingredients
  

For the base

  • 2 cups (260g) almonds.
  • 1 cup (155g) whole pitted dates.
  • small pinch salt.
  • 3-4 tablespoon water.

For the cheesecake filling.

  • 2 cups (225g) cashew nuts, soaked overnight., I used raw cashew pieces.
  • juice of a lemon.
  • ยฝ teaspoon vanilla extract.
  • ยฝ cup (125ml) coconut oil,, as liquid.
  • ยฝ cup (125ml) plain vegan coconut yogurt.
  • ยผ cup (60ml) maple syrup.

For the top of the cheesecake.

  • 1 large handful raspberries.
  • zest of a lemon.
  • optional: edible flowers - I used daisies.

Instructions
 

For the base.

  • Soak the dates in enough hot water to cover them and leave for 15 minutes to soften. Drain.
  • While the dates are soaking, line the cake tin with parchment paper. You'll want to make sure there's plenty of paper coming up and over the top of the tin, so that you can use it to slide the cheesecake out once itโ€™s ready.
  • Place the almonds and a pinch of salt into the food processor. Blend into breadcrumb size pieces. Be mindful not to blend to much, as you don't want it to turn to flour.
  • Add the soaked dates to the food processor together with a tablespoon of water. Pulse until the mix begins to just hold together when lightly pressed. You may need to add another tablespoon water if needed.
  • Scrape the nut and date mixture into an 8 inch cake tin and press down so it looks nice and even all around. This is your cheesecake base.

To make the cheesecake filling.

  • Take the drained, soaked cashew nuts and the rest of the filling ingredients and blend together until they're really creamy and smooth throughout.
  • Using a spatula turn the filling out on top of the cheesecake base and spread it out evenly. When ready, cover the cake tin with parchment paper and pop it into the freezer for around 2-3 hours to firm up.

To serve.

  • To serve the cheesecake at room temperature, remove from the freezer and leave it on the countertop somewhere cool to defrost for 2-4 hours before serving.
  • Top with fresh raspberries, lemon zest and edible flowers just before you serve.
Did you make this recipe?Please leave a comment below to help other people.

XOXO

Juliette

Spicy Red Cabbage Sauerkraut Recipe

July 25, 2018 by Juliette Leave a Comment

A jar of red cabbage sauerkraut.

If you enjoy fermented foods then this spicy red cabbage sauerkraut recipe is easy to make and goes really well with most savoury dishes, especially during summer.

An opened mason jar filled with red cabbage sauerkraut sitting by an apple half.
[feast_advanced_jump_to]

Why A Spicy Red Cabbage Sauerkraut?

I first heard about fermentation about ten years ago at an event where 2 lovely parents got up and demonstrated making raw sauerkraut with just 2 ingredients, cabbage and salt.

The event left a huge impression on me and straight away I was really curious about fermented foods and gut health.

Then the first time I tried sauerkraut it blew my mind how amazing it tasted.

That slightly salty, juicy sourness, the crunch, the tartness. Oh My!

I instantly loved it and went out to buy my first fermented foods book which was Wild Fermentation by Sandor Katz. I remember reading it from cover to cover, it's one of my favourite books.

So anyway, after making a basic sauerkraut at home for a while I decided to spice things up a bit and created this recipe for a summer garden party.

What else is in this recipe?

Ginger: also known as ginger root, ginger brings a wonderful warmth and tangy flavour to any recipe and goes well in savoury recipes as well as sweets and desserts. Please use fresh raw ginger in this recipe, for its vibrancy and if itโ€™s not organic youโ€™ll need to peel the skin off first.

Tip: Instead of using a knife it can be easier to use the side of a spoon to peel the skin from fresh ginger root.

Red Chilli: chilli of course adds heat and spice. Chilliโ€™s are technically a fruit and part of the nightshade family, related to bell peppers and tomatoes. In this recipe Iโ€™m using fresh red chilli pepper to give the sauerkraut a nice kick of heat. You only need a little because the flavourโ€™s strong and goes a long way. But feel free to add as much as you like adjusting it for your own personal taste.

Apple: an apple will add some light sweetness to the natural sourness of the fermented cabbage. I use it to help balance out the flavours or saltiness, sourness and heat. The apple will ferment faster than the cabbage does and help to give the sauerkraut a lovey fizz.

What is raw sauerkraut? 

Sauerkraut is probably the most well known lacto-fermented vegetable dish.

Fermentation is traditionally a way of preserving foods at times of the year where some foods are in shorter supply. Fermented foods have also traditionally been associated with having health giving properties.

Raw sauerkraut is made using raw cabbage and salt which creates a natural brine as the salt draws out water from the cabbage.

The resulting brine needs to completely cover the fruit and vegetables to avoid them spoiling.

I love to add a tablespoon of this to my salads, bowls and roll ups mostly but really you can add it to almost any savoury dish.

Top down view of a jar of red cabbage sauerkraut and red chillies.

Should I wash the cabbage before fermenting it?

If you're making raw sauerkraut you should definitely remove the outer leaves first but you donโ€™t actually need to washing the cabbage leave youโ€™ll be using. The successful fermentation process relies partly on the microbes which lie on the leaves of the cabbage in order to work.

What are pickled foods?

Pickling foods is the process of adding foods to vinegar to preserve which is not the same as fermenting, even though vinegar itself is fermented. 

Which salt should I use?

I like to use a good quality unrefined sea salt or Himalayan salt which naturally still contains some minerals. Look for a salt that is unrefined and has no additives as this may prevent your fermentation or just make it taste nasty. Please check the food label before using.

How long should I ferment cabbage to make a good sauerkraut?

You would typically let a sauerkraut sit and ferment for 3 days up to 4 months max, depending on the method you use. The longer you leave it, the stronger the taste will be.

I find my sauerkraut is ready in 2 weeks max. Do test yours every couple of days until you get the taste you like best. I refrigerate my sauerkraut when I feel itโ€™s ready and this stops it fermenting further and helps to keep it fresh.

If the atmosphere in your kitchen is cold or on the cool side it will take longer for the fermentation process to get started and if itโ€™s warmer the ferment will be ready sooner.

Serving ideas.

Gorgeous served with:

  • salads
  • buddha bowls
  • tacos
  • wraps
  • nori rolls
  • sushi


I LOVE sauerkraut and I hope you do too ๐Ÿ™‚

If you like this recipe check out my post for this basic raw sauerkraut.

or use it as an accompaniment with:

  • Raw cauliflower "fried" rice
  • Cauliflower couscous with orange fennel salad
  • Asparagus and pea shoot salad
  • Vegan Waldorf salad


๐Ÿ“– Recipe

A jar of red cabbage sauerkraut.

Spicy red cabbage sauerkraut

Juliette | Flourishing Kitchen
Spicy red cabbage sauerkraut with red chilli and ginger to give it a bit of kick and tang.
Leave a review
Print Recipe Pin Recipe Save Recipe Saved Recipe
Prep Time :40 minutes mins
Total Time :40 minutes mins
Course: Condiment
Cuisine: Vegan
Servings :1 medium mason jar

Equipment

  • a chopping board.
  • a sharp knife or mandolin.
  • a grater.
  • a large bowl.
  • a small plate.
  • a medium lidded mason jar for storing.
Prevent your screen from going dark

Ingredients
  

  • 1 medium red cabbage.
  • 1 apple.
  • an inch of chopped fresh ginger.
  • ยผ - ยฝ red chilli,, to taste.
  • 1 tablespoon himalayan pink salt.

Instructions
 

  • Begin by slicing the cabbage very thin with a sharp knife or mandolin, being extra careful if you're using the mandolin.
  • Grate half the apple leaving the remaining half. Finely chop the chilli and grate the ginger. Add these to the large bowl of sliced cabbage and mix thoroughly.
  • Sprinkle the salt all over the red cabbage mixture and stir so that it's fully incorporated then leave for 20 minutes. This gives the salt time to work on your ingredients and begin drawing out water from the vegetables which will start to soften.
  • Go back to your bowl and with clean hands start to work it all together. You need to grab handfuls and squeeze the red cabbage mix tightly over and over again until it becomes really wet and a big puddle of gorgeous pink liquid builds up at the bottom of the bowl. This mini work-out should take about 10 minutes.
  • You want it to produce so much water that, once it's packed into the jar, the cabbage is completely submerged. This is REALLY important because it will keep the sauerkraut fresh while it's in the anaerobic environment and prevent it from going mouldy.
  • Pack the mixture into your jar and press it down to get it all in.
  • Take the apple half and stuff it on top of the sauerkraut to make sure itโ€™s completely covered in the liquid. There needs to be a gap between the completely submerged sauerkraut and the lid of 1-2 inches.
  • Put the jar of sauerkraut on a plate and burp it (open the lid and let the air out) every day to let the build up of gas out of the jar so it doesnโ€™t explode! Allow your sauerkraut to ferment for a minimum of 3 days and up to 2 weeks before popping it in the fridge to hold the flavour where you like it.

Notes

If you don't get much natural brine from the sauerkraut give it a taste test. It may need just a little more salt worked into it.
Always taste the sauerkraut before putting it into the jar. You want to be able to taste all the flavours without them being completely drowned out by the saltiness.ย 
Once you've done this a few times you become more familiar with the flavours so it gets easier.
I keep a close eye on my sauerkraut and taste test it every couple of days until I feel like it's ready. Then I keep it in the refrigerator to hold the flavour and keep it fresh.
ย 
Did you make this recipe?Please leave a comment below to help other people.

Hey did you enjoy this post? If so it would mean the world to me if you would please Pin this to your Pinterest boards or even share the LOVE on social media so your friends can enjoy it too.

Iโ€™m off to make some tea!

Juliette

XOXO

Kale and Beetroot Salad

May 8, 2018 by Juliette Leave a Comment

My go-to tasty kale and beetroot salad recipe. Packed with orange segments, blueberries, walnut pieces, and topped with a creamy orange tahini dressing. Ready in 15 minutes.

A bowl of salad with kale, beetroot and orange slices with a silver fork sitting on a kitchen towel.

A tasty mix of fresh ingredients and bursting with flavour. My kale and beetroot salad is easy-to-make and perfect for a quick, nutritious meal at the end of the day or for make ahead lunches.

Beets are filled with nutrients including vitamin C, fibre and potassium, as well as iron, magnesium and zinc.

If you love to read about the health benefits of foods like I do, hereโ€™s an article from Healthline: Beetroot 101: Nutrition Facts and Health Benefits.

โญ๏ธโญ๏ธโญ๏ธ If you prefer to skip past the recipes steps and helpful notes please check the โ€˜Jump to Recipeโ€™ button above and be taken straight to the recipe.โญ๏ธโญ๏ธโญ๏ธ

[feast_advanced_jump_to]

A quick glance at ingredients

My kale and beetroot salad is packed with flavour and a medley of fresh and wholesome ingredients. 

Keeping the beetroot raw adds a nice fresh crunch to the salad. If you prefer, simply use pre-cooked beets or roast beets yourself instead. 

Labelled recipe ingredients for a kale and beetroot salad with orange and walnuts.
  • kale
  • beetroot
  • orange
  • red onion
  • blueberries
  • Walnut pieces
  • cress

Kale salad dressing

The dressing is easy to make. I whipped up something fresh with an orange and a few ingredients from the pantry. The orange makes this naturally sweet rather than using maple syrup and also adds a bright citrus twist.

  • orange juice
  • tahini
  • apple cider vinegar
  • mustard powder
  • salt

See recipe card for quantities.

Why youโ€™ll love this kale and beet salad recipe

It's a breeze to whip up in just a few minutes, making it perfect for busy days.

Free from gluten, dairy and refined sugar, it caters to various dietary preferences.

Ideal for meal prep, ensuring you have a nutritious option ready to enjoy.

Step-by-step instructions with images

Making this simple beetroot and kale salad is so easy, just follow the four simple steps below or skip to the recipe card for the full details.

A small bowl of salad dressing on a white surface with a halved orange, handheld whisk and a kitchen towel.

Step 1. Whisk together the orange tahini dressing ingredients in a small bowl until combined and set aside.

Small bowls of chopped recipe ingredients including cress, fresh orange pieces, red onion, beetroot and walnuts.

Step 2. Peel and chop the raw beetroot into matchstick size pieces. Peel and segment the orange, finely dice the red onion.

A bowl of kale salad with beetroot, orange segments and blueberries.

Step 3.Add the kale and beet salad ingredients to a large bowl and toss together lightly.

A salad dressing being poured over a bowl of salad with kale, oranges,beetroot and blueberries.

Step 4. Dress the salad with a little of the salad dressing and serve the remaining dressing on the side.
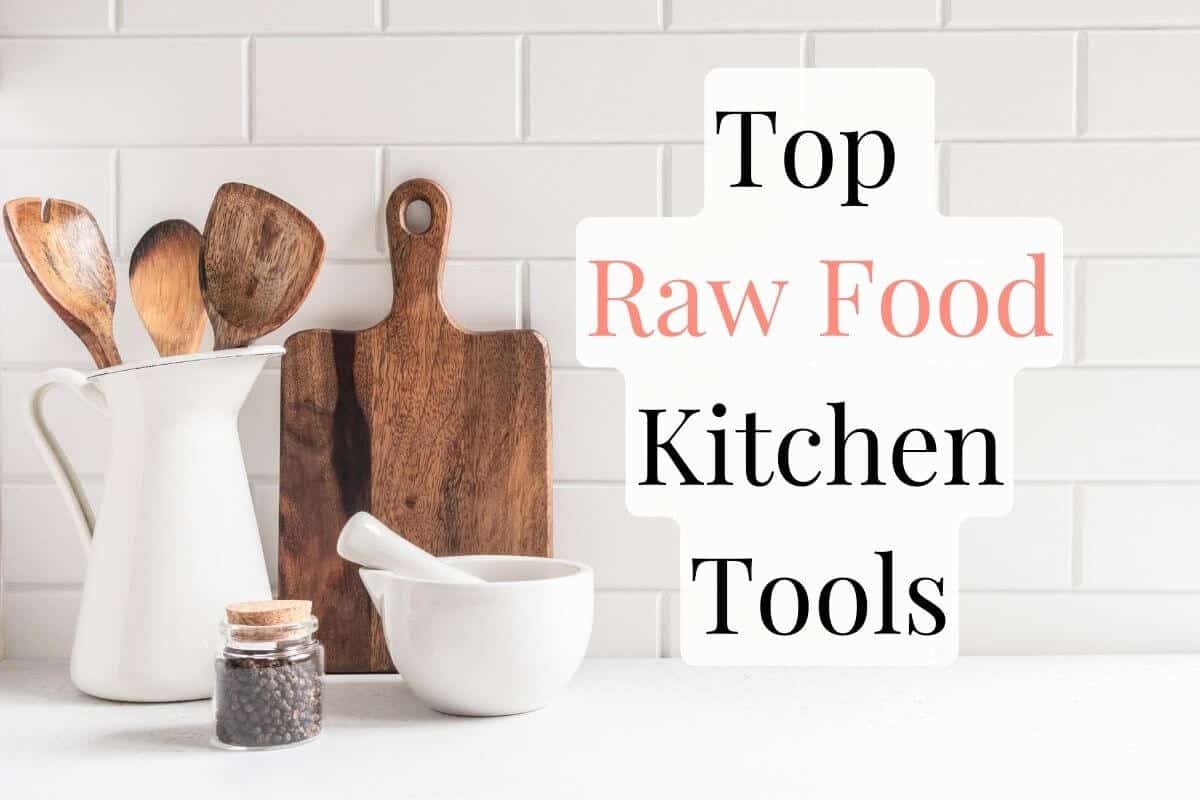
Substitutions

Get creative in the kitchen with the swaps and additions below. Try out different greens, fruit or nut alternatives to tailor this recipe to your own taste preferences. 

  • Experiment with different greens like rocket, chard, or a mix of leafy varieties.
  • Substitute orange segments with blood oranges, apples, or pink grapefruit for a twist.
  • Swap walnuts for shelled pistachios or pecan halves, or opt for nut-free pumpkin seeds.
  • Enhance the flavours with fresh herbs like parsley, dill, or mint, or switch it up with a creamy hemp seed ranch dressing.
  • Boost the protein content by adding lentil sprouts or chickpea sprouts to the mix.

Storing and leftovers

For weekly meal prep, prepare this beet and kale salad in advance and store it for up to three days. Keep the dressing separate until serving for maximum freshness.

Keep leftover salad dressing in a lidded container in the fridge for up to five days.

My top kale salad tips

A great way to soften kale is to add a splash of olive oil plus a sprinkle of salt to the leaves, before massaging them with your fingers. I love to do this before mixing kale with other salad ingredients. It also turns the leaves a beautiful dark green colour.

To finish the salad, top with some fresh herbs to add another layer of flavour and freshness that I think youโ€™ll love. Both fresh dill and parsley complement the beetroot wonderfully in this dish.

Taste and tweak as needed. Customise this raw salad recipe to your own taste preferences. Enhance the citrus flavour by adding more orange, increase the greens for a bigger raw veggie-packed dish, and don't forget to season with salt and pepper to your liking.

Iโ€™d love to know what you think if you make this recipe. If you have any questions, please let me know. Leave a comment below, or you can find me on Facebook, Instagram, or Pinterest.

Related

Looking for other recipes like this? Try these:

  • A white ceramic bowl filled with chopped kale, quinoa and avocado salad.
    Kale and Quinoa Sprout Salad
  • Brussel Sprout and Apple Salad (Vegan)
  • A salad bowl filled with pear, rocket, olives, cucumber and seeds fill a white salad bowl. A small jar containing salad dressing and a kitchen towel sit next to the bowl.
    Pear and Rocket Salad
  • A bowl filled with a quinoa salad with diced pumpkin, pecans, pumpkin seeds and pomegranate arils.
    Pumpkin Quinoa Salad

๐Ÿ“– Recipe

Kale and Beetroot Salad

Juliette | Flourishing Kitchen
My go-to tasty kale and beetroot salad recipe. Packed with orange segments, blueberries, walnut pieces, and topped with a creamy orange tahini dressing.
Leave a review
Print Recipe Pin Recipe Save Recipe Saved Recipe
Prep Time :15 minutes mins
Cook Time :0 minutes mins
Total Time :15 minutes mins
Course: Main Course, Salad
Cuisine: British, Raw Vegan
Servings :2

Equipment

  • Chopping board.
  • A paring knife
  • small bowl and hand whisk or fork
  • salad bowl.
Prevent your screen from going dark

Ingredients
  

  • 5 cups (100g) chopped kale, washed, stems removed
  • 1 medium beetroot, peeled and sliced into matchstick size pieces
  • 1 orange, peeled and segmented
  • โ…“ cup (35g) fresh blueberries
  • ยผ cup (30g) walnut pieces, roughly chopped
  • ยผ cup (ยฝ small) red onion, finely diced

Orange tahini salad dressing

  • 3 tablespoon tahini
  • 2-3 tablespoon orange juice, freshly squeezed
  • 1 tablespoon raw apple cider vinegar
  • ยผ teaspoon mustard powder
  • ยฝ teaspoon sea salt

Instructions
 

  • Prepare the dressing. Add the dressing ingredients to a small bowl and blend together with a hand whisk or a fork until smooth and creamy. Add a litte more freshly squeezed orange to thin as required.
  • Chop salad ingredients. Peel and chop the raw beetroot into matchstick size pieces, finely dice the red onion, peel and segment the orange.
  • Prepare kale salad. Add the kale and beetroot salad ingredients to a large bowl and lightly toss together to mix evenly.
  • Drizzle with dressing. Dress the salad with a little of the orange tahini salad dressing before serving. Serve with the remaining dressing on the side.

Notes

Top tip
A great way to soften the kale is to add a splash of olive oil and a sprinkle of salt to the leaves, then massage them with your fingers. I love to do this before mixing kale with other salad ingredients. It also turns the leaves a beautiful vibrant green colour.
Storing
This kale beet salad can be made in advance and kept fresh in the fridge for up to 3 days. Store the dressing separately in a lidded container in the fridge and add to the salad just before serving.
ย 
Did you make this recipe?Please leave a comment below to help other people.
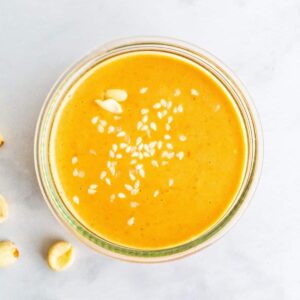
I'm off to make some tea. Happy Raw Food Eating!
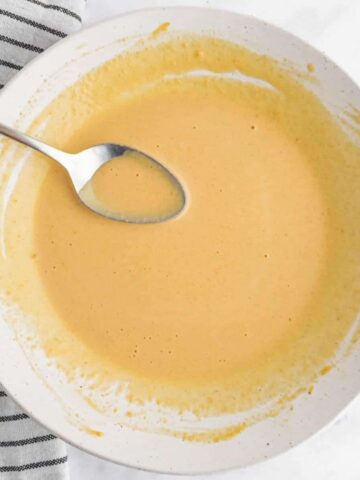
XOXO

Juliette

How To Make Raw Almond Milk

April 26, 2018 by Juliette 4 Comments

A glass of almond milk next to a few whole almonds.

Fresh, creamy and delicious, homemade raw almond milk tastes so much better than store bought and makes a great vegan alternative to dairy. Almond milk is easy to make and ready in under 10 minutes.

A glass of frothy almond milk and a few raw almonds on a kitchen towel.

Making your own kinds of plant milk is pretty fun and costs a fraction of what you have to pay in the supermarket.

I know how easy it is to pick up a bottle of ready-made almond milk when out shopping. Homemade nut milk means no nasty additives, preservatives and no artificial flavours.

I do this on a Sunday, that's my chosen meal prep day. Then I know I have fresh prepared almond milk in the fridge for my breakfasts during the week.

[feast_advanced_jump_to]

How is raw nut milk made?

You can make nut milk by blending soaked nuts with water. Then straining the liquid through a nut milk bag, muslin cloth or fine mesh sieve.
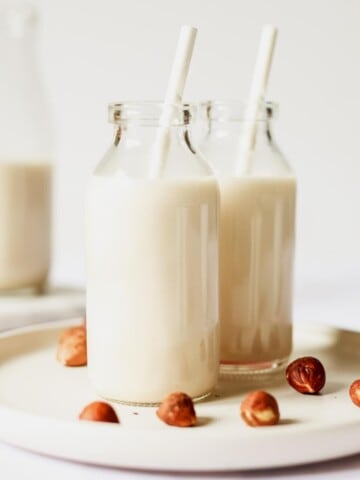
You can also make nut milk by blending raw nut butter with water.
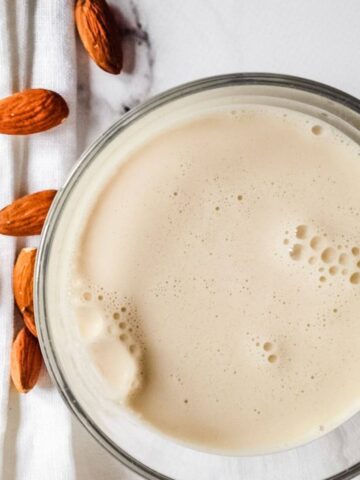
A small glass filled with freshly made almond milk and a dish of whole almonds.

If youโ€™re unsure if the nuts or nut milk are raw then ask the supplier direct.

Look for raw, unroasted, unsalted and unflavoured so their nutrients are intact.

I prefer to use water thatโ€™s either filtered, spring water or still mineral water rather than tap water.

How long does homemade almond milk last?

I keep almond milk in a clean lidded jar in the fridge for up to 3 days. I like to use a mason jar or bottle. Itโ€™s very easy to steralise jars so I recommend doing that.

You can use it in cereal, smoothies, milkshakes, chia pudding, overnight oats and in many other delicious raw food recipes.

Yes, you can freeze almond milk too. A popular way to do that is in small containers or an ice cube tray. Handy if you take it in your morning coffee.

How do you sterilise a glass jar?

Clean the glass jar with detergent in your dishwasher or by hand in the usual way and allow to dry.

Iโ€™ll sterilise my own jars in one of two ways.

1) I submerge the jar in lightly simmering water for 10 minutes before placing it upside down over a tea cloth, allowing it to dry naturally on the kitchen worktop before using.

Iโ€™ll wait for the water to cool a while before lifting the jar, so as not to scald myself.

2) Alternatively, I preheat the oven to 160ยฐC/gas mark 3 and place the clean jar onto a tray. I place it into the oven for 15 minutes then remove it and allow it to cool. As Iโ€™ll be putting cool raw foods into my mason jars I want to make sure the jar has cooled thoroughly before using.

Fresh nut milk being strained into a glass bowl through a nut milk bag.

What kind of nuts make great vegan milk?

You can make your own vegan milks at home from other nuts and seeds including:

  • cashews,
  • brazil nuts,
  • walnuts,
  • pistachios,
  • macadamia,
  • hemp hearts
  • pumpkin seeds
  • sesame seeds
  • sunflower seeds

and also

  • tiger nuts (actually an edible tuber)
  • shredded coconut
  • oats

Do you have to soak nuts before making milk?

Typically you would leave almonds to soak in filtered water or spring water (not tap water) overnight before straining to make the nut milk.

You can absolutely use nuts that havenโ€™t been pre soaked if you have a good blender but I prefer to use soaked. Your milk may be grainy otherwise.

Soaking softens the nuts, plus it makes the milk creamier. Also, you may find that the milk has a slightly bitter taste if you donโ€™t soak the nuts first.

What to do with almond pulp.

The left over almond pulp makes a great almond flour alternative for many other raw food recipes such as raw crackers, wraps, sweets, cheese, cheesecakes and biscuits.

You can also freeze the pulp to use at a later date.

With the pulp you can make this chocolate coconut bliss balls recipe here >>

๐Ÿ“– Recipe

A glass of almond milk next to a few whole almonds.

How to make raw almond milk

Juliette | Flourishing Kitchen
Fresh, creamy and delicious, homemade raw almond milk tastes so much better than store bought and makes a great vegan alternative to dairy. Almond milk is easy to make and ready in under 10 minutes.
5 from 3 votes
Leave a review
Print Recipe Save Recipe Saved Recipe
Prep Time :10 minutes mins
Total Time :10 minutes mins
Course: Drinks
Cuisine: Vegan
Servings :2

Equipment

  • High speed blender.
  • nut milk bag or muslin cloth.
  • Large bowl.
  • glass storage jar.
Prevent your screen from going dark

Ingredients
  

  • ยฝ cup (65g) raw almonds,, pre-soaked overnight.
  • 1 pitted date.
  • 2 cups (480ml) filtered or bottled still water,, not tap water.

Instructions
 

  • Discard the soak water and rinse the almonds. Now add them to your blender with filtered water and a pitted date. Blend until smooth.
  • Strain the liquid through your nut milk bag or muslin cloth into the bowl. Squeeze as much liquid out of the bag as possible (I love this bit) into the bowl leaving the pulp at the bottom of the bag/cloth as dry as you can.
  • Pour your fresh raw almond milk into a sealable container and store in the fridge for up to 3 days.

Notes

This recipe can easily be doubled to produce a larger quantity.
For a creamy, stronger tasting almond milk you just use less water before blending.
Youโ€™ll notice that as the almond milk settles there is some separation. This is normal. Just stir the milk before using.
By popping the skins off the soaked almonds before blending youโ€™ll get a whiter, creamier almond milk.
Itโ€™s quite common to add a pinch of sea salt or pink himalayan salt to the blender. I prefer the taste without salt which is why I donโ€™t include it in my recipe.
Try different flavours by adding a pinch of cinnamon or a few drops of vanilla essence.
Did you make this recipe?Please leave a comment below to help other people.

Hey, did you like this recipe? If so it would mean the world to me if you would please Pin this to your Pinterest boards or even share it on social media so others can find it too.

Iโ€™m off for some tea.

xoxo

Juliette

mum, animal lover, raw food enthusiast

Basic Raw Sauerkraut Recipe

April 24, 2018 by Juliette Leave a Comment

A chopping board, shredded cabbage and a mandolin.

Try this basic sauerkraut recipe to get you started with fermenting. Sauerkraut tastes great on the side with most dishes or try a small amount or kraut or a teaspoon of the juice in with your smoothies.

A jar filled with fresh sauerkraut, a sliced white cabbage, a knife and salt.

If youโ€™re curious about raw food then you may want to get into making your own raw unpasteurised fermented sauerkraut.

๐Ÿ“– Recipe

Basic raw sauerkraut recipe

Juliette | Flourishing Kitchen
Try this basic sauerkraut recipe to get you started with fermenting.
5 from 1 vote
Leave a review
Print Recipe Save Recipe Saved Recipe
Prep Time :40 minutes mins
Fermenting time :14 days d
Total Time :14 days d 40 minutes mins
Course: Condiment
Cuisine: Vegan
Servings :1 medium mason jar

Equipment

  • 1 chopping board.
  • 1 sharp knife.
  • 1 large mixing bowl.
  • 1 clean glass jar with lid or mason jar.
  • A small amount of filtered/bottled water may be necessary.
Prevent your screen from going dark

Ingredients
  

  • 1 Small White Cabbage.
  • 1-2 tablespoons Himalayan pink salt

Instructions
 

  • Peel the outer layer of leaves from the cabbage then cut out and reserve the stem, youโ€™ll need this for later.
  • Half the cabbage then slice each half thinly and add to the mixing bowl. Sprinkle 1 tablespoon of the salt over the cabbage and mix in thoroughly with your fingers.
  • Leave for 30 minutes to allow the salt to begin drawing out the water from the cabbage. Massage the cabbage with your hands for a good 10 minutes until a good amount of water (brine) is released from the leaves.
  • Do a taste test. It should taste salty but, not horribly so. Equally, if itโ€™s not salty enough then add a little more salt and mix it through the cabbage.
  • Pack the cabbage into a mason jar. Pour in the brine, making sure the cabbage is completely submerged. Place a piece of reserved cabbage (from the stem) on top of the sauerkraut to help in holding under the brine. Leave a good couple of inches gap at the top of the jar to allow the fermenting to take place.
  • Cover the jar with the lid and leave to ferment for 2 weeks before putting into the fridge. You will need to burp the jar (remove the lid to let the air out, then place it on again) every day to release the pressure that builds up inside - you donโ€™t want it to explode all over the counter!
  • Taste the sauerkraut before putting into the fridge. If you prefer a stronger more sour taste from the sauerkraut leave it for another week before placing it in the fridge. You will need to continue to burp the sauerkraut each day until it's ready.
Did you make this recipe?Please leave a comment below to help other people.

Enjoy! Iโ€™m off to make some tea.

I may have to visit the fridge to grab a forkful of sauerkraut now too.

Love raw food ๐Ÿ™‚

XOXO

Juliette

Discover 6 healthy foods raw foodies love

March 21, 2018 by Juliette Leave a Comment

A selection of sliced raw fruits on a blue background.

In this blog post I look at 6 healthy foods raw foodies love. They're nutrient rich and really easy to use.

If youโ€™re curious about how to start a raw food diet and wondering what foods you can eat then here are few suggestions which may surprise you.

Assortment of fresh sliced fruits on a blue background includes watermelon, peach, lime, berries, plums.

Image by rimmabondarenko via Canva.

When I first became interested in raw food I focussed on simply adding more fresh fruits and vegetables into my meals. As I went along I began to see other foods, and ways to prepare them, which I hadnโ€™t really noticed before.

One of the surprising and lovely parts of eating this way is that you do learn how to make the most of everything. Every season, every plant. Exploring raw foods you may become more open minded about foods generally, and start to use ingredients in ways you never considered before.

So, I thought Iโ€™d share with you some of the foods that have opened my eyes.

I love the ways you can use each of these groups and encourage you to take a look yourselves and investigate, to see if they give you as much joy as they do me!

[feast_advanced_jump_to]

1 - Fresh raw microgreens.

Microgreens are tiny plant seedlings - mini versions of their fully formed selves and not quite reaching their โ€˜baby greensโ€™ stage.  Theyโ€™re grown from the seeds of herbs, vegetables and edible flowers such as radish, broccoli, spinach, beetroot, rocket, kale, chard, basil, sunflower, pea, coriander, nasturtiums and marigolds.

Microgreens go a step beyond sprouting where the they begin to grow and produce tiny leaves. Remember growing cress at infant school when you were little to see how plants grow? Well, it's pretty much along the same lines.

Microgreens typically require soil in order for them to grow in a week or two. Whereas, you can grow sprouts in a jar (or other container) using just water in a matter of days.

Once the seeds have sprouted they start to grow at an accelerated rate, charging up towards the sun. They need an incredible amount of energy in order to do this, which until then has been stored up inside the tiny seed waiting to be released.

The new plants needs energy from the sun in order to succeed in reaching their full potential. So if youโ€™re eating these, youโ€™re not only taking in their incredible range of nutrients, but youโ€™re also taking in their energy.

Theyโ€™re usually harvested in about one to four weeks, depending on the plant, at about 3-4 inches tall.

If youโ€™re growing them at home you can harvest them using scissors to snip them from their roots just above the soil.

How do you use microgreens?

Although theyโ€™re light and delicate at this stage of their lives they really do add a great punch of flavour to your salads and meals. Theyโ€™re packed full of goodness and are understood to be more nutrient dense while tiny than when theyโ€™re fully grown.

I think microgreens are very pretty too and love to add them to salads. In fact Iโ€™ll pop them onto just about any dish including wraps, sushi, soups, curries and into my morning smoothies to give me an added nutrient boost.

While you may have seen microgreens in the supermarkets theyโ€™re actually pretty easy and inexpensive to grow at home. You can grow them compost in a relatively small space, and they take just days to grow before harvesting.

I have to say that I absolutely LOVE growing them at home in the kitchen. My current faves are sunflower shoots and pea shoots.

2 - Raw nuts and seeds.

Nuts and seeds are incredibly versatile and can be used to prepare many healthy raw food dishes. From pesto to vegan sauces, dips, dressings, granola, soups, salads, and homemade cereal bars, nuts and seeds can also provide wonderful texture and crunch.

If you want to try alternatives to dairy you can use raw nuts and seeds to make your own nut milks such as almond milk, tiger nut milk, or hemp milk for example, at home with a blender & even try making your own nut butters.

You can also use nuts and seeds in making desserts such as ice cream, cheesecake, biscuits and to make vegan cheese recipes.

According to research, nuts are a great source of micronutrients such as potassium, magnesium, calcium, B vitamin folate and many others (source).

Nuts and seeds are also high in fibre, healthy fats and are a great source of protein (source).

It's quite common for raw foodies to turn them into living foods by soaking and sprouting raw, unpasteurised, non-roasted nuts and seeds before eating to break down their outer coating. This process makes them easier for our bodies to digest by breaking down enzyme inhibitors, phytic acid and tannins which therefore allows us to take in more nutrients.

All in all theyโ€™re such fabulous and versatile foods and really fun experimenting with if you love tinkering with recipes in the kitchen!

3 - Seaweed.

Sea Veggies are actually algae and are often overlooked in healthy diets. They've become more popular in the West in recent years and now can be found in many health stores and some supermarkets. 

Most seaweeds we can buy only need to be soaked rather than cooked (not the flakes) which makes them really easy healthy raw foods to add to your salads, soups and other dishes.

Sea vegetables come in three colours - green, red and brown, the most popular ones are:

  • arame
  • dulse
  • kelp
  • kombu
  • nori and
  • wakame.

Theyโ€™re full of nutrients including sodium and iodine, phytochemicals, trace elements and chlorophyll.

4 - Fresh herbs and spices.

Herbs and spices have the amazing ability to completely transform the flavour of our meals and many have also been used traditionally the world over to aid our health in one way or another.

Theyโ€™re especially useful in dips, dressings, sauces, salads and soups but you really can add them to just about anything!

Easily available in our supermarkets and garden centres, herbs and spices are also really fun to grow either on your windowsill or in your garden. Theyโ€™re a staple in my pantry and garden and I always have at least one pot growing in the kitchen no matter the time of year because I feel theyโ€™re so essential. Put simply, food would be pretty boring without them.

Itโ€™s so easy to try fresh alternatives in addition to using the little jars of dried herbs you already have at home. Which do you love to use regularly?

Iโ€™ve put together some examples of herbs and spices you may use to create some of your your favourite flavours.

  • Chinese style- garlic, ginger, chilli, star anise, clove, Sichuan pepper
  • French style- garlic, dijon mustard, basil, thyme, rosemary, fennel, capers, chervil, tarragon,
  • Greek style - garlic, thyme, oregano, fennel, dill, mint, parsley
  • Italian style - garlic, basil, marjoram. fennel, parsley, thyme, bay, sage
  • Indian style - cumin, coriander, mustard seeds, turmeric, ginger, chilli, cinnamon, fenugreek, cardamom,
  • Mexican style - chilli, coriander, garlic, cumin, paprika, oregano, chipotle,
  • Thai style - garlic, galangal, coriander, kaffir lime, chilli, tamarind, peppercorn, lemongrass, holy basil

5 - Sprouting.

Sprouting is another really fun and easy way to prepare foods at home in a small space. And it can be enjoyed indoors all year round.

Soaking the seeds and allowing them to sprout activates the process of germination. The seed then begins to grow a tiny shoot.

This whole process of sprouting makes the food easier to digest once the hull breaks down and falls away. Theyโ€™ve become especially popular more recently as people learn about their nutritional value. Theyโ€™re highly nutrient dense - choc full of vitamins, minerals, phytochemicals, fiber and antioxidants (source).

You need to soak, rinse and drain them each day according to their packets growing instructions for them to sprout. Give them a rinse in the morning and evening each day which takes just a couple of minutes.

Typically sprouting takes between 2-5 days depending on the seed. You can buy equipment online and at your local health food store. Or get started quickly at home using a glass jar and some cheesecloth or muslin and a rubber band.

Itโ€™s important to purchase good quality seeds from a known source. Look for ones which are raw, organic and clearly marked suitable for sprouting. Make sure also that the equipment you use is scrupulously clean.

Popular seeds to sprout at home are sunflower, sweet pea, buckwheat, radish, broccoli, and many more. This process really doesnโ€™t take much effort at all and you gain hugely.

Plus itโ€™s really fun!

And please do your research. Make sure that the seeds you're sprouting are suitable to be eaten raw. Some foods, like most beans and grains, contain toxins. These shouldn't be eaten raw at all and they have to be cooked before being consumed. If youโ€™re unsure then call or email the producer and ask.

I love to use them in salads mainly. They're also brilliant in wraps, pates, dressings, smoothies, stir fryโ€™s. You can also use them to make sprouted grain bread or even dehydrate them to make crackers.

A popular brand to use that you probably will have come across before is Vogel. They produce high quality products that are fab to get you started without being too expensive.

If you fall in love with sprouting, definitely buy quality seeds from a store in larger quantities. They're often more affordable this way.

The Food Standards Agency advises that people in vulnerable groups should always cook sprouts thoroughly until steaming hot all the way through before eating. This includes, pregnant women, young children, the elderly & those with a weakened immune system. This is because some sprouts may contain bacteria that cause foodborne illness.

6 - Raw fermented foods and drinks.

These have become more popular in recent years and are some of my favourite foods! Raw unpasteurised ferments have been used traditionally for centuries all over the world as a way of preserving foods.

Microorganisms are found on the leaves of foods like cabbage for example, used in making sauerkraut and kimchi. The lactobacillus converts sugars into lactic acid which limits the growth of harmful bacteria and preserves the food.

Pasteurising these foods kills the living microorganisms in them and it's those we tend to find available in the supermarkets.

I love these types of raw foods because theyโ€™re really healthy, fun, versatile and affordable to make.

Easy ferments to begin making at home are sauerkraut and ginger ale.  Of course, you can make quick pickles at home using vinegar. The raw, unpasteurised kind that bubble and fizz add a particular tang to dishes and canโ€™t be compared to any other food (in my opinion).

As with any change in your diet please do your research. You should always speak to your doctor or qualified healthcare professional before making changes.


If you enjoyed this post about raw foods and found it useful, Iโ€™d be very grateful if youโ€™d help it spread by sharing it. Thank you!

Ta ta for now and take care, Iโ€™m off to make some tea!

XOXO

Juliette

Ultimate Plant-Based Food Swaps

March 7, 2018 by Juliette Leave a Comment

Close up of a range of vegan protein and fat sources includes avocado, chia seeds and coconut halves.

If youโ€™re wondering how to upgrade your diet with more plant based food, itโ€™s is much easier than you think. Get started with my 10 Ultimate plant-based food swaps. They're easy and healthy whole food alternatives that are gluten and dairy-free.

An assortment of plant based protein and fat sources includes coconut, avocado, nuts and chickpeas.

Image by rimmabonderenko via Canva.

Weโ€™re constantly being bombarded in the news, and just about everywhere else we look, with information about food and diet.

When youโ€™re looking to do something simple so that you can eat better, sleep better, feel better, it seems that everyone has an opinion.

It can feel overwhelming thinking of all the things you want to do, wondering where the heck you should start especially when constantly on the go.

Iโ€™m not going to tell you what or how you should be eating.

But what Iโ€™d love to do, is provide a place where you can grab simple, fun recipes and ideas to upgrade your diet without always having to cook.

By breaking overwhelming tasks into baby steps it becomes a whole lot easier and more fun to do.

Making healthier food choices meant trying to find both cooked and raw alternatives bit by bit rather than all at once.

[feast_advanced_jump_to]
Two bottles of plant based milk with rolled oats, nuts and seeds on a white background.

Image by Mizina from Getty Images via Canva.

What did I do to upgrade my diet?

When I started out, I researched plant-based alternatives to what I was already eating.

So I looked for different sweeteners like maple syrup for example to replace table sugar, then looked for gluten free flour alternatives and wheat free grains etc. to see what I could find.

Then turned the whole thing into a kind of game so those times when I was feeling a bit bored with my routine I could always swap things up a little in my own cheeky way.

Well, I felt it was cheeky anyway.

Why tell the kids I was making brownies with beetroot or a tin of black beans?

I made cakes with coconut flour, ice cream with week-old bananas that had begun to go brown (theyโ€™re sweeter like this).

I started making raw sweets for fun using pitted dates and the almond-meal left after making nut milk.

Each food swap had to be an upgrade from my usual ingredients and also had to be gluten free, refined sugar free and dairy free.

So I started up a list of things which with time, just grew and grew and ended up creating a small chart which I stuck to the front of our fridge.

10 Easy plant-based food swaps.

1 - Simplify Fats

Instead of reaching into the cupboard to find all sorts fats I simplified to just these:

  • Coconut oil, olive oil, extra virgin olive oil (for dips, sauces and drizzling)
  • Avocado
  • Nuts and seeds
  • Coconut
  • Olives

2 - Sugars

There are so many different names given to the sugar in our foods. I like to stick to these:

  • Stevia
  • Maple syrup
  • Lucuma powder
  • Coconut sugar
  • Dates and date paste

3 - Table Salt

I swap this with unrefined sea salt / celtic sea salt because table salt is stripped of its natural mineral content during processing.

4 - Bread

Now that we have much better sources of gluten-free bread available to us this can be a fab alternative. Crackers, oatcakes, and sprouted grain breads can make a delightful change. There are so many to choose from now and do look out for those with the least amount of additives, preservatives and flavouring.

5 - Breakfast cereal

Make your own cereal using gluten free alternatives such as oats, buckwheat and quinoa. You can also use nuts and seeds -  I love chia seeds, hemp, almonds and hazelnuts.

What favourites do you have?

6 - Cakes and cookies

Gluten free flours such as coconut flour and ground almonds can be used make wonderful cakes and tarts.

Have you discovered chocolate coconut bliss balls? Theyโ€™re gorgeous!

You can make cookies and cakes with raw ingredients and youโ€™ll be amazed at how simple and delicious they are.

7 - Croutons

How about using your favourite nuts or seeds instead?

8 - Dairy milk

Non dairy milks are easily available now in most supermarkets, but you need to watch out for added ingredients in some brands.

I love the taste of freshly made dairy free milks like oat milk, almond and hazelnut. I do sometimes buy pre-made alternatives from the supermarket when Iโ€™m pushed for time but they have to avoid using thickeners, flavourings, additives and preservatives in their produce.

9 - Eggs

Aquafaba (the liquid from tins of chickpeas), psyllium husk powder, ground flax seed, chia seeds.

10 - Wheat Flour

Almond flour, buckwheat flour, coconut flour, chickpea flour, gluten free flour.

As with any change in your diet you should always speak to your doctor or qualified healthcare professional before making changes and to discuss if including more plant-based and raw foods would be suitable for you.

If you enjoyed this post, Iโ€™d be so grateful if youโ€™d help it spread by emailing it to a friend, or sharing it on Facebook. Thank you!

Fresh cuppa anyone?

Bye for now.

Juliette

10 Ways To Start with Raw Food

February 27, 2018 by Juliette Leave a Comment

Three bottles of smoothie on a white background with fruits, vegetables, ginger and some leaves.

If youโ€™re looking to upgrade your diet with some raw and wholesome plant-based goodness check out my top 10 ways to start with raw food.

An assortment of raw fruits, vegetables and bottles of smoothie.

Raw foods are becoming increasingly popular and appealing as more of us choose to consume less meat, and fewer animal products and consider our impact on the environment.

The negative effects of eating more processed, high salt, fat and sugar-laden foods have made many of us literally hungry to discover alternatives.

Our preference now to seek out whole, unrefined plants and whole foods like fruits, vegetables, nuts, seeds, whole grains, and legumes is growing year on year.

Thankfully the variety of fresh fruits and vegetables easily available to most of us in the UK via supermarkets and market stalls throughout the year is huge!

Partnerships with producers who bring us the most colourful, diverse range of foods from across the world is something I for one, am hugely grateful for.

[feast_advanced_jump_to]

What raw foods can you eat?

Foods that you can eat on a raw food diet consist mostly of fresh fruit and vegetables, dried fruits, nuts and seeds that havenโ€™t been roasted, artificially flavoured or heat treated.

It also includes food like soaked and sprouted nuts, seeds, beans, grains, micro-greens, seaweeds, raw unpasteurised fermented foods and more.

To discover more about what a raw food diet is and what you can eat on a raw food diet check out my previous post "What exactly is a raw food diet?" >>>

You donโ€™t need to go 100% raw to enjoy raw foods.

Itโ€™s my own opinion that eating a healthy plant-based diet shouldnโ€™t be about restricting what you eat, losing weight or making everything you eat 100% raw.

It's more about enjoying the rainbow assortment of nutrient-rich goodness, being kinder to animals and choosing to live in a more eco-friendly sustainable way.

I donโ€™t try to be perfect, super strict or feel guilty about the food I eat. Mostly plant-based and raw is right for me. You do whatโ€™s right for you.

If youโ€™re crazy busy, healthy meals made with little or no cooking are totally a plus and will leave you with more time for other things. YAY!

A selection of sliced raw fruits randomly laid out.

Image by Stephanie Studer onย Unsplash.

So while youโ€™re thinking about what plant-based possibilities there are, here are 10 ways you can start right away.

1) Raw juices and smoothies.

This was my way into healthier eating. I prefer juices and smoothies to be vegetable-based with a small amount of fruit. Theyโ€™re a great way to get in leafy greens just by condensing them into a drink.

Freshly made juices and smoothies are full of nutrients and can be super hydrating for your body.

I often dilute juices with water to make them less concentrated and last longer during my day.

Making these can work especially well in the mornings and at weekends when thereโ€™s more time to spend with kids who like to create their own combinations.

2) Freshly made dairy-free milk and milkshakes.

Making fresh dairy-free milks and shakes is easier than you think and they taste amazing!

To me, they taste far superior to high street ready-made versions that are often filled with added ingredients.

A great vegan milk to start with is almond milk or oat milk, although rolled oats are not typically raw.

How about chocolate and hazelnut or perhaps cherry almond milkshake or maybe strawberry and bananaโ€™s more your style?

[convertkit form=5606185]

3) Raw breakfasts.

If youโ€™re used to having breakfast and itโ€™s something you really enjoy (like me) then raw breakfasts are easy-peasy and super quick to make.

Itโ€™s popular in the raw foodie community to eat fruit for breakfast and that can be a sumptuously sweet and heavenly experience, especially in Summer.

When itโ€™s cold outside, I often long for something heavier than eating fruit. When Iโ€™m feeling more adventurous thatโ€™s the perfect time for me to try something new.

So my go-to breakfast when itโ€™s cooler is homemade cereal. I like to use ingredients like oats, soaked buckwheat, and sprouted quinoa then throw on some seeds.

Sunflower seeds, pumpkin, hemp, chia seeds or flax seeds are all great options.

Lastly, I add two or three pieces of fruit. Top with dairy-free milk. Thatโ€™s it.

If you need to have food on the go, you can pack cereal and fruit in a box or jar and carry the milk separately.

If something more fancy is what youโ€™re after how about homemade muesli or a chia pudding? They take about 5 minutes to prepare then you can leave them in the fridge overnight until the following morning.

A bowl of yogurt topped with an assortment of sliced fresh fruit.

Photo by Brooke Larkย on Unsplash.

4) Raw vegan salads, bowls and sides.

Bowls have also become a popular salad choice - they look so pretty too. Start with greens and top with a mix of chopped and spiralized vegetables, cooked grains, beans, legumes, raw sprouts or micro-greens. Maybe add some nuts or seeds for crunch and finally, add a dressing.

Classic-style side salads like coleslaw, tomato salad, cucumber salad, Waldorf salad and many more can be added to most dishes.

The main raw vegan dish of the day for me is a huge salad. And Iโ€™m not talking about a few bits of lettuce and tomato. Iโ€™m talking PROPER salad.

The base of salads like this is leafy greens eg. cos, kale, Swiss chard, rocket, watercress, and pak choi. Iโ€™ll often begin with more than one type of green.

Topped with fresh chopped, grated or julienned raw vegetables, healthy fats like nuts, seeds or avocados, and fruits like cucumber, tomatoes, mango, pineapple whatever you fancy.

Add in a beautiful homemade dressing, herbs or spices and youโ€™re off to a fab start.

Building a really great salad doesnโ€™t take much but, a good one can outperform most cooked meals for me.

And you know those big bowls you find shared at parties among friends to pick at? Yep. Iโ€™m talking salads that large.

A big raw vegan salad needs to be sustaining and there has to be enough to help meet your own personal calorific needs for the day.

5) Raw dips and dressings.

Do you like salad dressings, dips, salsas and sauces?

Try creating some of your own raw versions to liven things up a little.

It's not very time-consuming or expensive to do.ย 

Your freshly prepared homemade foods contain no nasty ingredients that are often found in our ready-made processed versions.

These dishes will add a variety of flavours and texture to many meals. Theyโ€™re a must for a great salad, vegetable noodles, snacks and much more.

6) Raw noodles.

Our much-loved obsession with spaghetti is easily replaced with alternatives made from fresh vegetables and fruits. You can make your own versions with courgette, beetroot, sweet potato, butternut squash, carrots, parsnips and cucumbers.

Theyโ€™re now so popular that you can find ready-prepared versions in supermarkets up and down the UK.

Top yours with a gorgeous raw pesto, tomato or alfredo sauce.

Looking for zoodles recipes?

  • A large bowl of courgette spaghetti with broccoli, fresh herbs and diced chilli.
    Courgette Spaghetti w/Broccoli, Lemon, Chilli
  • A big bowl of courgetti spaghetti with diced summer mediterranean vegetables.
    Courgetti Spaghetti with Vegetables
  • A bowl of butternut squash noodles with pesto and pomegranate seeds.
    Squash Noodles w/Pesto and Pomegranate (raw, vegan)
A bowl of courgette noodles mixed with diced mediterranean vegetables and basil leaves.

7) Raw wraps.

There are so many things you can do with these and again these can be quick and easy to throw together.

Choose the larger leafy greens for your wrap and stuff with chopped vegetables, topped with a sauce or dressing of your choice.

How about a homemade veggie soup? Theyโ€™re like a vegetable-based savoury smoothie. Top them with things like nuts, seeds, and raw sprouts.

8) Raw soups.

It's also a great way to use up leftover veggies in the fridge. Itโ€™s economical and may help to reduce your weekly food waste.

Gently warm up raw soups if you donโ€™t yet fancy trying them cold.

You could make a big batch of soup and freeze some for another day.

9) Sprouts and microgreens.

Thankfully fresh sprouts and micro-greens have become more widely available in the UK in recent times.

You can easily grow your own for very little money and theyโ€™re much nicer than most store-bought options. Theyโ€™re full of nutrients.

Some of my favourites are broccoli, alfalfa, pink radish, sunflower greens, lentil sprouts, quinoa and sprouted chickpeas.

I love these in wraps, salads, bowls and smoothies.

The FSA advises that people in vulnerable groups should always cook sprouts thoroughly until steaming hot all the way through before eating. This includes pregnant women, young children, the elderly & those with a weakened immune system. This is because some sprouts may contain bacteria.

10) Raw vegan sweets and desserts.

I try to stay away from the premade raw produce in stores and like to make my own versions instead.

You can make a huge array of sumptuous desserts and sweet treats using raw ingredients.

From Medjool dates stuffed with pecans to little coconut bliss balls to raw cheesecakes.

My mouth is watering already.

Create meals without always having to cook.

Once you've found a few raw recipes you really enjoy, start to write them down or save them onto your phone, so that you don't forget.

Very soon you'll have enough raw food dishes to include a few each week.

Challenge yourself to enjoy introducing new techniques, new flavours, and new ingredients little by little each season.

Keeping it simple, fun and interesting without taking it all too seriously will help to keep you from feeling bored or overwhelmed.

Please do your research about sprouting as some foods really must be cooked and shouldnโ€™t be eaten raw eg. Most beans are toxic unless they have been cooked before eating. Most mushrooms should also be cooked.

As with any change in your diet, you should speak to your doctor before making changes and discuss if including more plant-based and raw foods will be suitable for you.

Iโ€™m off to make some tea.

XOXO

Juliette

mum, dog owner, lover of raw food

What Do You Eat on a Raw Food Diet?

February 13, 2018 by Juliette Leave a Comment

A row of raw foods includes fruit, leafy greens and a bottle of red smoothie.

If the idea of eating simple, refreshing raw whole foods to feel healthier seems attractive to you, read on. Discover what a raw food diet is and foods you can eat right here. Plus check out the meal ideas and more.

Breakfast bowl filled with fresh berries next to a bunch of green flowers.

Photo by Brooke Lark on Unsplash.

[feast_advanced_jump_to]

What is a raw food diet?

Eating raw foods can be highly nutritious. The focus on this way of eating is around enjoying more fresh seasonal whole foods, as unprocessed and close to nature as possible.

Food can be warmed but is believed to begin losing many nutrients and enzymes after 118 degrees F.

I think of it as more of a lifestyle choice than a diet. Diets make me think about food restrictions and trying to lose weight. Raw foods mean neither of these things to me.

Food is there to be enjoyed, and one of the things I love about when it's raw is that I eat an abundance to get the nutrition my body needs to be at its best.

Iโ€™m passionate about raw foods because eating this way gives me crazy energy all day long. 

Eating mostly raw plants is a simple, peaceful and beautiful way to eat that's also nourishing, sustainable, eco-friendly and cruelty-free.

I can prepare most of my meals this way in under 20 minutes, with no cooking and very little washing-up! ...Cool right?

It's naturally really fast food and full of goodness.

Including plenty of raw ingredients in my diet ensures that I always have colourful and seasonal foods on my plate all year. Itโ€™s ever-changing and never dull.

Itโ€™s been (and still is) hugely beneficial to my health in many other ways too. In fact, itโ€™s been positively life-changing.

A mix of images from our recipes including asparagus salad, peanut dressing, breakfast bowls and dip.

What do you eat?

After eating a standard Western diet for so long, one of the most adorable aspects of raw food is the simplicity of it all. There's wholeness, a rainbow of colours and vibrance. Plus of course NO COOKING! Yes, that's right no cooking at all.

Mainly, I focus on eating plant-based whole foods, including:

  • plenty of fresh fruits, vegetables and leafy greens,
  • nuts and seeds,
  • seaweeds, 
  • sprouts, 
  • micro-greens,
  • some fermented foods like sauerkraut, kombucha, kefir and more. 

Iโ€™ve listed some examples below.

[convertkit form=5231962]

Fresh fruit.

e.g. Apple, Apricot, Avocado, Banana, Blackberry, Blueberry, Coconut, Cherry, Cranberry, Dates, Figs, Grapes, Kiwi, Lemon, Lime, Lychee, Mango, Melon, Nectarine, Orange, Papaya, Passion Fruit, Peach, Pear, Pineapple, Plum, Pomegranate, Quince, Raspberry, Redcurrant, Satsuma, Strawberry, Tangerine, Watermelon.

Vegetables.

e.g. Artichoke, Asparagus, Aubergine, Beetroot, Brussel Sprouts, Broccoli, Cabbage, Cauliflower, Carrot, Celery, Celeriac, Chicory, Chilli, Corn (Sweetcorn), Courgette, Cucumber, Endive, Fennel, Garden Peas, Green Bean, French Bean, Lettuce, Leek, Marrow, Mushroom, Olives, Onion, Parsnip, Peppers (Bell), Pumpkin, Radish, Rhubarb, Runner Bean, Snow Pea, Sweet Potato, Squash, Turnip.

Leafy greens.

e.g. Arugula (Rocket), Bok Choy, Cavolo Nero, Beet Greens, Chard, Choi Sum, Kale, Lettuce, Spinach, Spring Greens, Watercress.

Raw nuts and seeds.

e.g. Almonds, Brazil, Cashew, Coconut, Hazelnut, Macadamia Peanut, Pine nut Pistachio, Walnut, Aniseed, Caraway, Celery, Chia, Dill, Fennel, Flax, Hemp Hearts, Macadamia, Pecan, Poppy, Pumpkin, Sesame, Sunflower.

Nut and seed butter.

e.g. Almond, Brazil Nut, Cashew, Coconut, Hazelnut, Macadamia, Pecan, Sunflower Seed, Walnut.

Plant Milk.

e.g. Almond, Cashew, Coconut, Hazelnut, Hemp Seed, Macadamia, Oat, Quinoa, Rice, Sesame Seed, Pumpkin Seed, Sunflower Seed, Tigernut.

Dried fruit.

e.g. Apple slices, Apricots, Banana chips, Blueberries, Cherries, Cranberries, Currants, Dates, Figs, Goji Berries, Mandarin, Peaches, Pineapple, Prunes, Raisins, Sun-Dried Tomatoes.

Seaweed and algae.

e.g. Arame, Dulse, Kelp, Kombu, Nori, Wakame.

Naturally unpasteurised fermented foods.

e.g. Kimchi, Miso, Sauerkraut, Kombucha, Kefir.

Microgreens and Sprouts.

e.g. Amaranth, Basil, Broccoli, Cauliflower, Cabbage, Chia Seed, Celery, Coriander, Garlic, Chive, Kale, Mustard, Parsley, Pea Shoots, Rocket, Radish, Sunflower, Watercress.

Sprouted and soaked seeds.

e.g. Chickpeas, Lentils, Mung Beans, Oats, Buckwheat, Quinoa, Radish, Alfalfa, Chia Seeds, Flax, Pumpkin, Sesame, and Sunflower.

The FSA advises that people in vulnerable groups should always cook sprouts thoroughly until steaming hot all the way through before eating. This includes pregnant women, young children, the elderly and those with a weakened immune system. This is because some sprouts may contain harmful bacteria.

Unrefined natural sugars.

e.g. Coconut sugar, Maple syrup, Carob, Date paste, Lucuma powder.

Cold-pressed oil

e.g. Avocado, Coconut, Flax, Olive, Sesame.

A bowl of cauliflower couscous with chopped herbs, lemon halves and olives.

Do you need to go fully raw?

Did you know that most raw foodies are, in fact, not 100% Raw? So their diet might go from 50% - 90%.

Iโ€™m in this group. I donโ€™t want to be 100% raw.

Where I live is cold much of the time, and my body naturally craves warmth. For me and many others, getting the right balance means enjoying cooked foods and raw foods, especially in colder months.

Many people get a dehydrator to do the warming for them. Using one will enable you to produce many more raw recipes.

A high-speed blender can warm foods slightly too. So theyโ€™re perfect for making homemade soups!

Many people opt for vegetarian or vegan when considering going raw.

Some people include raw dairy, raw eggs, fish (such as sashimi and ceviche) and a small amount of meat.

Weโ€™re each individual. How we eat will reflect this. 

All that matters is finding out what works best for you. 

Check out more raw food articles you may like:

  • Three bottles of smoothie on a white background with fruits, vegetables, ginger and some leaves.
    10 Ways To Start with Raw Food
  • Mixed raw fruits and vegetables on a marbled background.
    10 Raw Food Techniques Youโ€™ll Love
  • A selection of sliced raw fruits on a blue background.
    Discover 6 healthy foods raw foodies love
  • A modern kitchen with pink walls and a pink dining chair.
    Top Raw Food Kitchen Tools

Plant-based raw food meal ideas.

Here are some ideas to help you make delicious raw foods that are easy to prepare and full of nutrient-rich ingredients.

Breakfast - Healthy breakfast recipes can be the easiest way to start with raw food. Recipes like this raspberry and apple buckwheat breakfast or my strawberry coconut chia pudding.

Main dishes - Raw main dishes are full of vibrant leafy greens, veggies, sprouts and more like these raw veggie wraps, or one of my favourites - courgette spaghetti.

Drinks that are filled with deliciousness including smoothies, nut milk and milkshakes.

Fermented foods such as raw sauerkraut or this cashew yogurt recipe.

Dips and dressings like this creamy sprouted chickpea hummus, an easy cashew mayonnaise recipe or my lemon herb vinaigrette.

Close up of a plate with pea shoots, asparagus, peas, chickpea sprouts, and lemon slices.

3 Great ways to start

Start exploring simple new recipes, foods, and new combinations.
A great way to avoid feeling overwhelmed is to break it down into small doable steps.

Step 1 - One meal at a time

Start to focus on enjoying just one meal at a time and give yourself time to discover new recipes you love.

Breakfast (for most people) is the first meal of the day. This is a great place to begin and set yourself up successfully for the rest of the day.

Step 2 - East Seasonally

For each season, I like to create a list of raw foods I love and want to include in my recipes.

For example, I know Iโ€™ll buy asparagus in May, strawberries in June and squash in October. What will you look forward to whatโ€™s in season this month?

Your local supermarket often provides pamphlets with the current seasonโ€™s produce. Or check out your local greengrocers or town market to see whatโ€™s around where you are.

I like to look for local produce first as the main foods on my shopping list. Seasonal local foods are usually more affordable and may travel fewer food miles too.

You can find out more about seasonal foods in the UK here: http://eattheseasons.co.uk

Step 3 - Create a weekly meal plan

Create a weekly meal plan and start to include a few meal ideas or recipes with plenty of fresh raw fruits and vegetables.

Meal planning is one of the most important strategies for starting and staying on a raw, focused lifestyle.

For more tips on how to start a raw food diet, check out my post: 10 ways to start with raw foods.

What are the benefits of a raw food diet?

Many people enjoying a diet thatโ€™s rich in raw foods report experiencing:

  • higher energy levels
  • better digestion
  • clearer thinking
  • clearer skin
  • reduced bloating
  • improved immunity

A whole foods plant-based lifestyle with plenty of freshly prepared raw ingredients could be one of the best things you do for your health.

As with any change in your diet, you should always speak to your doctor or a qualified healthcare professional before making changes and discussing if raw foods suit you.

If you found this post helpful, Iโ€™d be very grateful if youโ€™d help by sharing it. Thank you!

Iโ€™m off to make some tea!

Juliette

Want my raw food list sent to your Inbox? Why not subscribe to Flourishing Kitchen and get recipes and raw food tips straight to your inbox each week?

  • « Previous Page
  • 1
  • 2

Iโ€™m Juliette, welcome to my blog where I share my love for plant based whole foods & raw vegan recipes.

Here youโ€™ll find simple, fun ways to prepare delicious, nutrient rich meals (without always having to cook).

Find out more โ†’

Get my recipe ebook

Ebook mockup.

Trending Recipes

  • A jar full of yogurt, topped with cheesecloth sits on a wood surface. A couple of cashew nuts sit to the right.
    Cashew Yogurt Recipe
  • Sea moss gel in a glass jar.
    How to make Sea Moss Gel
  • A close up image of bowl with cucumber apple salad in a white fresh herb dressing.
    Apple Cucumber Salad
  • A glass dish filed with cashew mayonnaise.
    Easy Cashew Mayonnaise

Seasonal

  • A bowl of porridge topped with raspberries, sliced pear and sprinkled with flaked almonds and mint leaves.
    Raw Buckwheat Porridge
  • Carrot Cucumber Salad
  • A breakfast cereal made with chopped apple, sultanas and fresh raspberries.
    Raw Buckwheat Breakfast with Apple & Raspberries
  • A jar full of sprouts with a cheesecloth lid.
    How to Grow Broccoli Sprouts (jar method)

Footer

โ†‘ back to top

About

  • About
  • Privacy Policy
  • Cookie Policy
  • Terms & Condition
Do Not Sell or Share My Personal Information

Newsletter

Sign up for emails and updates

Contact

Contact

copyright ยฉ 2025 flourishing kitchen all rights reserved.