Sprouting adzuki beans in a few simple steps from start to finish. Light, crunchy and loaded with protein and nutrients, adzuki bean sprouts are easy to add to salads, wraps, soups and more.
A mighty little bean perfect for sprouting and enjoying raw all year round!
Sprouting Series
Are you curious about sprouting? If so, then do check out my sprouting series on the blog here to get more familiar with it all.
My other current sprouting recipes include: How to grow broccoli sprouts, how to sprout quinoa, sunflower sprouts, sunflower microgreens, sprouting buckwheat, how to sprout chickpeas, sprouting adzuki beans and how to sprout lentils.
Jump to:
If you're new to raw foods and looking for more information, you might enjoy this post, Raw Food What Do You Eat?
What are adzuki beans?
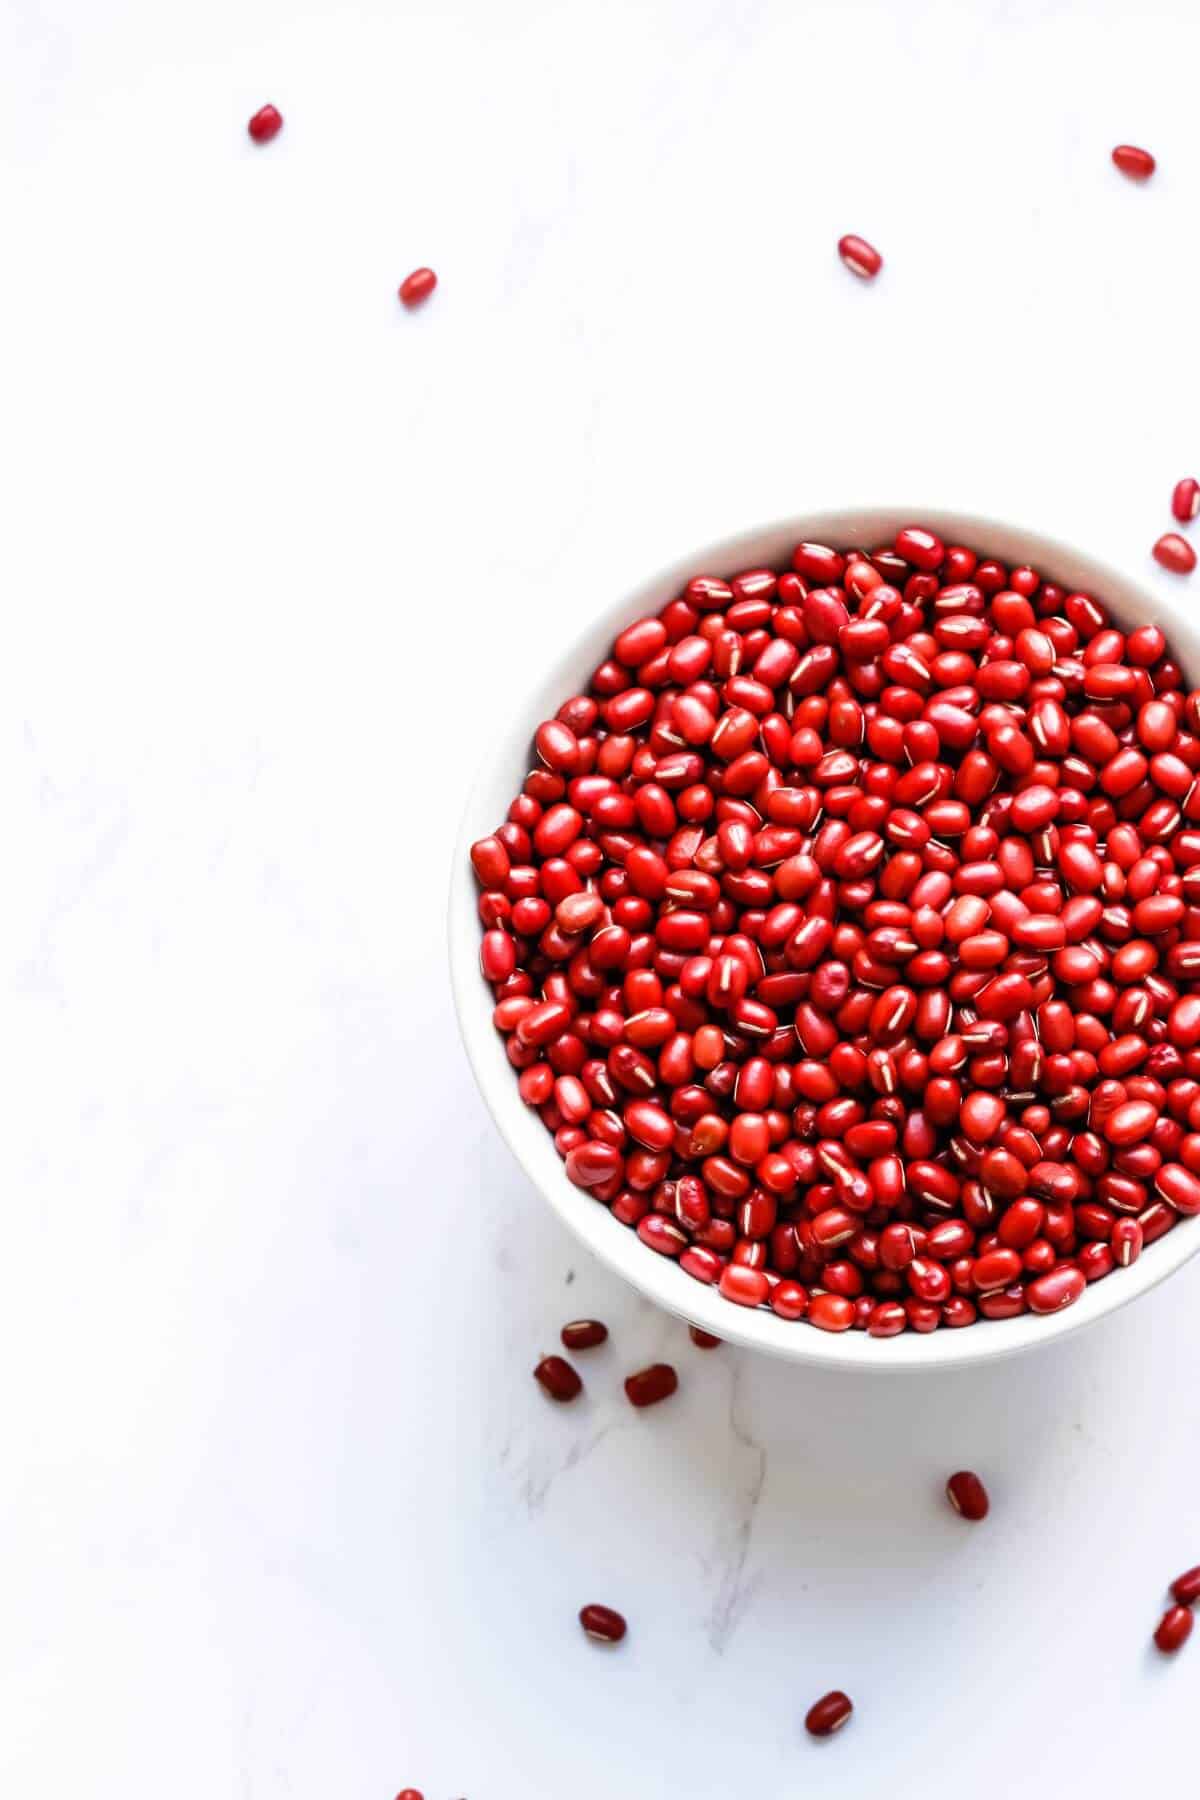
Adzuki beans are tiny little shiny red legumes about 5mm long. They come from an ancient vine widely cultivated throughout East Asia. There are other varieties in colours mottled, grey, white and black.
Also known as azuki bean, aduki bean, red bean, or red mung bean, their Latin name is Vigna Angularis.
They are commonly used in Japanese and Chinese desserts, cooking them with sugar or turning them into a paste to use in prized recipes.
Once they've been sprouted, I love to add them raw to salads and bowls. However, they can also be added to chillies, curries, soups and stews.
What you'll need
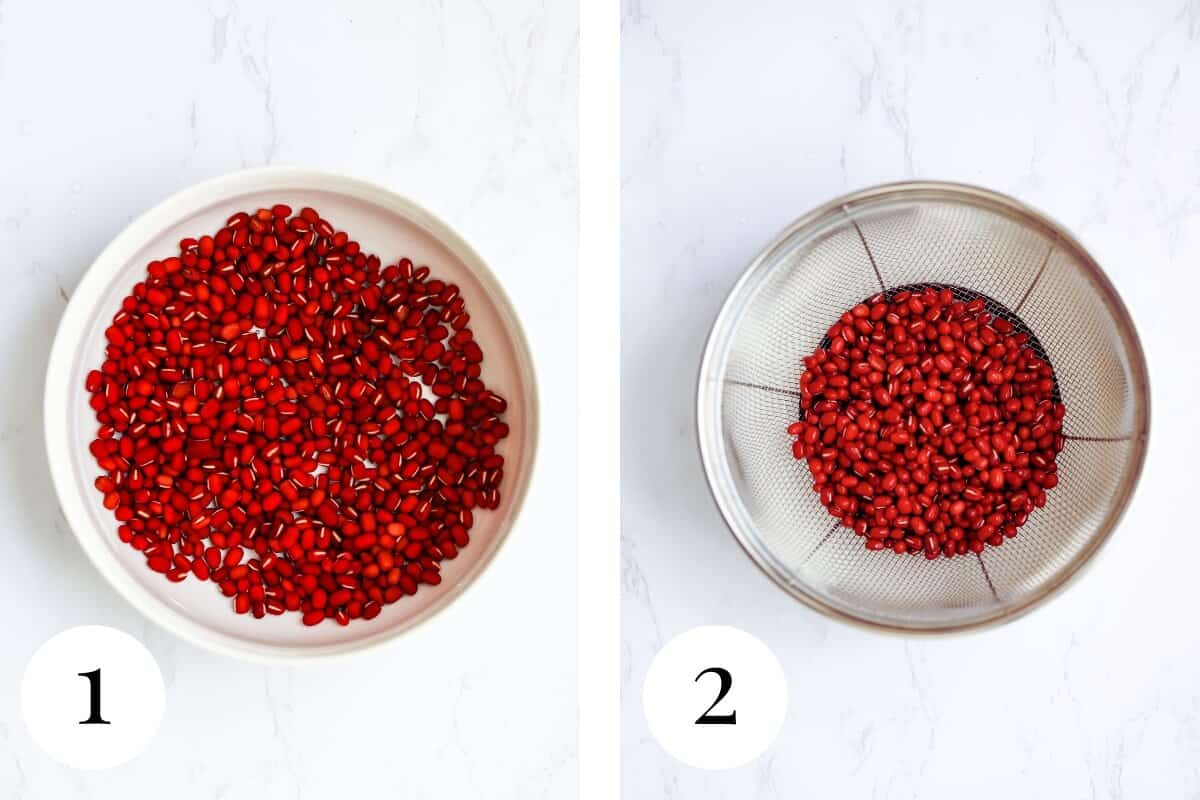
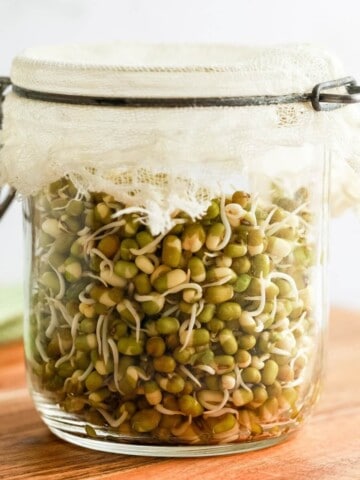
For sprouting adzuki beans in a jar, you'll need some dried adzuki beans, a wide-mouthed mason jar, and fresh, cold water.
If you don't have a suitably sized sprouting lid, use a piece of cheesecloth with a rubber band to hold the cloth over the top of the jar. This will prevent the beans from spilling out and also help keep them clean while sprouting.
I like to use organic adzuki beans grown specifically for sprouting as I have the most success with these. Be sure to use dried adzuki beans, not the tinned versions, which will have been cooked.
You can search specifically for them among sprouting seeds companies online. Certified sprouting seeds that are sold in the UK are required to have been through thorough testing before being sold as such.
Step by Step Instructions
The steps for growing adzuki bean sprouts are as follows:
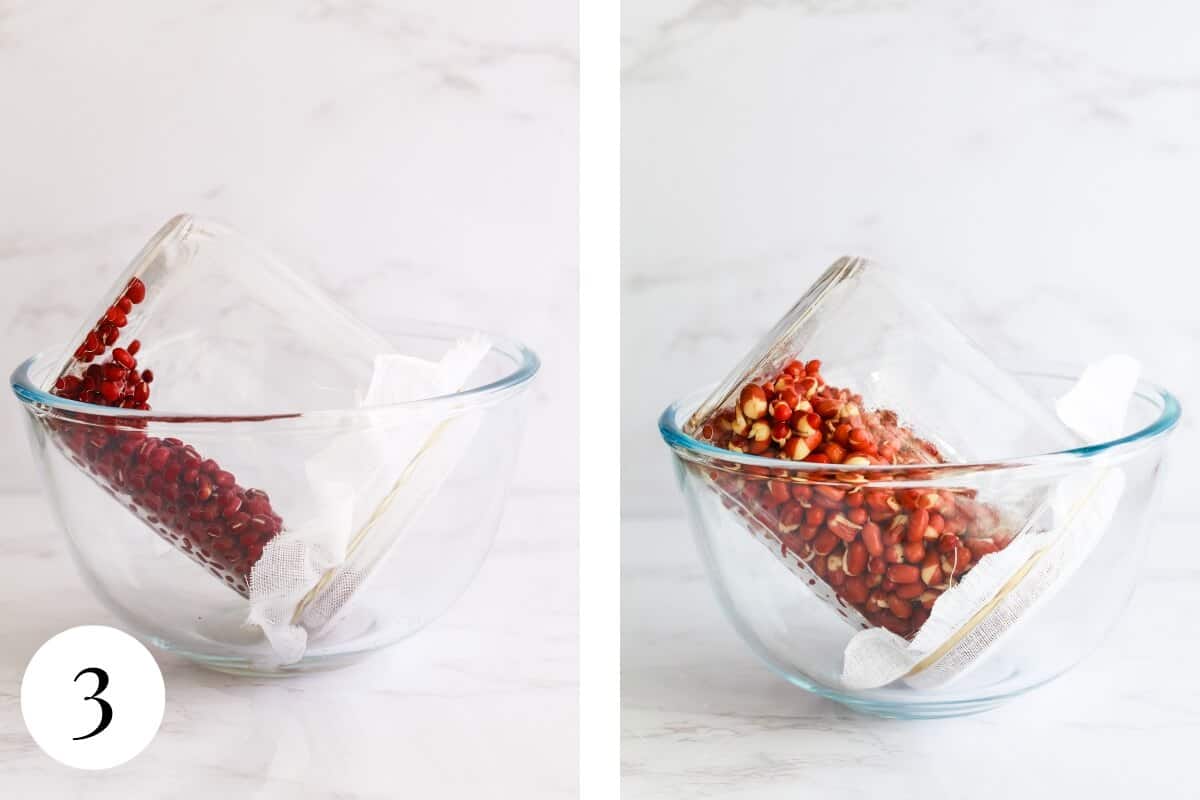
Step 1 - Rinse the beans well, picking out any pieces of grit or broken beans before adding them to a mason jar or bowl. Cover the beans with 3 times the amount of water, as they will soak up a good amount. Expect them to double or triple in size overall.
Step 2 - Soak adzuki beans for 8-12 hours. I like to leave them overnight as I get more sprouts with a longer soaking time (I do 12 hours). Now, drain the soak water from the beans using a strainer and rinse them well. Be sure to drain them for a few minutes so they don't sit in any residual water.
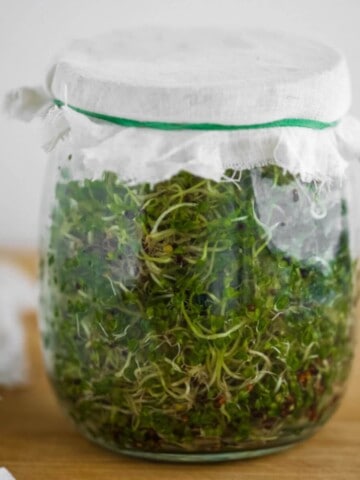
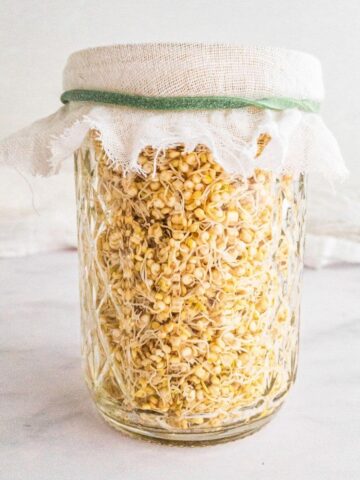
Step 3 -Leave the beans to sprout in a jar for 3-5 days. Repeat rinsing/draining twice daily during this time, until the beans have sprouted.
For exact quantities, see the recipe below.
TIP: Place the mason jar upturned about 90 degrees into a bowl. This helps to ensure any excess water drains off after rinsing.
I like to leave them on the countertop to one side so I can keep an eye on them. It takes a full 5 days in cooler weather before I see my adzuki beans sprouting at home. So, try not to be disheartened if they don't shoot up as quickly as other sprouts.
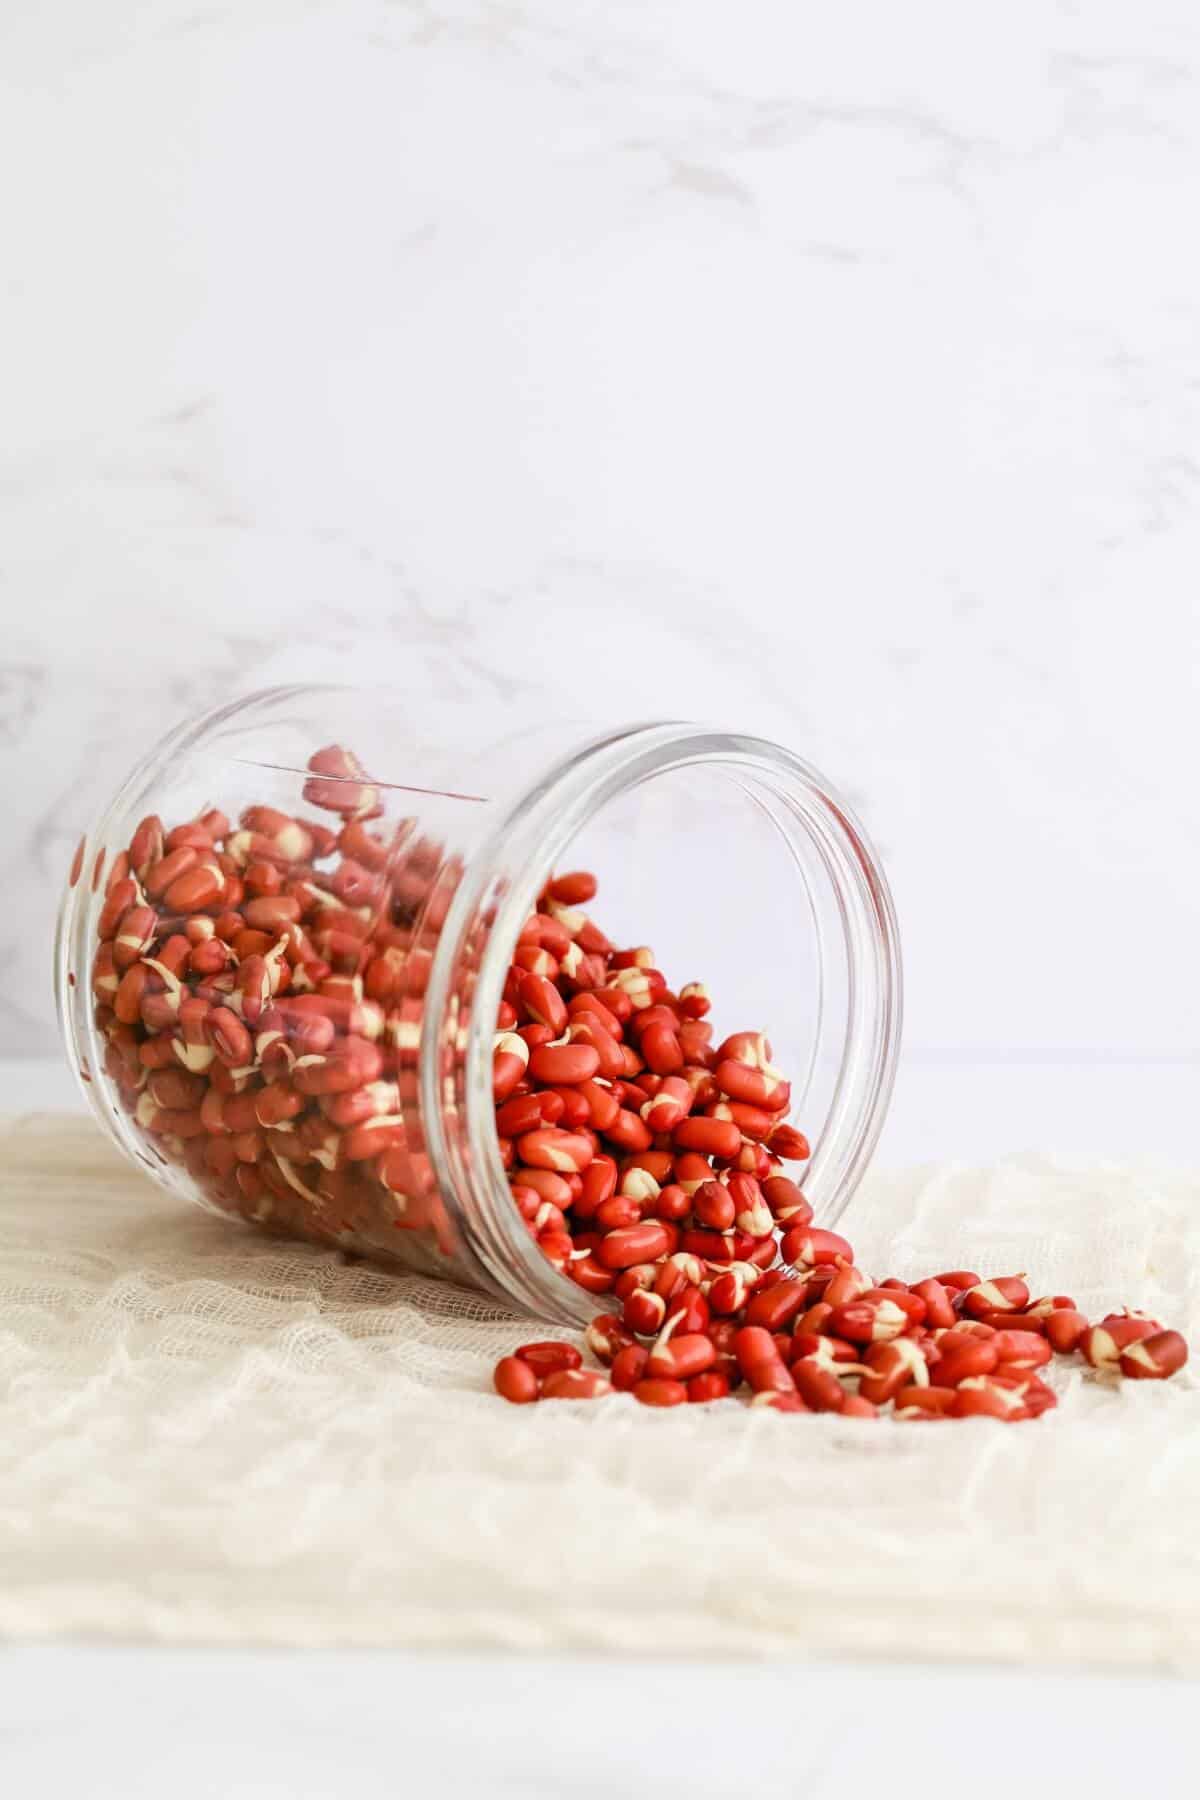
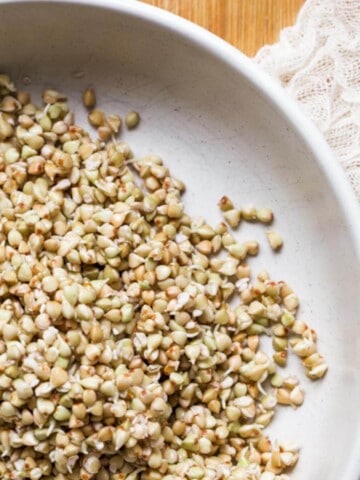
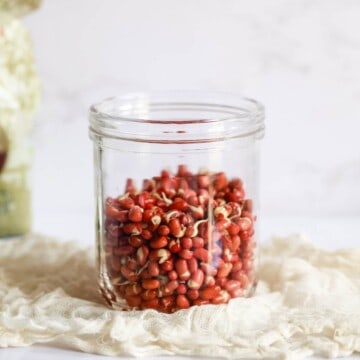
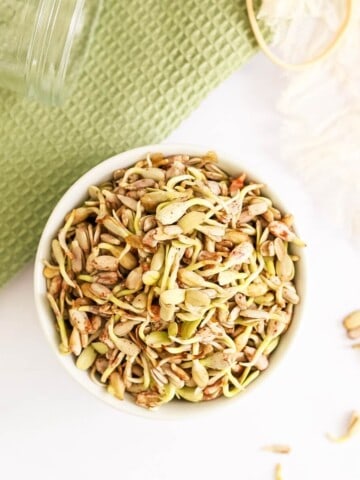
Please give them a final rinse when they're ready. I like them when the tail's about the same length as the bean or more. Although, some people prefer them when their tail is longer - about 2cm long. It's really down to your own personal preference.
Also, their little outer jacket will split during the sprouting process, revealing the light cream-coloured bean underneath. Again, some people like to remove any loose outer layers which sometimes separate from the bean.
I enjoy them as is.
Storing
Store your adzuki bean sprouts in a container in the fridge for up to 3 days. Use a lidded container and line it with a paper towel to draw up any excess water after rinsing and draining.
FAQ
Once soaked, they typically take 3-5 days to sprout, depending on room temperature.
Yes! They're packed with protein, fibre, vitamins and minerals, including
b vitamins, folate, potassium, iron, calcium, phosphorus and antioxidants.
Yes. Once they have sprouted, they can be enjoyed raw in salads, grain bowls, wraps or turned into a dip.
Similar recipes
Looking for other raw sprouting recipes like this? Try these:

📖 Recipe
Sprouting Adzuki Beans
Equipment
- 1 Wide mouthed mason jar
- 1 Piece of cheesecloth and rubber band or a sprouting lid
- 1 Strainer or sieve.
Ingredients
- ½ cup (100g) raw dried adzuki beans
Instructions
- Step 1 - Soak the beans in cold water. Pick out any broken/split beans or grit and discard. Please give them a good rinse to wake them up, then add the raw adzuki beans to a bowl or a wide-mouthed mason jar. Cover generously with 3 times the amount of water, as they'll absorb quite a lot. Leave them to soak for 8-12 hours.
- Step 2 - Rinse and Drain the soak water from the beans. Rinse again in fresh cold water and drain them thoroughly before adding them to the mason jar for sprouting. Draining is essential so that they aren't sitting in any water.
- Step 3 - Sprout adzuki beans in the mason jar over the next 3-5 days, remembering to rinse and drain them twice daily. Morning and evening are good times to do this.
- Finally - When ready and their tails have grown as long as the bean or a little more, give them a rinse and drain them before use. You can now store adzuki bean sprouts in the refrigerator for up to 3 days in a lidded container on kitchen paper. Please rinse and drain each day to help them stay fresh!
Notes
Tips
Use fresh cold water for rinsing. It's popular but optional to use filtered or spring water depending on the water quality where you live. If you're new to sprouting adzuki beans, I recommend you sniff them each day when you're rinsing them. This way, you'll get to know what they should smell like. It's good to know how they're getting on. After a few times, you can tell how fresh they are and if they're not quite right this way. Next, drain thoroughly so the sprouting adzuki beans don't sit in water while sprouting.Food Safety
Warmth, humidity and wet beans will attract the wrong kind of bacteria, which can result in mouldy adzuki sprouts. If this happens or your adzuki sprouts smell weird, discard them and start again.Food safety
The UK Food Standards Agency recommends people in vulnerable groups always cook any sprouts until steaming hot all the way through before eating them.
This is because sprouts sometimes contain bacteria, which some people may be susceptible to. Vulnerable groups include the elderly, young children, those with a weakened immune system, and pregnant women.
Never eat sprouts or microgreens that look or smell bad or weird. If you're unsure, then throw them out and start again.
Not all seeds or beans are suitable for sprouting or eating raw. Please be sure to check first.
Check the FSA website for more details.


Marge von M says
Am getting into sprouting beans and pulses so was looking to see if red beans are as easy to do as mung, and it seems so!
Also wanted to mention that traditionally natto is fermented soya beans, not azuki beans.
The texture and taste would be very different. Soya beans are much higher in protein than azuki beans so they complement rice as a whole meal when served with hot rice.
Azuki is usually used for desserts in Japan like yōkan which is made with agar, azuki and sugar or to fill rice mochi.
Juliette says
Thank you Marge, I appreciate your comments and have updated the blog post. All my best wishes to you.
felicity says
I have grown green spotted lentils and sprouted some chick peasyearz ago but I really want to learn which seeds and peas beans or lentils are safe to sprout and eat raw also which beans I can grow and eat fresh such as giant Lima beans (butter beans) in the uk broad or field beans I think also called fava beans ? Python snake beans asparagus beans also called yard long beans or Chinese long beans .I'm so confused by all the different names .I need a site that tells me which are safe to puck and eat raw or sprouted and which must be cooked .
It says somewhere that runner beans (pole beans) (stick beans) climbing beans are toxic eaten raw but I've eaten them raw since 3 or 4 years of age and I'm 65 in July? Maybe not toxic then ?
Juliette says
Hey Felicity ! Thank you so much for your comment. It's great to see that you're interested in learning more about sprouting. While a definitive guide would be fantastic, unfortunately, I don't know any website that provides that much information. However, I can suggest a few sprouting seeds that are quite easy to sprout and enjoy raw, depending on your own preferences. These include whole lentils, chickpeas, garden peas, mung beans, & adzuki beans. Alfalfa, beetroot, broccoli, red cabbage, chive, clover, fennel, kale, mustard, radish, rocket, & sunflower. I recommend finding a reliable supplier of certified organic sprouting seeds specifically produced for growing and eating raw sprouts. I hope this helps! If you have any further questions, feel free to ask.